
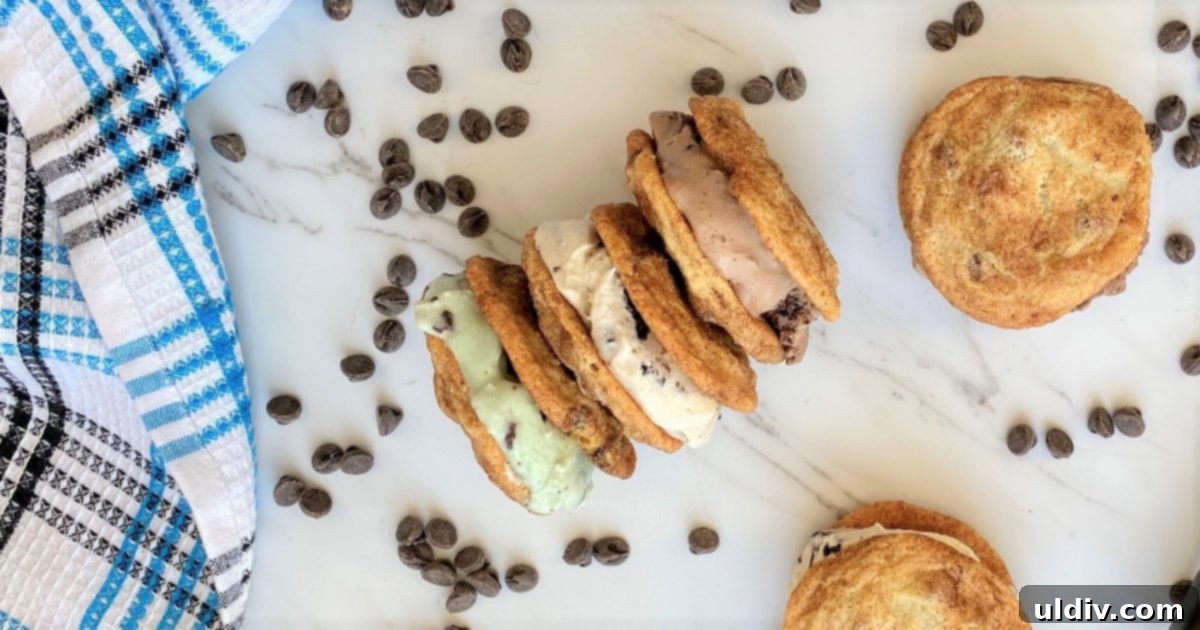
Indulge your sweet tooth with these truly extraordinary Snickerdoodle Cookie Ice Cream Sandwiches. Forget ordinary desserts; this recipe takes two perfectly crafted, cinnamon-sugar-dusted chocolate chip snickerdoodle cookies – chewy in the center, delightfully crispy at the edges – and cradles a generous scoop of cool, creamy ice cream between them. The result is a homemade frozen treat that promises an explosion of flavors and textures, transporting you to dessert paradise with every bite. It’s the ultimate decadent delight for any occasion, proving that some of the best culinary creations are born from simple, beloved ingredients.
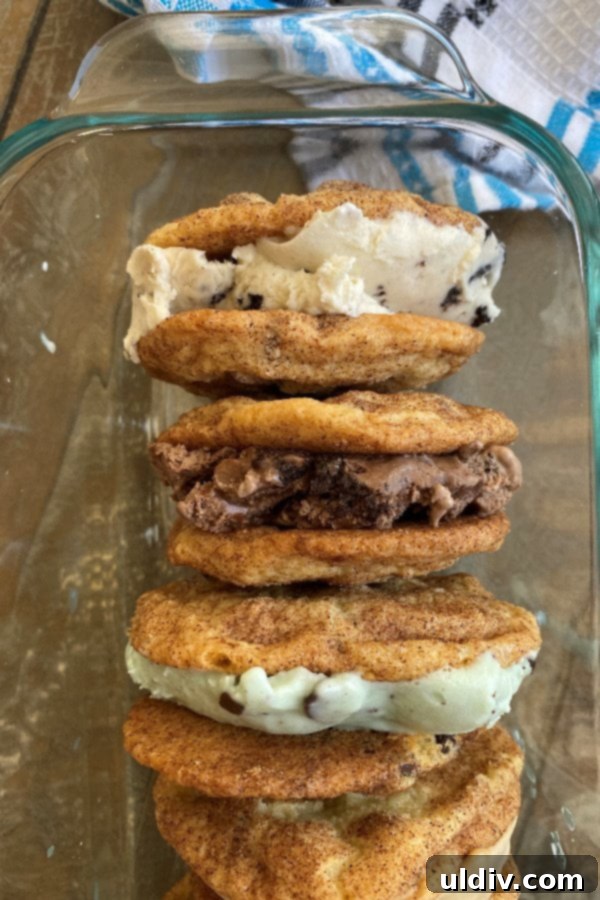
For many home bakers, myself included, a well-stocked cookie jar is a sign of a happy kitchen. There’s a certain comfort in knowing that a delicious, homemade treat is always within reach. Whether it’s a quick batch of almond butter chocolate chip cookies or the playful charm of sprinkley sugar cookies, fresh cookies bring joy. While I adore a classic cookie on its own, sometimes you crave something truly spectacular, something that elevates a simple cookie into an unforgettable dessert experience. That’s where these Snickerdoodle Cookie Ice Cream Sandwiches come in.
These aren’t just any snickerdoodles. We’re talking about cookies that hit all the right notes: a tender, soft chewiness towards the middle that gives way to a delicate crispness around the edges. The signature cinnamon-sugar coating adds a warm spice, perfectly complementing the subtle sweetness and buttery richness. When these exquisite cookies become the vessels for your favorite frozen dairy delight, they transform into a frozen dessert that is truly next-level. This recipe is an invitation to experience the pinnacle of homemade ice cream sandwiches, combining the nostalgic comfort of a snickerdoodle with the refreshing coolness of ice cream.
Why These Snickerdoodle Ice Cream Sandwiches Are Irresistible
Prepare to fall in love with these homemade ice cream sandwiches for a multitude of reasons. They offer a unique blend of comfort and extravagance, making them a standout treat.
- An Unforgettable Decadent Frozen Treat: When you’re in the mood for something truly special, something that feels like a luxurious indulgence, these snickerdoodle ice cream sandwiches are your answer. The combination of warm cinnamon, sweet sugar, chocolate chips, and cool, creamy ice cream creates a symphony of flavors and textures that is utterly captivating. These cookies, flecked with chocolate chips and dusted with cinnamon sugar, are a new obsession for a reason—they’re simply divine.
- Endless Customization and Variety: One of the most enjoyable aspects of making homemade ice cream sandwiches is the boundless potential for creativity. While the snickerdoodle cookie base is fantastic on its own, you can easily switch up the ice cream flavors to suit your mood or dietary preferences. The possibilities are truly endless, allowing you to create a unique frozen masterpiece every time.
- Homemade Goodness, Superior Flavor: Nothing beats the taste of homemade. From the carefully selected ingredients in the cookies to the choice of high-quality ice cream, every component contributes to a superior flavor profile that store-bought versions simply can’t match. You control the freshness and quality, resulting in a dessert that tastes genuinely exceptional.
- Fun for All Ages: Making and assembling these ice cream sandwiches is a joyful activity that can be shared with family and friends. It’s a fantastic project for kids in the kitchen, offering a delicious reward at the end. The process itself becomes part of the delightful experience, creating memories along with delectable treats.
- Perfect for Any Occasion: Whether you’re hosting a summer barbecue, celebrating a birthday, or simply treating yourself after a long week, these Snickerdoodle Cookie Ice Cream Sandwiches fit the bill. They are impressive enough for entertaining yet simple enough for a casual indulgence.

Essential Ingredients for Your Snickerdoodle Masterpiece
Crafting the perfect snickerdoodle cookie ice cream sandwich begins with a selection of high-quality ingredients. Most of these items are likely already in a well-stocked baking pantry, ensuring you can whip up this delightful dessert without a special trip to the store. Here’s a closer look at what you’ll need and why each component is crucial:
- Salted Butter: Butter provides rich flavor and helps create that desirable tender texture in your cookies. Using salted butter balances the sweetness and adds a depth of flavor that unsalted butter might miss unless you add extra salt. Ensure it’s at room temperature for optimal creaming.
- Vegetable Shortening: This often-overlooked ingredient is key to achieving the perfect snickerdoodle texture. Shortening helps create a softer, chewier cookie that doesn’t spread too much, contributing to the “puffy” center and preventing the cookies from becoming overly crispy. Brands like Crisco are popular choices.
- Granulated Sugar: Sugar sweetens the cookies and helps with browning and texture. It’s used both in the cookie dough and for the signature cinnamon-sugar coating.
- Large Eggs: Eggs act as a binder, adding moisture, richness, and structure to the cookies. Using large eggs is standard for most baking recipes, and ensuring they are at room temperature helps them incorporate more smoothly into the batter.
- All-Purpose Flour: The structural backbone of your cookies. Measure it correctly (preferably by weight) to avoid dry, crumbly cookies or overly soft ones.
- Baking Soda: This leavening agent reacts with the acidic cream of tartar to create carbon dioxide, giving the cookies their characteristic rise and soft texture.
- Kosher Salt: Enhances all the other flavors, balancing the sweetness and adding complexity. Don’t skip it!
- Cream of Tartar: The secret ingredient for classic snickerdoodles, responsible for their distinctive tangy flavor and chewy texture. We’ll delve deeper into this magical powder below.
- Cinnamon: The essential spice for that iconic snickerdoodle taste. It’s used generously in the coating, infusing the cookies with warmth and aroma.
- Semi-Sweet Chocolate Chips: While traditional snickerdoodles don’t include chocolate, adding semi-sweet chocolate chips takes these cookies to a whole new level of deliciousness, introducing another layer of flavor and a delightful melty texture when warm.
- Your Favorite Store-Bought or Homemade Ice Cream: The star of the sandwich filling! Choose a high-quality ice cream that complements the snickerdoodle flavor. Vanilla, coffee, or even mint chip are excellent choices.
The Science Behind the Snickerdoodle: Why Cream of Tartar is Key
While most ingredients on our list are familiar baking staples, cream of tartar might be the one that raises an eyebrow. What exactly is this mysterious white powder, and why is it so indispensable for authentic snickerdoodles?
Despite its name, cream of tartar is neither a cream nor a liquid. It’s actually a white, acidic powder known scientifically as potassium bitartrate. It’s a natural byproduct of the wine fermentation process, crystallizing on the inside of wine barrels during wine production. Historically, it’s been used for a variety of culinary purposes, but it truly shines in specific baking applications.
In the world of baking, cream of tartar is a remarkably versatile ingredient. It plays a crucial role in stabilizing whipped egg whites, helping meringues and angel food cakes achieve lofty, firm peaks. But for snickerdoodles, its function is twofold and absolutely essential:
- Distinctive Tangy Flavor: Cream of tartar provides the characteristic subtle tangy, slightly sour note that sets snickerdoodles apart from other sugar cookies. This unique flavor profile is a hallmark of the cookie and contributes significantly to its overall deliciousness.
- Chewy Texture and Anti-Crystallization: When combined with baking soda, cream of tartar creates a leavening reaction that gives snickerdoodles their signature soft, chewy interior. More importantly, its acidic properties prevent sugar from crystallizing as the cookies bake and cool. This ensures the cookies remain wonderfully soft and pliable, even days after baking, rather than becoming hard and brittle. Without cream of tartar, you’d end up with a good cookie, but not a true snickerdoodle.
So, there you have it – the science lesson behind this humble yet powerful ingredient. Now that we understand its magic, let’s get baking and create some truly spectacular cookies!
How to Assemble Your Gourmet Cookie Ice Cream Sandwiches
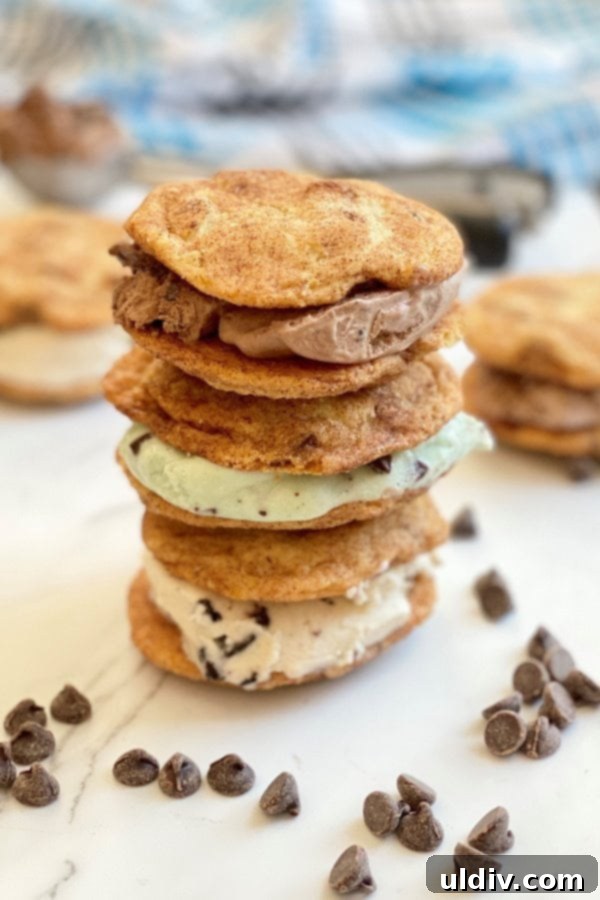
Assembling these snickerdoodle cookie ice cream sandwiches is the delightful culmination of your baking efforts. This is where your creativity can truly shine, especially when choosing your ice cream flavors. Some fantastic options to consider include classic vanilla bean, rich coffee mocha, decadent brownie chocolate chip, or the ever-popular cookies and cream. Feel free to experiment with your personal favorites!
- Soften the Ice Cream (Slightly): Approximately 5 to 10 minutes before you plan to assemble your sandwiches, take your chosen ice cream out of the freezer. Allowing it to soften slightly will make it much easier to scoop and spread evenly without damaging your delicate cookies. You want it pliable, not melted.
- Pair and Scoop: Select two cookies that are similar in size and shape to form each sandwich. Scoop about ¼ cup of ice cream (or more, depending on your preference and cookie size) onto the flat bottom side of one cookie. Use the back of the scoop or a small offset spatula to gently spread the ice cream to the edges.
- Seal the Deal: Carefully place the flat bottom side of the second cookie on top of the ice cream. Gently but firmly press the cookies together, allowing the ice cream to spread evenly to the edges of the cookies. Be mindful not to press too hard, as this can cause the cookies to break or the ice cream to squish out excessively.
- Wrap and Freeze: For the best results and to prevent freezer burn, wrap each assembled ice cream sandwich tightly in plastic wrap. This also helps them hold their shape. Place the wrapped sandwiches in the freezer for at least 30 minutes to firm up completely before serving. They can be stored in the freezer for up to 1 week, though it’s rare they last that long!
Pro Baking Tips for Flawless Snickerdoodle Cookies
Achieving bakery-quality snickerdoodles that are perfect for ice cream sandwiches involves a few key techniques. Follow these pro tips for consistently excellent results every time:
- Room Temperature Ingredients are a Must: Always bring your butter and eggs to room temperature before you begin. Room temperature butter creams more easily with sugar, creating a light and airy base for your cookies. Room temperature eggs emulsify better with the fat, resulting in a smoother, more uniform batter and a better cookie texture.
- Preheat Your Oven Thoroughly: Don’t rush the preheating process. Allow your oven at least 15-20 minutes to fully reach the desired temperature and stabilize. A properly preheated oven ensures even baking from the start, preventing cookies from spreading too quickly or baking unevenly.
- Scrape Down the Bowl Religiously: As you beat the butter, shortening, and sugar, and again after adding the eggs and flour, make sure to frequently scrape down the sides and bottom of your mixing bowl with a spatula. This ensures all ingredients are thoroughly combined and prevents pockets of unmixed butter or flour, leading to a uniform batter and evenly textured cookies.
- Parchment Paper is Your Best Friend: Line your baking sheets with parchment paper or a silicone baking mat. This crucial step prevents the cookies from sticking to the pan, promotes even heat distribution, and makes for effortless cleanup. It also helps the cookies maintain their shape and bake consistently.
- Use a Large Cookie Scoop for Consistency: For uniformly sized cookies, which is especially important for making neat ice cream sandwiches, use a large cookie scoop (about 2 tablespoons). This ensures each cookie bakes at the same rate and results in a batch of perfectly matched snickerdoodles.
- Rotate Baking Sheets for Even Baking: Ovens often have hot spots. If baking one pan at a time, rotate the sheet halfway through the baking time (front to back) to ensure all cookies bake evenly. If you’re baking two sheets simultaneously, not only rotate them front to back but also switch their positions from the top rack to the lower rack and vice versa.
- Master the Art of “Underbaking”: For that ideal soft, chewy center and slightly crispy edge, it’s often best to remove cookies from the oven when they appear slightly undercooked in the middle. The residual heat from the baking sheet will continue to cook them as they cool, leading to a perfectly tender texture. Look for puffed centers and golden-brown edges.
- Cooling Methods Affect Texture: The way you cool your cookies can influence their final texture. For an extra soft and chewy cookie, let them cool entirely on the parchment paper on the baking sheet. For a slightly crisper cookie, transfer them to a wire cooling rack after a few minutes on the sheet, allowing air to circulate around them.

Customization, Serving, and Storage Ideas
These Snickerdoodle Cookie Ice Cream Sandwiches are fantastic as is, but don’t hesitate to unleash your creativity for even more variety:
Get Creative with Customizations
- Ice Cream Flavors: Beyond the classic suggestions, consider adventurous pairings like pistachio, salted caramel, black cherry, or even a spicy chili chocolate ice cream for a surprising kick. Seasonal flavors can also add a delightful twist.
- Cookie Add-ins: While chocolate chips are a wonderful addition, you could also experiment with white chocolate chips, butterscotch chips, or even a sprinkle of chopped toasted nuts (like pecans or walnuts) in the cookie dough for added texture.
- Edge Coatings: After assembling, roll the edges of the ice cream sandwiches in sprinkles, mini chocolate chips, chopped nuts, or even shredded coconut for an extra layer of flavor and visual appeal.
Serving Suggestions
These sandwiches are a dessert in themselves, but you can elevate the presentation:
- Serve them alongside a warm cup of coffee or a cold glass of milk.
- For a party, arrange a platter of different flavored sandwiches, perhaps cut in half for easier eating.
- A drizzle of warm caramel or chocolate sauce just before serving can add an extra touch of gourmet elegance.
Storage and Make-Ahead Tips
One of the best things about ice cream sandwiches is that they are perfect for making ahead, which means less stress when it’s time for dessert!
- Individual Wrapping: After assembling, individually wrap each sandwich tightly in plastic wrap. This prevents freezer burn and makes them easy to grab and serve one at a time.
- Freezer-Friendly Container: Store the wrapped sandwiches in an airtight freezer-safe container or a large freezer bag. This provides an extra layer of protection against freezer odors and keeps them fresh.
- Shelf Life: Properly stored, these snickerdoodle cookie ice cream sandwiches will keep well in the freezer for up to 1 week. Beyond that, the cookies might start to lose some of their optimal texture, but they’ll still be delicious.
- Party Prep: These are ideal for entertaining as they can be completely prepared days in advance. Simply pull them out of the freezer a few minutes before serving to allow the ice cream to soften slightly for the perfect biting consistency.
A Final Sweet Note

Did you try this recipe?
I would absolutely love to hear from you! Please let me know how your Snickerdoodle Cookie Ice Cream Sandwiches turned out by leaving a comment and a star rating below. Your feedback is invaluable, and it truly makes my day to see your culinary creations. Don’t forget to share your delicious results on Pinterest, Instagram, and Facebook! Tag me @amycaseycooks so I can admire your work!
Happy baking and enjoying!
~ Amy
Snickerdoodle Cookie and Ice Cream Sandwich Recipe
Snickerdoodle Cookie and Ice Cream Sandwich Recipe
Indulge in these homemade Snickerdoodle Cookie Ice Cream Sandwiches. Fill two chewy in the center, crispy on the edges, chocolate chip snickerdoodle cookies with cool and creamy ice cream for an out-of-this-world frozen dessert.
Print Recipe
Pin Recipe
Rate This Recipe
Prep Time: 10 minutes
Cook Time: 40 minutes
Total Time: 50 minutes
Servings: 12 ice cream sandwiches
Calories: 486 kcal
Author: Amy Casey
Equipment
- Large Cookie Scoop
Ingredients
- 8 tablespoons salted butter at room temperature
- ½ cup vegetable shortening such as Crisco
- 1 ¾ cups granulated sugar divided
- 2 large eggs
- 2 ½ cups all-purpose flour
- 1 teaspoon kosher salt
- ½ teaspoon baking soda
- 2 teaspoons cream of tartar
- 1 tablespoon cinnamon
- 2 cups semi-sweet chocolate chips
- 3 pints of your favorite ice cream
Instructions
- Preheat oven to 375 degrees F (190°C). Line 2 baking sheets with parchment paper and set aside.
- In the bowl of a standing mixer, beat the room temperature butter, vegetable shortening, and 1 ½ cups of granulated sugar on medium-low speed for about 3 minutes until light and fluffy. Stop to scrape down the sides of the bowl to ensure even mixing.
- Add the large eggs one at a time, beating for 30 to 60 seconds after each addition or until fully incorporated into the mixture. Again, scrape down the bowl.
- In a separate small bowl, whisk together the all-purpose flour, kosher salt, baking soda, and cream of tartar until well combined.
- With the mixer on low speed, gradually add the dry ingredients to the wet ingredients. Beat until just combined, being careful not to overmix the dough.
- Gently fold in the semi-sweet chocolate chips, mixing for about 30 seconds until they are evenly distributed throughout the cookie dough.
- In another small bowl, combine the remaining ¼ cup of granulated sugar and the cinnamon for the coating.
- Using a large cookie scoop (approximately 2 tablespoons of dough), form the cookie batter into balls. Roll each dough ball thoroughly in the cinnamon-sugar mixture. Place the coated dough balls about 2 to 3 inches apart on the prepared baking sheets.
- Bake for 10 to 12 minutes. The cookies should puff up slightly in the middle, have golden brown edges, and still look a little soft in the center. Transfer them to a wire cooling rack to cool completely.
- Ensure the cookies are completely cooled before assembling the ice cream sandwiches. Take your chosen ice cream out of the freezer about 5 minutes prior to assembly to allow it to soften slightly, making it easier to scoop.
- To assemble each sandwich, select two similar-sized cookies. Scoop about ¼ cup (or your desired amount) of ice cream onto the flat bottom side of one cookie. Place the flat bottom side of the second cookie on top of the ice cream. Gently press the cookies together until the ice cream reaches the edges. Wrap each assembled sandwich tightly in plastic wrap and store in the freezer for up to 1 week.
Notes
- Have all the ingredients at room temperature. This makes them mix together better and ensures a smoother batter.
- Preheat the oven for at least 15 minutes before baking to ensure it reaches and stabilizes at the correct temperature for even cooking.
- Scrape down the bowl frequently as you beat the batter. This helps with uniform mixing of all ingredients, preventing pockets of unmixed flour or butter.
- Line the baking sheets with parchment paper or a silicone baking mat. This prevents sticking and promotes even baking.
- Use a large cookie scoop to make all the cookies the same size. This ensures consistent baking times and perfectly matched sandwich halves.
- Rotate the baking sheets halfway through the baking time. If baking only one pan, rotate it front to back. If baking two sheets, also switch them from the top to the lower baking rack for uniform results.
- Baking times are a range; adjust based on your oven. For a softer, chewier center – which is ideal for ice cream sandwiches – take the cookies out of the oven when they are slightly undercooked in the middle. They will continue to set as they cool.
- For a softer cookie, cool them completely on the parchment paper. For a crisper cookie, transfer them to a cooling rack after a few minutes on the sheet.
Nutrition
Serving: 1 ice cream sandwich | Calories: 486kcal | Carbohydrates: 64.1g | Protein: 5.5g | Fat: 24g | Saturated Fat: 11.3g | Cholesterol: 64mg | Sodium: 337mg | Fiber: 1.7g | Sugar: 41.8g
Did you make this recipe?
Tag @amycaseycooks on Instagram so we can all admire your work!