

Transforming a classic into a modern favorite, the **Crispy Chicken Parmesan Sandwich** takes the beloved flavors of traditional chicken Parmesan and tucks them into a delightful handheld format. Imagine perfectly crispy, panko-Parmesan crusted chicken cutlets nestled between warm, toasty garlic-herb butter rolls, generously slathered with rich basil marinara sauce, and crowned with a luscious layer of melted, mellow mozzarella cheese. This recipe offers a casual yet utterly satisfying experience, making it an ideal choice for a comforting lunch, a hearty dinner, or even as irresistible party snacks that are sure to be a crowd-pleaser.

The Irresistible Charm of a Chicken Parm Sandwich
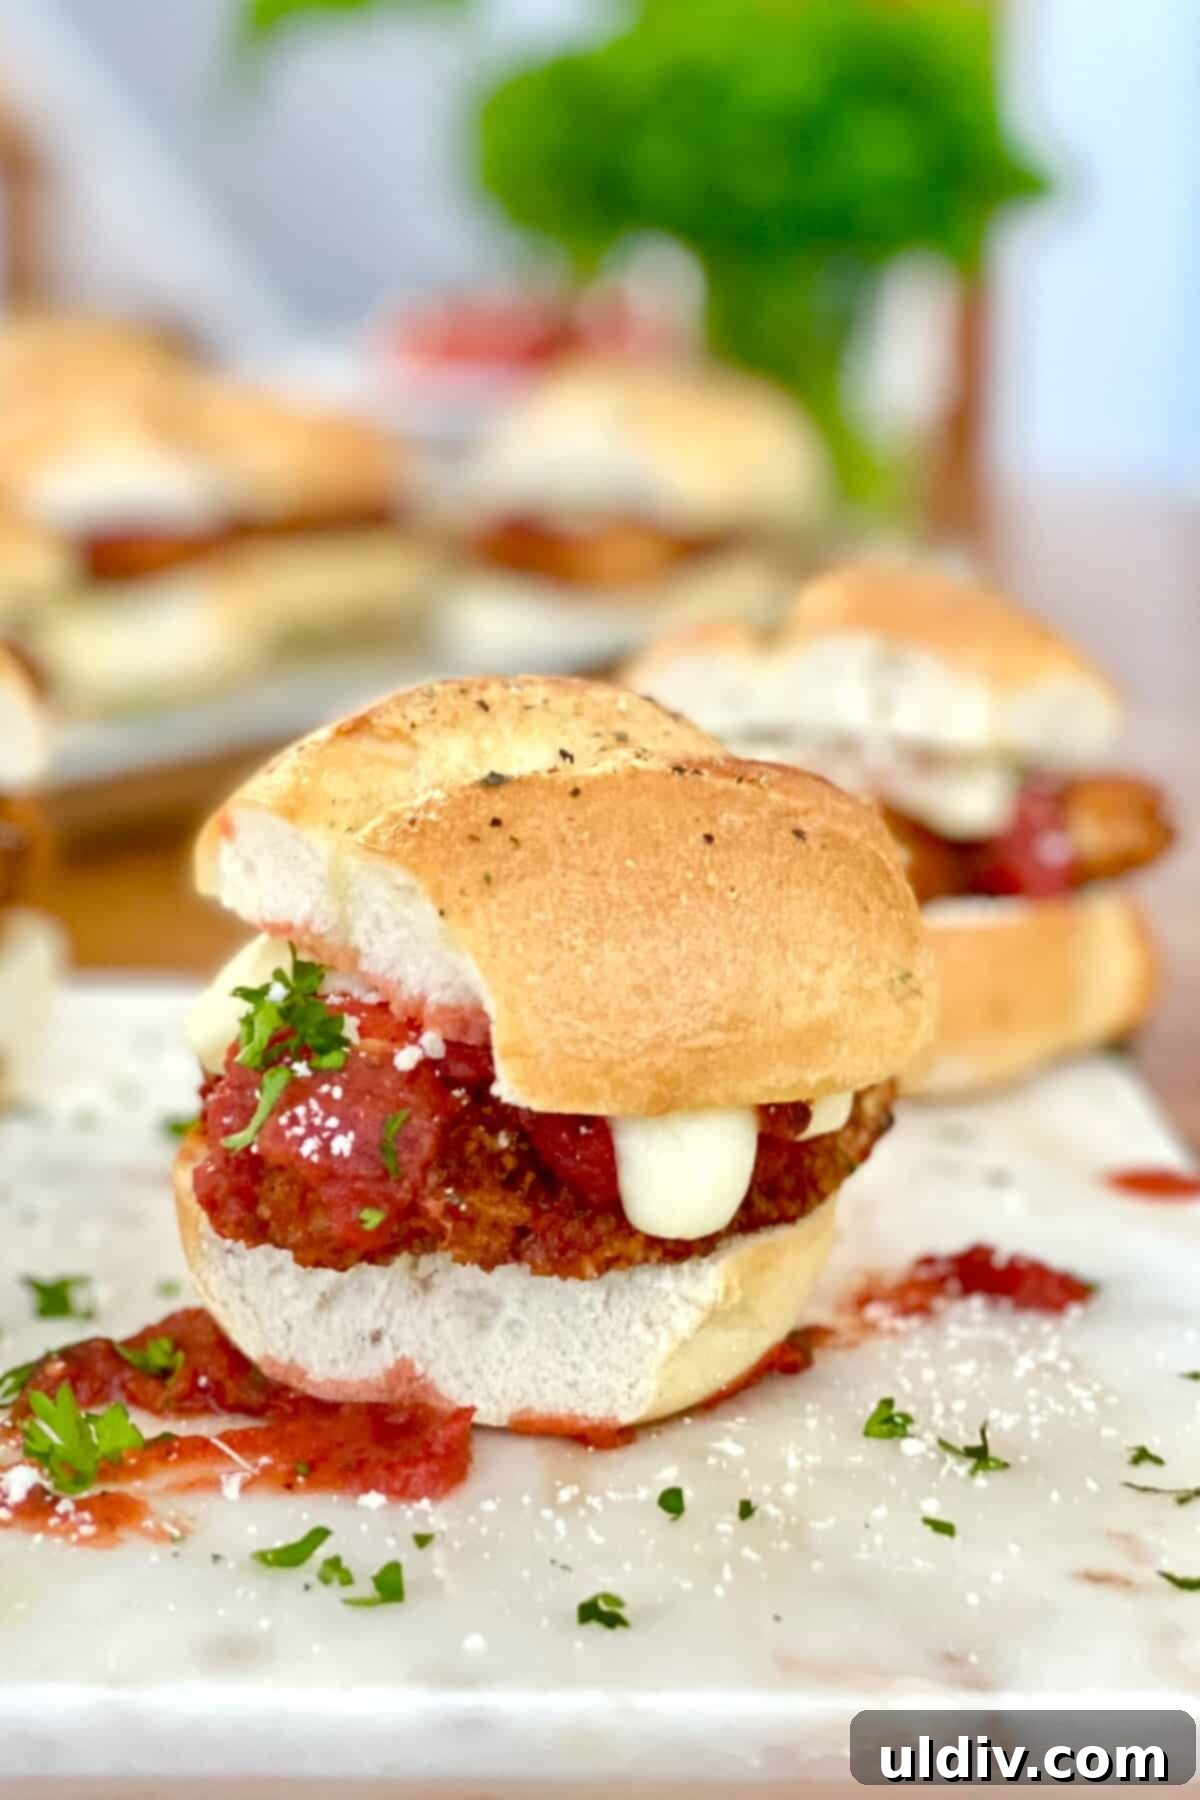
What’s not to adore about a perfectly crafted chicken Parmesan sandwich? It starts with the satisfying crunch of chicken coated in a golden-brown panko-Parmesan crust. This delightful crispiness is then complemented by the vibrant sweetness of a basil-infused marinara sauce. A generous layer of melty, gooey mozzarella cheese creates an irresistible texture, while a garlic butter-brushed, toasted roll provides the perfect vessel for all these incredible flavors. Each bite offers a harmonious blend of textures—crispy, tender, soft—and a symphony of Italian-inspired tastes that evoke comfort and culinary joy. Serve these sandwiches, perhaps with an extra side of warm marinara for dipping, and let the feasting begin!
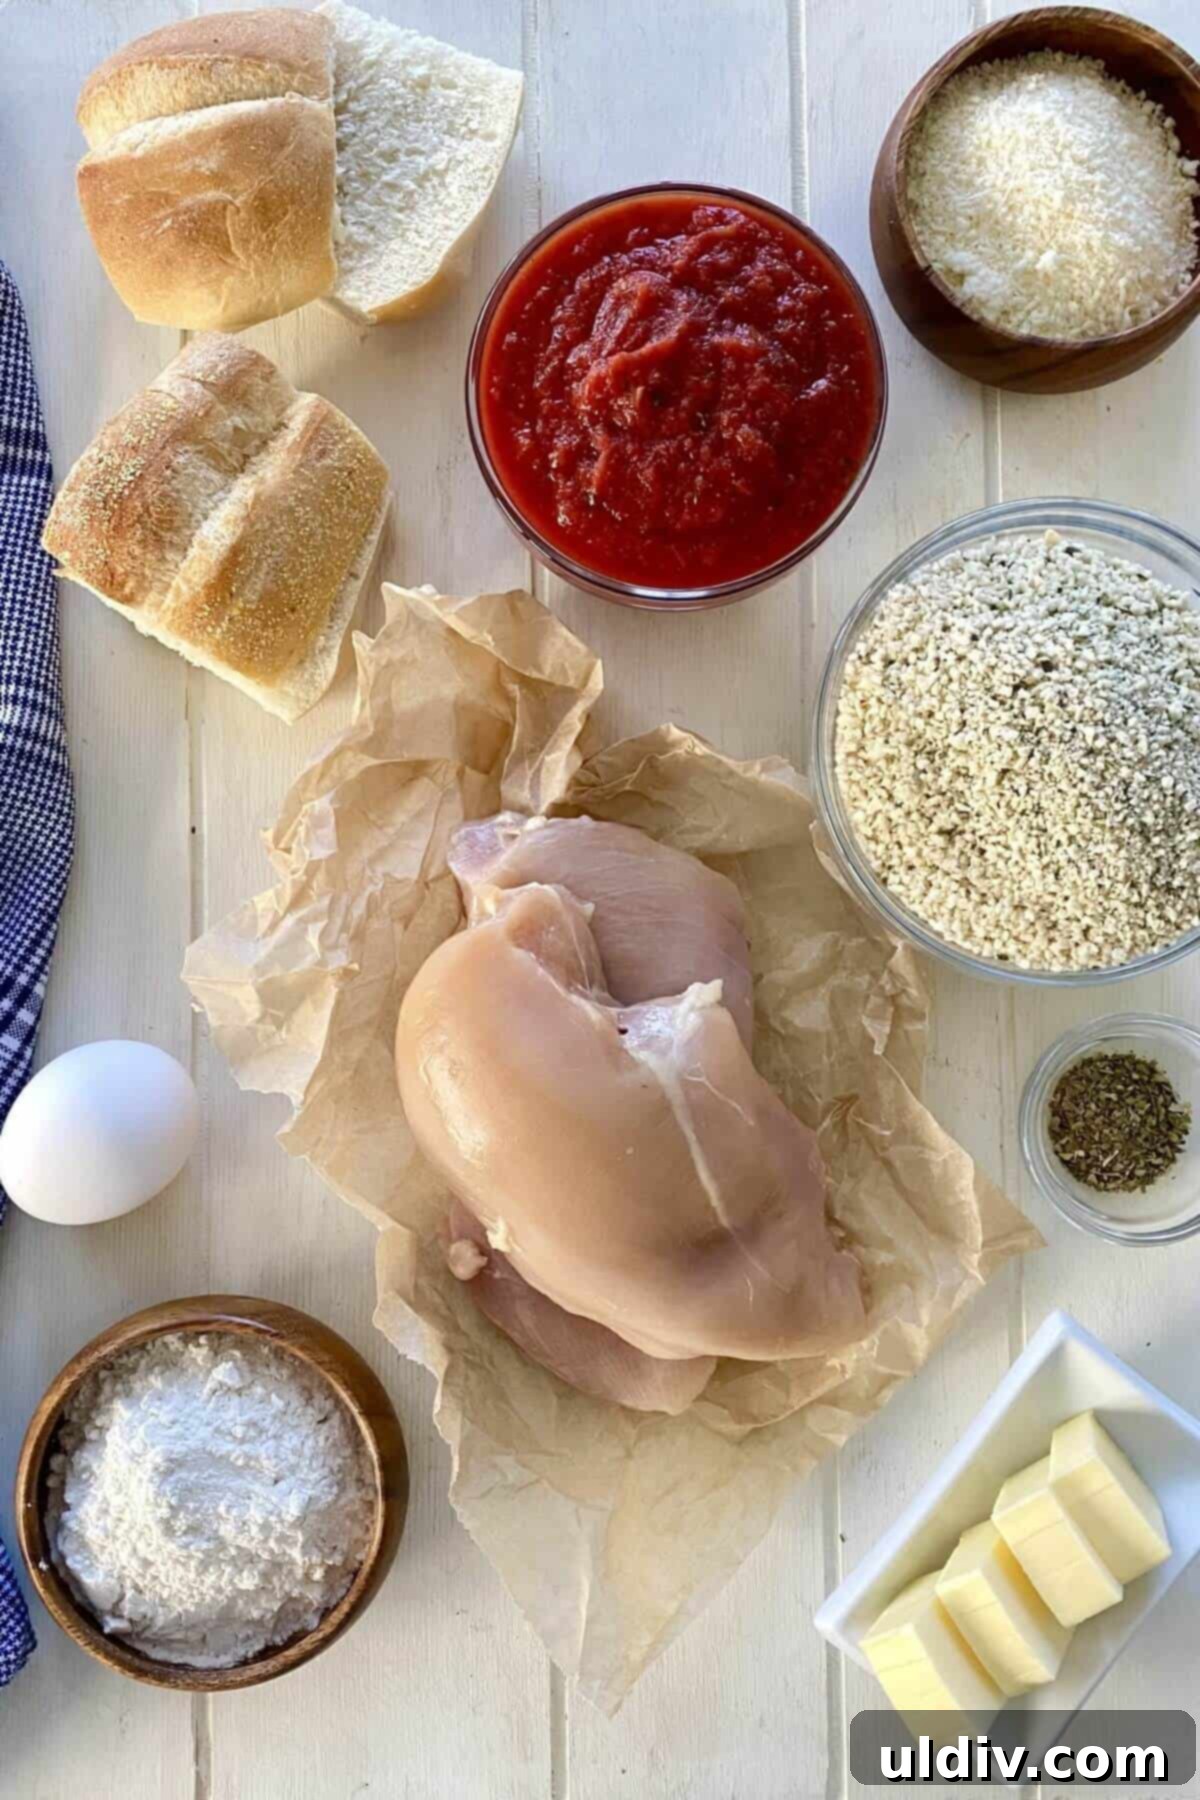
Essential Ingredients & Smart Substitutions
Crafting the ultimate Chicken Parmesan Sandwich begins with selecting quality ingredients. Here’s a breakdown of what you’ll need, along with useful tips and substitutions to tailor the recipe to your preferences:
- Boneless, Skinless Chicken Breasts: We recommend using fresh, high-quality chicken breasts for the best flavor and texture. For those who prefer a richer, more succulent bite, boneless, skinless chicken thighs make an excellent alternative. Pounding the chicken to an even thickness is crucial for quick and consistent cooking.
- Italian Seasoned Panko Breadcrumbs: Panko breadcrumbs are a game-changer for achieving an extra-crispy, light crust that regular breadcrumbs simply can’t match. If you’re looking to make this recipe gluten-free, a 1-to-1 gluten-free panko blend works perfectly without compromising on crunch.
- Parmesan Cheese: Freshly grated Parmesan cheese adds a nutty, salty depth to both the breading and the final garnish. For an authentic Italian experience, opt for high-quality Parmigiano-Reggiano. You’ll need some for the coating and extra for serving.
- Large Eggs: Eggs serve as the essential binder in our breading process, ensuring that the seasoned flour and panko mixture adhere beautifully to the chicken cutlets.
- All-Purpose Flour: The first step in our triple-coating method, all-purpose flour provides a foundational layer for the breading. To make the recipe suitable for gluten-sensitive diets, a 1-to-1 gluten-free flour blend can be used interchangeably.
- Kosher Salt & Freshly Ground Black Pepper: Proper seasoning at every stage of cooking is vital for developing rich, nuanced flavors. Don’t shy away from seasoning the flour, chicken, and even the finished fried cutlets.
- Olive Oil: A good quality olive oil is ideal for frying the chicken to a golden, crispy finish. If you prefer, a neutral oil like canola, vegetable, or grapeseed oil can also be used.
- Salted Butter: Melted salted butter is the base for our aromatic garlic-herb spread, which infuses the rolls with incredible flavor before toasting. If using unsalted butter, simply adjust the amount of added salt to taste.
- Garlic Powder, Dried Oregano, Dried Basil: These classic Italian dried herbs are whisked into the melted butter to create a fragrant, savory spread for the rolls. For an even fresher taste, a small amount of finely minced fresh garlic and chopped fresh herbs can be incorporated.
- Marinara Sauce: The quality of your marinara sauce significantly impacts the overall flavor of the sandwich. While our homemade basil marinara sauce is highly recommended for its vibrant freshness and depth, there are many excellent store-bought marinara sauces available that offer a convenient and delicious alternative.
- Small Sandwich Rolls: The choice of roll is important! Look for soft yet sturdy small sandwich rolls, such as slider buns, brioche buns, or small ciabatta rolls, that can comfortably hold the flavorful fillings without falling apart. For a gluten-free option, select your preferred gluten-free sandwich rolls.
- Mozzarella Cheese: Mellow, perfectly melty mozzarella cheese is the quintessential topping for chicken Parmesan. Whether you choose fresh mozzarella slices or pre-sliced low-moisture mozzarella, ensure it melts smoothly to create that signature gooey texture.
This carefully curated list, along with the flexible substitution suggestions, empowers you to create the perfect crispy chicken Parmesan sandwich, catering to various tastes and dietary needs.
Crafting Your Perfect Chicken Parm Sandwich: Step-by-Step Guide
This recipe brilliantly transforms traditional chicken Parmesan into a delightful, easy-to-handle sandwich format, making it an ideal choice for casual meals, game day gatherings, or as impressive appetizers. The process is designed to be straightforward, ensuring you achieve delicious and perfectly crispy results every single time.
Preparing the Crispy Chicken Cutlets
Begin by preparing your chicken with precision. Take each boneless, skinless chicken breast and carefully slice it horizontally into two thinner cutlets. This technique ensures the chicken cooks more quickly and evenly, creating pieces that are perfectly sized for your small rolls. Next, slice each of these thin cutlets into two smaller, more manageable pieces. Place these chicken portions between two sheets of plastic wrap or in a large zip-top bag, then gently pound them with a meat mallet. Aim for an even thickness of about ¼ to ½ inch. This crucial step not only tenderizes the chicken but also guarantees uniform cooking, preventing dry spots and promoting even crispiness.
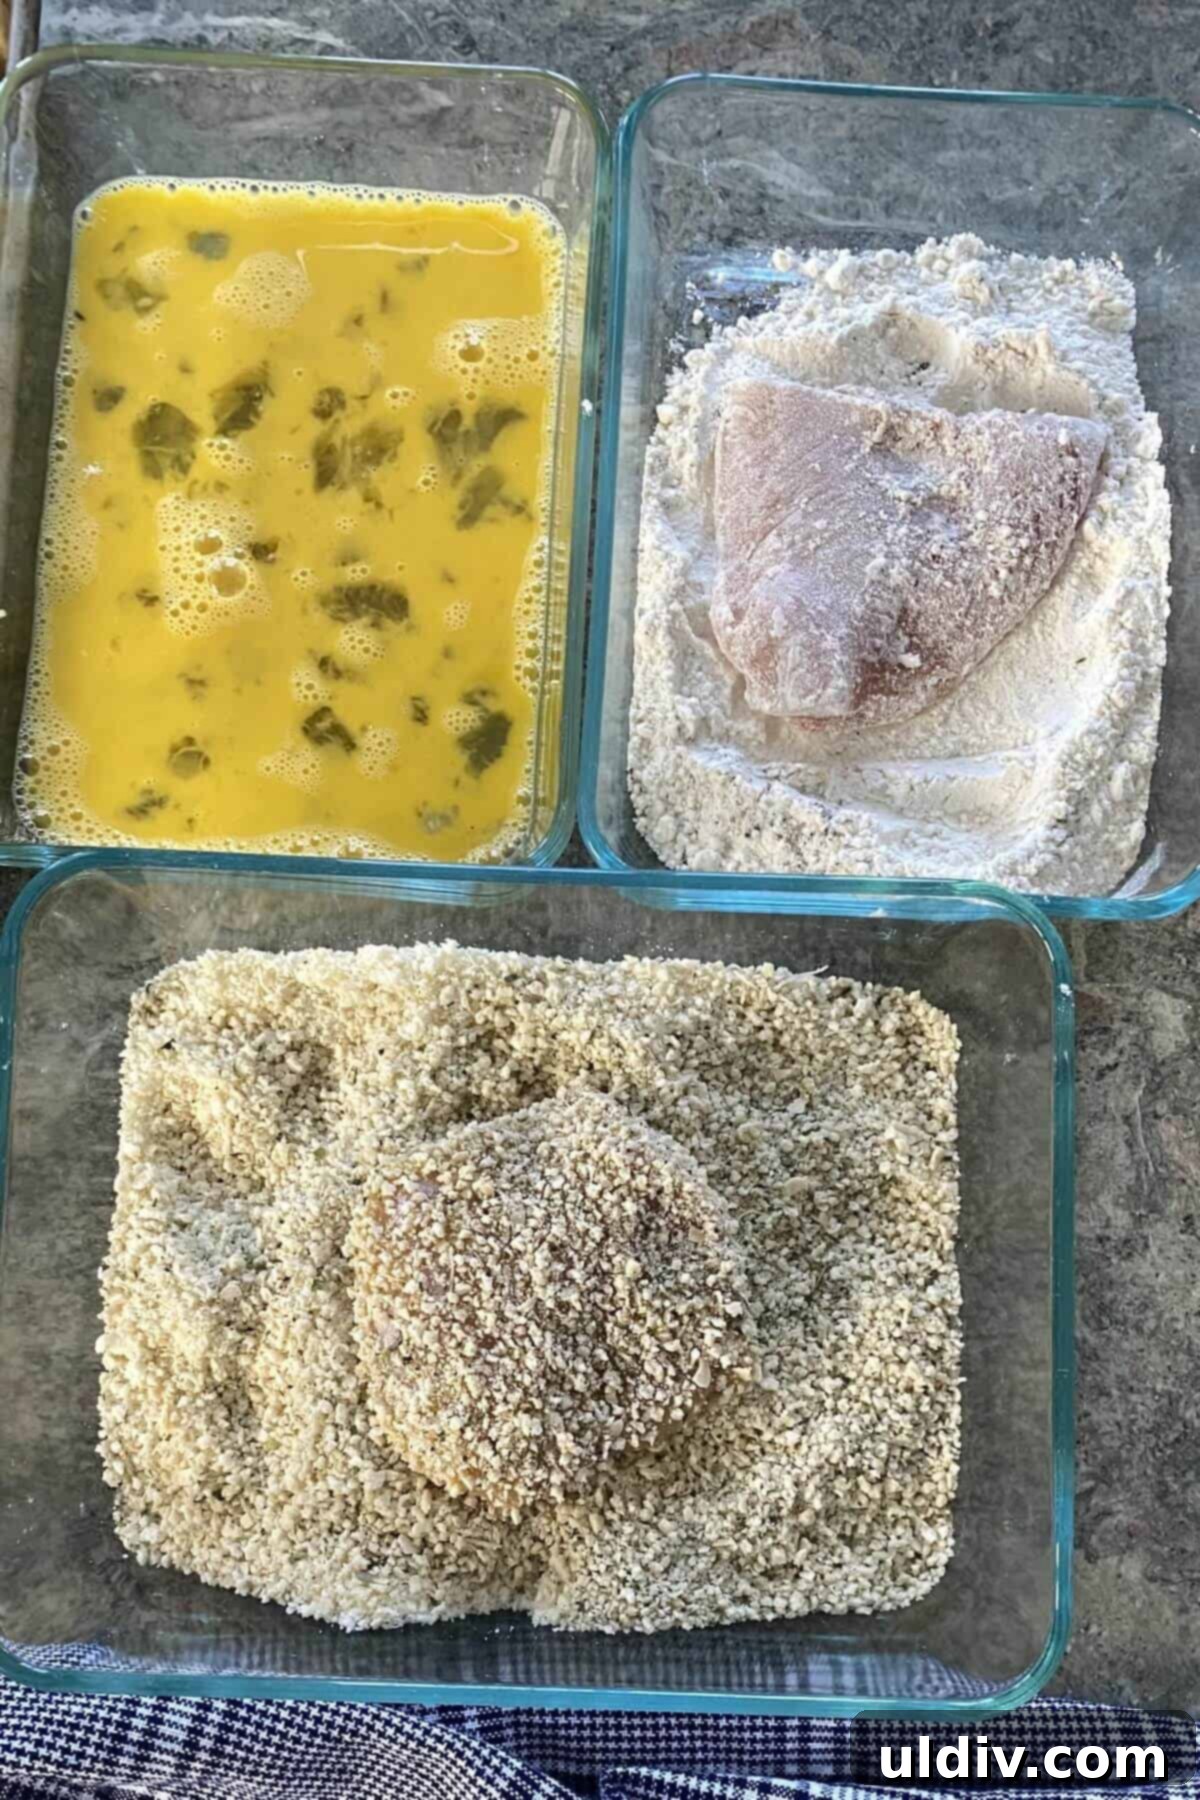
The Essential Three-Step Breading Process
Achieving that signature crispy, intensely flavorful crust is all about mastering the three-step breading process. Set up three separate, shallow dishes or plates. In the first dish, combine your all-purpose flour with ½ teaspoon of kosher salt and ¼ teaspoon of freshly ground black pepper. In the second dish, lightly beat two large eggs. For the third and final dish, create a flavorful mixture of 1 ½ cups of Italian seasoned panko breadcrumbs and ½ cup of grated Parmesan cheese. To bread each chicken piece, first dredge it thoroughly in the seasoned flour, ensuring it’s completely coated, then gently tap off any excess. Next, dip the chicken into the beaten egg, allowing any extra to drip away. Finally, firmly press the chicken into the panko-Parmesan mixture, making sure it’s coated with a thick, even layer. This meticulous triple coating is the secret to a robust, incredibly crispy exterior that stands up to the sauce.
Frying to Golden Perfection
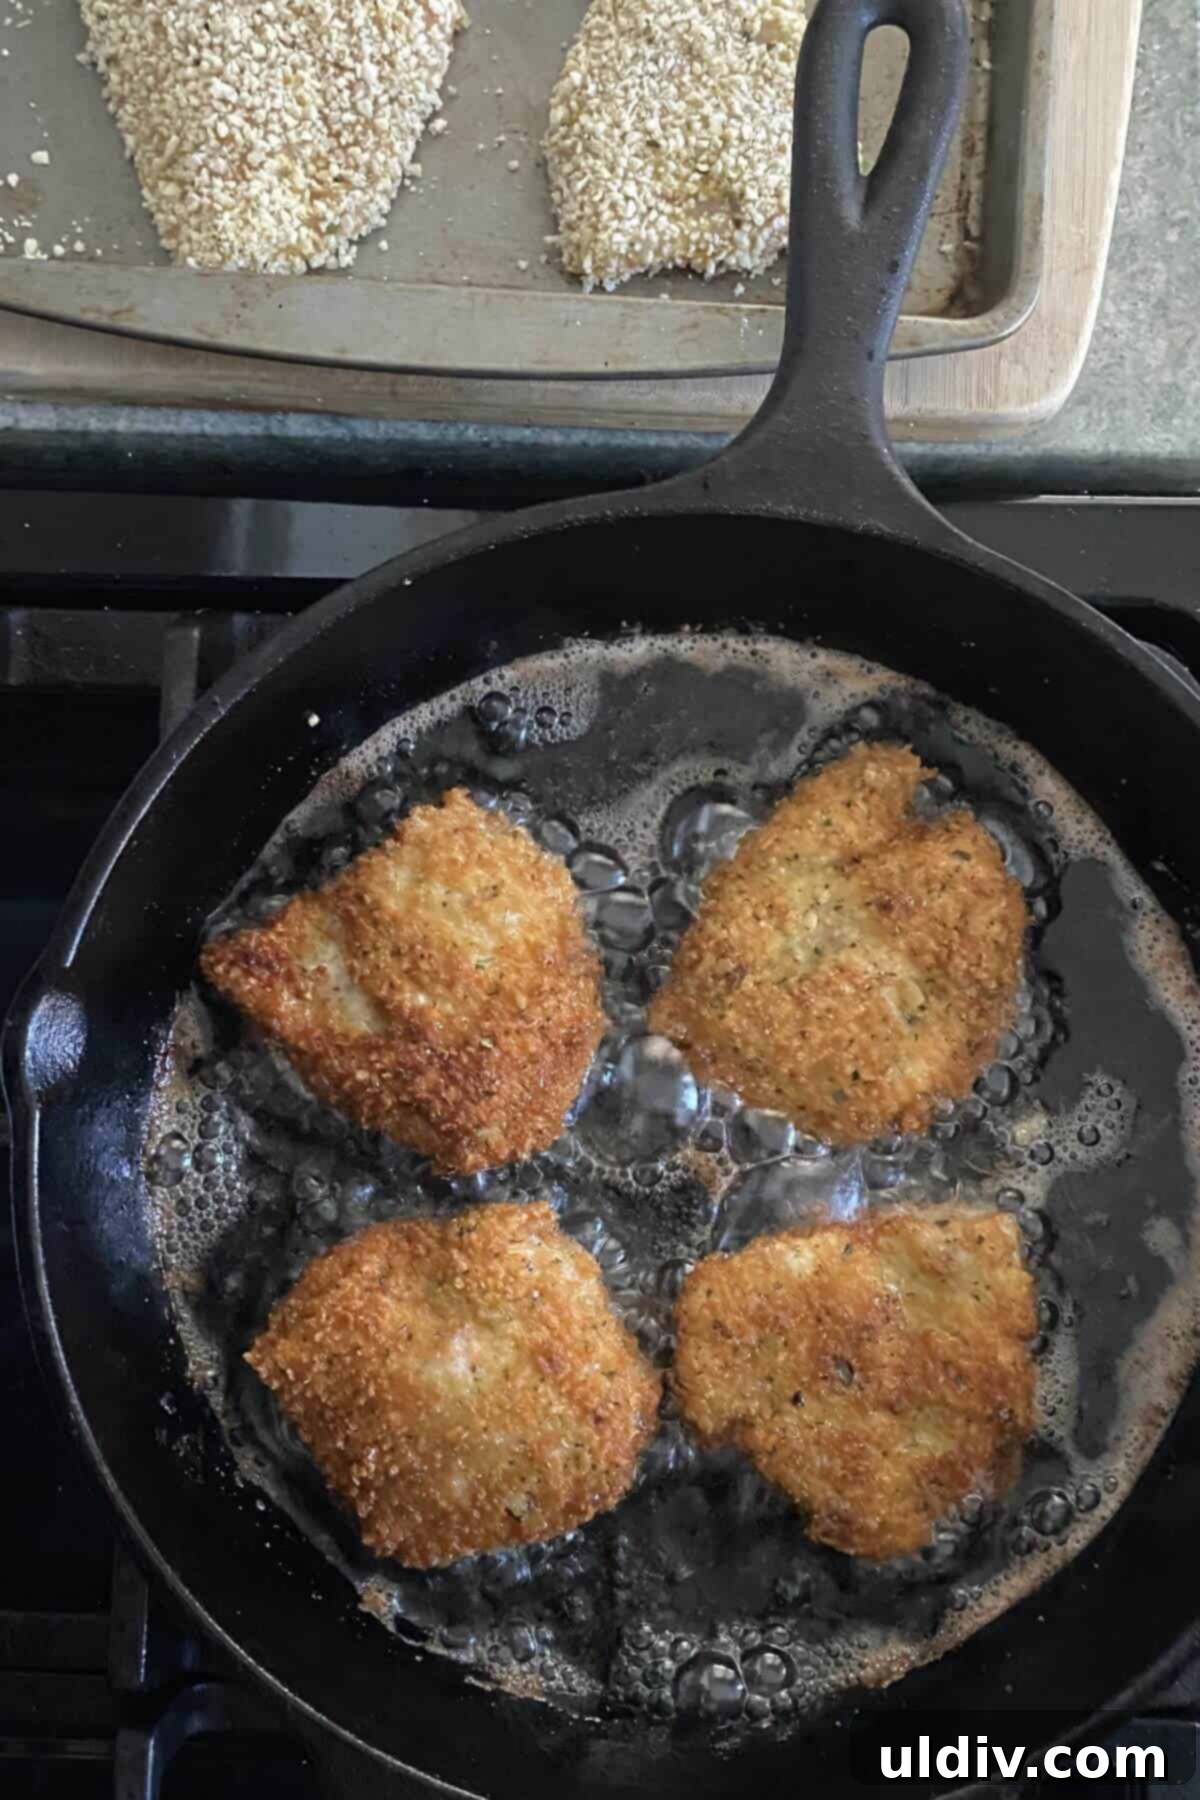
In a heavy-bottomed pan, such as a sturdy cast-iron skillet or a large sauté pan, heat about 1 cup of olive oil over medium heat. The key to impeccably crispy, non-greasy chicken is maintaining the optimal oil temperature; aim for a range between 350°F (175°C) and 375°F (190°C). An instant-read digital thermometer is highly recommended for accurate temperature monitoring. Once the oil is at the correct temperature, carefully fry the breaded chicken cutlets in batches, taking care not to overcrowd the pan. Cook for approximately 2 minutes per side, or until each piece is beautifully golden brown and cooked through to an internal temperature of 165°F (74°C). As each batch finishes frying, immediately transfer the crispy chicken to a wire cooling rack set over a rimmed baking sheet. This setup allows any excess oil to drain away, preventing the chicken from steaming and ensuring its delectable crispness. While still hot, lightly sprinkle the fried chicken with a pinch of kosher salt and a little extra grated Parmesan cheese for an added boost of flavor.
Preparing the Herb-Garlic Butter Rolls
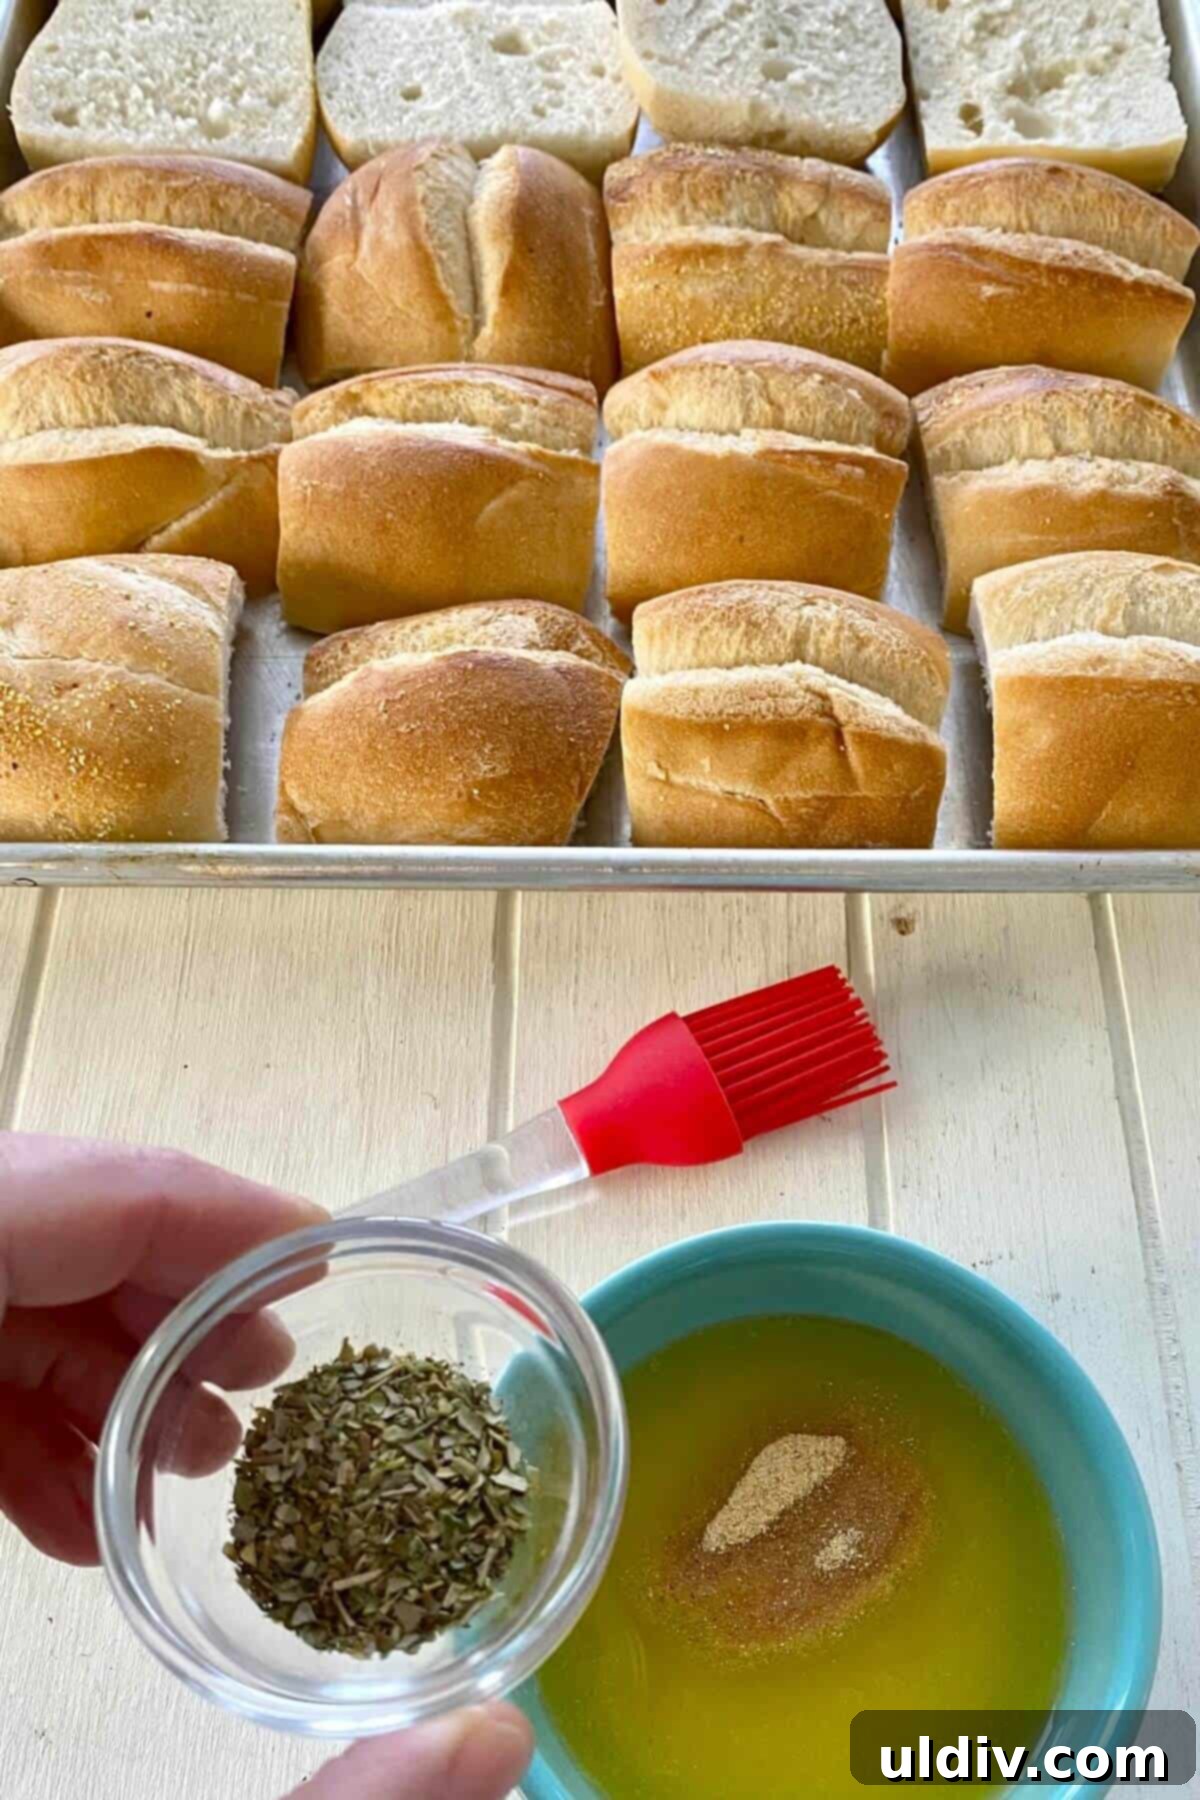
While your chicken cutlets are frying to golden perfection, turn your attention to preparing the rolls. In a small bowl, whisk together ¼ cup of melted salted butter with ½ teaspoon of garlic powder, ½ teaspoon of dried oregano, and ½ teaspoon of dried basil. These herbs will infuse the butter with a wonderfully aromatic Italian flavor. Slice your 12 small sandwich rolls in half horizontally. On a large rimmed baking sheet, arrange the bottom halves of the rolls cut-side up and the top halves cut-side down. Generously brush both the tops and bottoms of the rolls with the fragrant herb-garlic butter mixture. Toast them in a preheated oven (425°F/220°C) for about 5 minutes, or until they are lightly golden brown and irresistibly fragrant. Once toasted, remove the baking sheet from the oven and set the roll tops aside for later assembly.
Assembling and Baking Your Cheesy Chicken Parm Sandwiches
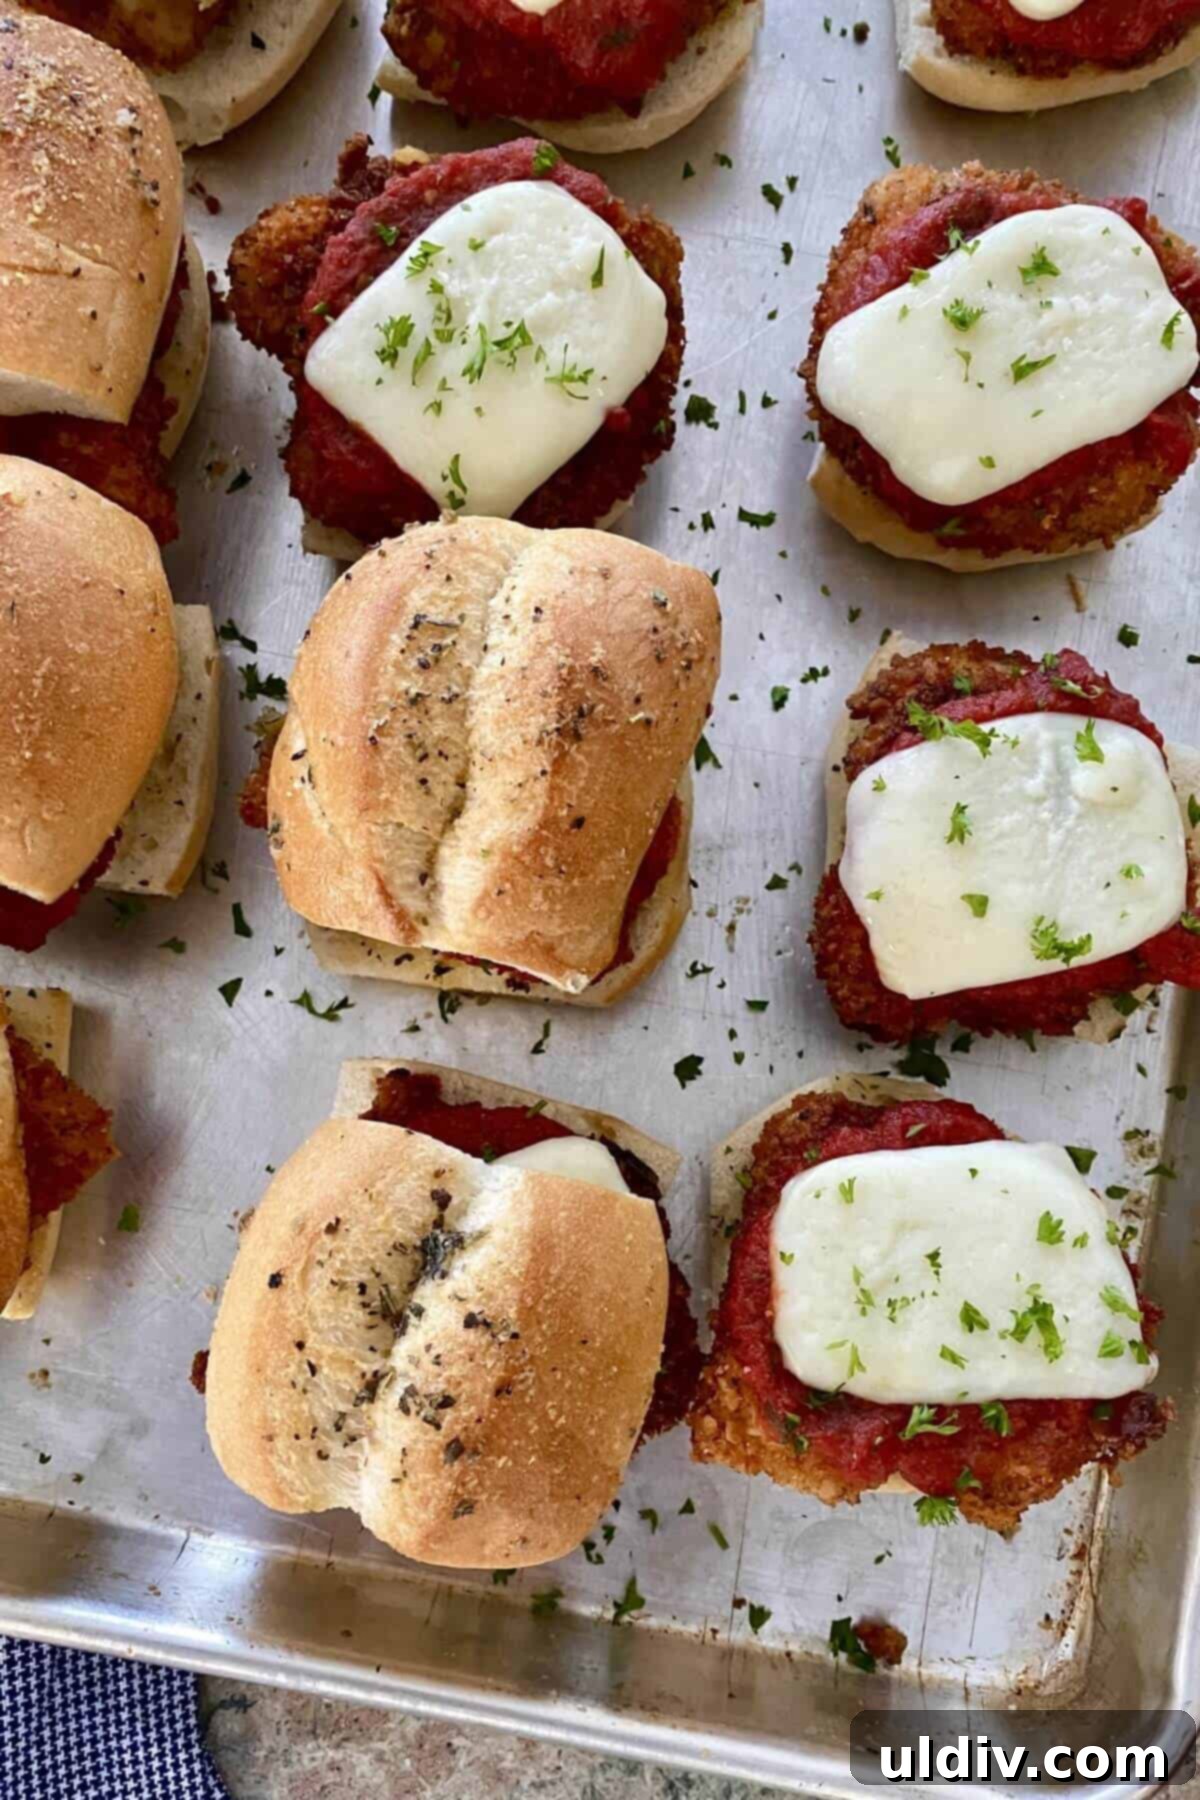
Now comes the most exciting part: assembling your delicious sandwiches! Take the toasted roll bottoms and spread a spoonful of warm marinara sauce on each. This creates a flavorful base for the chicken. Next, carefully place one piece of your crispy, cooked chicken cutlet on top of the marinara-brushed roll bottom. Add another generous tablespoon or two of marinara sauce over the chicken, ensuring it’s well-coated. Finally, crown each chicken piece with a slice of mozzarella cheese. Arrange these partially assembled sandwich bottoms back on your baking sheet, ensuring they are ready for their final bake.
Return the baking sheet to the preheated oven and bake for an additional 5 to 8 minutes, or until the mozzarella cheese is perfectly melted, bubbly, and slightly golden. During the last couple of minutes of baking time, place the reserved toasted roll tops back onto the baking sheet, alongside the sandwich bottoms, allowing them to warm through gently. This ensures your buns are soft and wonderfully toasted without becoming overly crisp.
Final Touches and Serving
Once your cheesy chicken Parmesan sandwiches emerge from the oven, remove them and immediately give them a final, optional sprinkle of freshly grated Parmesan cheese for an extra burst of flavor. While the sandwiches are baking, gently warm the remaining marinara sauce for dipping. Serve these irresistible sandwiches immediately, allowing everyone to enjoy the harmonious blend of crispy chicken, rich basil marinara, gooey melted mozzarella, and buttery, toasted rolls. The combination of textures and flavors makes these sandwiches an unforgettable culinary delight.
Tips for Chicken Parmesan Sandwich Success
Achieving the perfect chicken parmesan sandwich every time is easier than you think, especially with these expert tips and insights:
- Marinara Sauce Matters: Choose Wisely: The marinara sauce is a cornerstone of this sandwich, so its quality profoundly impacts the final taste. While a homemade basil marinara sauce offers an unbeatable depth of flavor and freshness, we understand that time isn’t always on your side. In such cases, opt for your absolute favorite high-quality store-bought brand. Taste-test a few to find one with a robust tomato flavor and good balance of herbs.
- Tender Chicken is Key: Pound with Purpose: For the most tender, succulent chicken that cooks evenly and fits beautifully on your rolls, don’t skip the pounding step. Lightly pounding the chicken breasts to an even thickness (around ¼ to ½ inch) ensures that every piece cooks quickly and remains incredibly juicy, preventing any dry spots.
- Optimal Oil Temperature for Frying: Precision for Perfection: The secret to truly crispy, non-greasy chicken lies in maintaining the correct oil temperature. Aim for a temperature range between 350°F (175°C) and 375°F (190°C). If the oil is too cool, the breading will absorb excessive oil, resulting in a soggy, heavy crust. Conversely, if the oil is too hot, the breading will burn quickly before the chicken has a chance to cook through. An instant-read digital thermometer or a candy thermometer is an invaluable tool for precise temperature control.
- Maintain Crispness After Frying: The Cooling Rack Advantage: As you fry the chicken in batches, resist the urge to stack them on paper towels. Instead, immediately transfer the cooked pieces to a wire cooling rack placed over a baking sheet. This setup allows air to circulate freely around the chicken, preventing it from steaming and ensuring its delightful crispness is preserved.
- Avoid Overcrowding the Pan: Give Them Space: When frying, it’s crucial to fry the chicken in batches. Overcrowding the pan will drastically lower the oil temperature, leading to greasy chicken and uneven browning. Give each piece ample space to crisp up beautifully.
- Season at Every Stage: Build Layers of Flavor: Don’t underestimate the power of seasoning throughout the cooking process. From generously seasoning the flour mixture to sprinkling a pinch of kosher salt on the hot fried chicken, layering seasonings at each step builds a richer, more complex flavor profile in every bite.
- Explore Cheese Combinations: Beyond Mozzarella: While mozzarella is the classic choice for its incredible melt and mild flavor, don’t hesitate to experiment! A blend of mozzarella with a thin slice of provolone can add an extra layer of sharp, savory flavor and an even more satisfying stretch when melted.
Storing and Reheating Your Chicken Parm Sandwiches
While these crispy chicken Parmesan sandwiches are truly at their peak when enjoyed fresh, right out of the oven, it’s certainly possible to savor them later. Whether you have delicious leftovers or wish to prepare them slightly in advance, here are the best ways to store and reheat your sandwiches:
For Best Results: Reheating in the Oven
To reheat multiple assembled sandwiches and maximize their crispness, arrange them on a baking sheet. Loosely cover the sandwiches with aluminum foil. This helps to prevent them from drying out and ensures the cheese melts evenly without over-browning. Place the baking sheet in a preheated oven at 375°F (190°C) for 15 to 20 minutes, or until the sandwiches are heated through and the cheese is beautifully re-melted and bubbly. For an extra touch of crispness on the buns, remove the foil for the last few minutes of baking.
Quick Reheat: Microwave Method (for individual sandwiches)
If you’re short on time and need a quick reheat for an individual sandwich, the microwave is a convenient option. Wrap the sandwich in a paper towel to help absorb moisture and prevent it from becoming overly soft. Microwave on 60% power at 1-minute intervals, checking frequently, until the sandwich is thoroughly hot. Please note that while this method is fast, the chicken breading may not retain the same level of crispness as when freshly made or reheated in the oven, but it will still be incredibly flavorful and satisfying.
More Delicious Sandwich Recipes to Explore
If you’ve enjoyed crafting and savoring these delightful Crispy Chicken Parmesan Sandwiches, we’re confident you’ll love exploring other creative and comforting sandwich recipes from our extensive collection. Perfect for any meal or occasion, these recipes offer exciting new flavors and textures:
- Wild Cod Fish Reubens with 30 Second Russian Dressing
- Instant Pot Barbecue Brisket Sandwiches
- Grilled Balsamic Chicken Caprese Sandwiches
- Barbecue Pork Tenderloin Sliders
- Sweet and Tangy Meatball Hoagies
Share Your Culinary Creations!
Have you had the pleasure of making this delightful Crispy Chicken Parmesan Sandwich recipe? We would absolutely love to hear about your experience! Your feedback not only helps us grow but also inspires other home cooks to try these delicious recipes.
Please take a moment to leave a comment below and consider giving this recipe a star rating. We genuinely appreciate every piece of feedback we receive and do our best to reply to all your comments. Your insights are incredibly valuable!
Don’t forget to snap a fantastic photo of your amazing creation and share it with us on Instagram! Make sure to tag @amycaseycooks so we can admire your culinary masterpiece and even feature your work in our Insta stories. We always get so much joy from seeing all your unique interpretations and delicious results.
For more fabulous foodie stories, mouth-watering videos, essential cooking tips, and exciting new recipes to tantalize your taste buds, be sure to check out our Facebook and Pinterest pages. And to ensure you never miss out on our latest culinary adventures and recipe releases, sign up for our newsletter today!

Crispy Chicken Parmesan Sandwich Recipe
Crispy Chicken Parmesan Sandwich Recipe
Equipment
- Meat Mallet
- 3 shallow dishes for breading
- Cast iron skillet or large sauté pan
- Digital thermometer or candy thermometer
- Wire cooling rack
- Rimmed baking sheets
- Small bowl for butter mixture
Ingredients
- 3 boneless skinless chicken breasts (about 2 pounds)
- 1 ½ cups Italian seasoned panko
- ½ cup grated Parmesan cheese (plus more for serving)
- 2 large eggs (beaten)
- ½ cup all-purpose flour
- Kosher salt (to taste)
- Black pepper (to taste)
- 1 cup olive oil (for frying)
- ¼ cup salted butter (melted)
- ½ teaspoon garlic powder
- ½ teaspoon dried oregano
- ½ teaspoon dried basil
- 12 small sandwich rolls (about 3 inches each)
- 3 cups marinara sauce (homemade or store-bought)
- 8 ounces mozzarella cheese (cut into 12 slices)
Instructions
- Preheat oven to 425 degrees F (220°C). Place a wire cooling rack on a rimmed baking sheet. Set aside.
- Prepare the chicken: Place chicken breasts on a cutting board. Carefully slice each horizontally into 2 thin cutlets. Then, cut each cutlet into 2 pieces, making a total of 12 pieces. Cover the cutlets with plastic wrap and lightly pound with a meat mallet to an even thickness (about ¼ to ½ inch). Set aside.
- Coat the chicken: Set up three separate shallow dishes. In the first, place the Italian seasoned panko and ½ cup Parmesan cheese. In the second, place the 2 beaten eggs. In the third, place the ½ cup all-purpose flour seasoned with ½ teaspoon kosher salt and ¼ teaspoon black pepper. Dredge each chicken piece first in the seasoned flour, tapping off excess, then dip into the beaten egg, allowing excess to drip off, and finally, press firmly into the panko-Parmesan mixture to coat thoroughly. Set the breaded chicken aside.
- Fry the chicken: In a cast iron skillet or large sauté pan, heat 1 cup of olive oil over medium heat until it reaches 350-375 degrees F (175-190°C) using a digital thermometer. Fry the coated chicken in batches (do not overcrowd the pan) for about 2 minutes per side, or until golden brown and cooked through (internal temperature 165°F/74°C). Remove the chicken to the prepared wire cooling rack. Lightly sprinkle the hot fried chicken with additional kosher salt and Parmesan cheese.
- Prepare the butter mixture: In a small bowl, whisk together the ¼ cup melted butter, ½ teaspoon garlic powder, ½ teaspoon dried oregano, and ½ teaspoon dried basil. Set aside.
- Toast the rolls: On a large rimmed baking sheet, place the tops of the small sandwich rolls cut-side down and the bottoms cut-side up. Brush both the tops and bottoms generously with the melted herb-garlic butter mixture. Toast in the preheated oven for 5 minutes, or until the rolls are lightly browned and fragrant. Remove from the oven.
- Remove the roll tops from the baking sheet and set them aside.
- Assemble the sandwiches: Brush the toasted roll bottoms with a layer of warm marinara sauce. Top each with one piece of the crispy cooked chicken. Add about 2 tablespoons more of marinara sauce over the chicken, then place one slice of mozzarella cheese on top.
- Bake to melt cheese: Return the baking sheet with the assembled sandwich bottoms to the oven. Bake for 5 to 8 minutes, or until the mozzarella cheese is perfectly melted and bubbly. During the last 2 minutes of baking, add the reserved roll tops back onto the baking sheet to warm through.
- Warm marinara: While the sandwiches are baking, gently warm the remaining marinara sauce in a small saucepan.
- Serve: Remove the hot sandwiches from the oven. Garnish with an optional sprinkle of fresh Parmesan cheese. Serve immediately with the warm marinara sauce on the side for dipping.
Video
Notes
To ensure your chicken is tender and cooks evenly, always lightly pound the chicken breasts with a meat mallet to an even thickness before breading.
The key to perfectly crispy (not greasy) fried chicken is maintaining the correct oil temperature. Aim for 350-375 degrees F (175-190°C). Use an instant-read digital thermometer or a candy thermometer to monitor it accurately. If the oil is too cool, the breading will absorb too much oil; if it’s too hot, the breading will burn before the chicken is cooked through.
After frying, always transfer the chicken to a cooling rack set over a baking sheet. This allows air to circulate around the chicken, preventing it from steaming and ensuring the crust remains wonderfully crispy.