
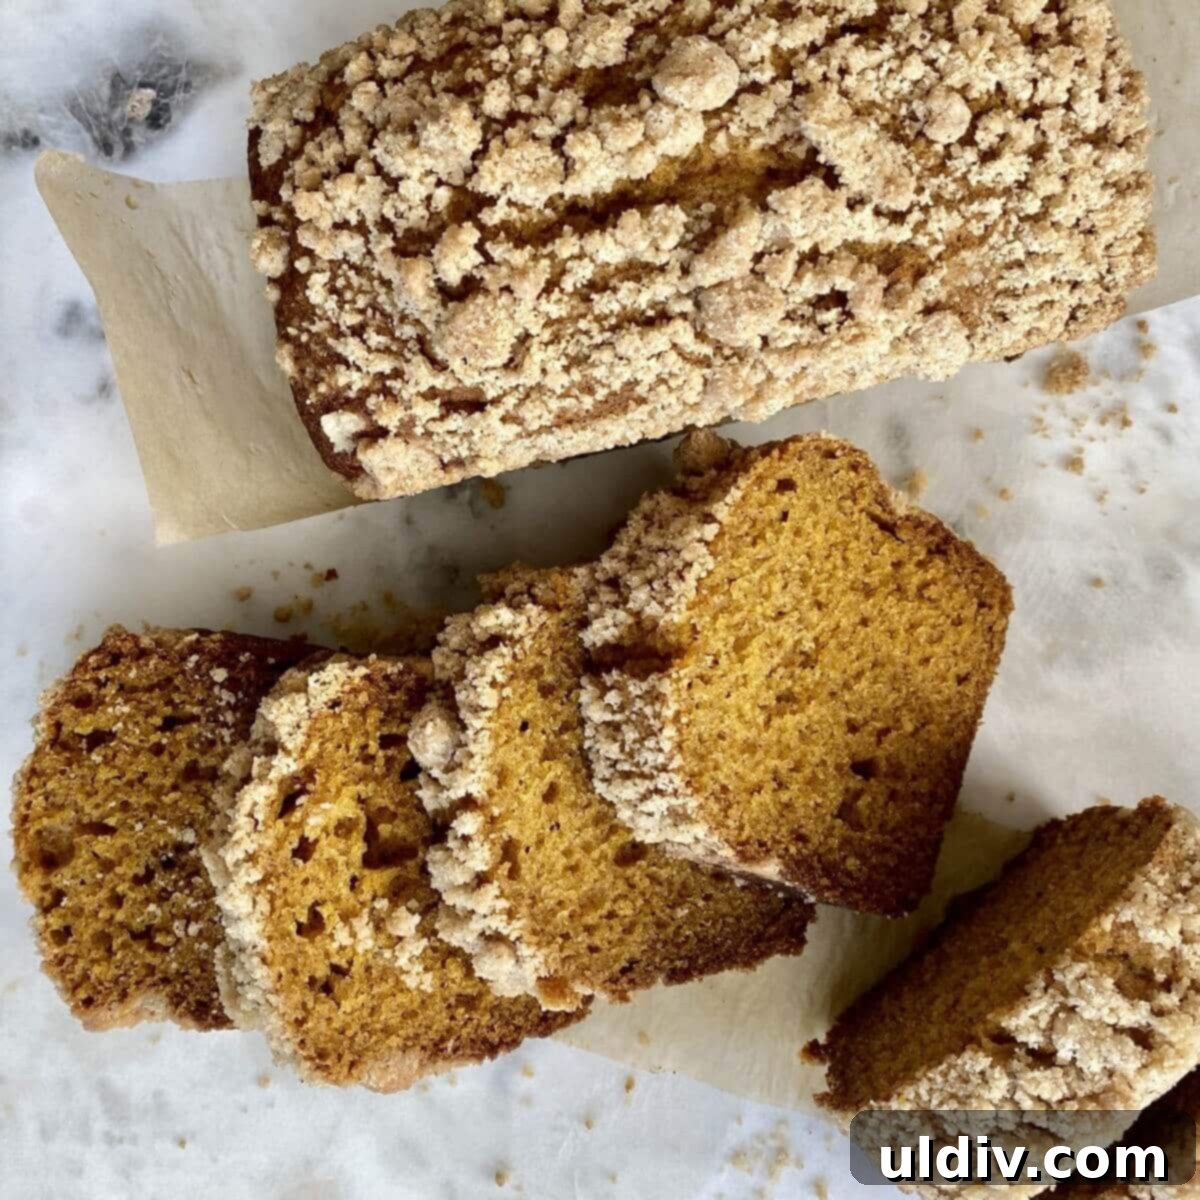
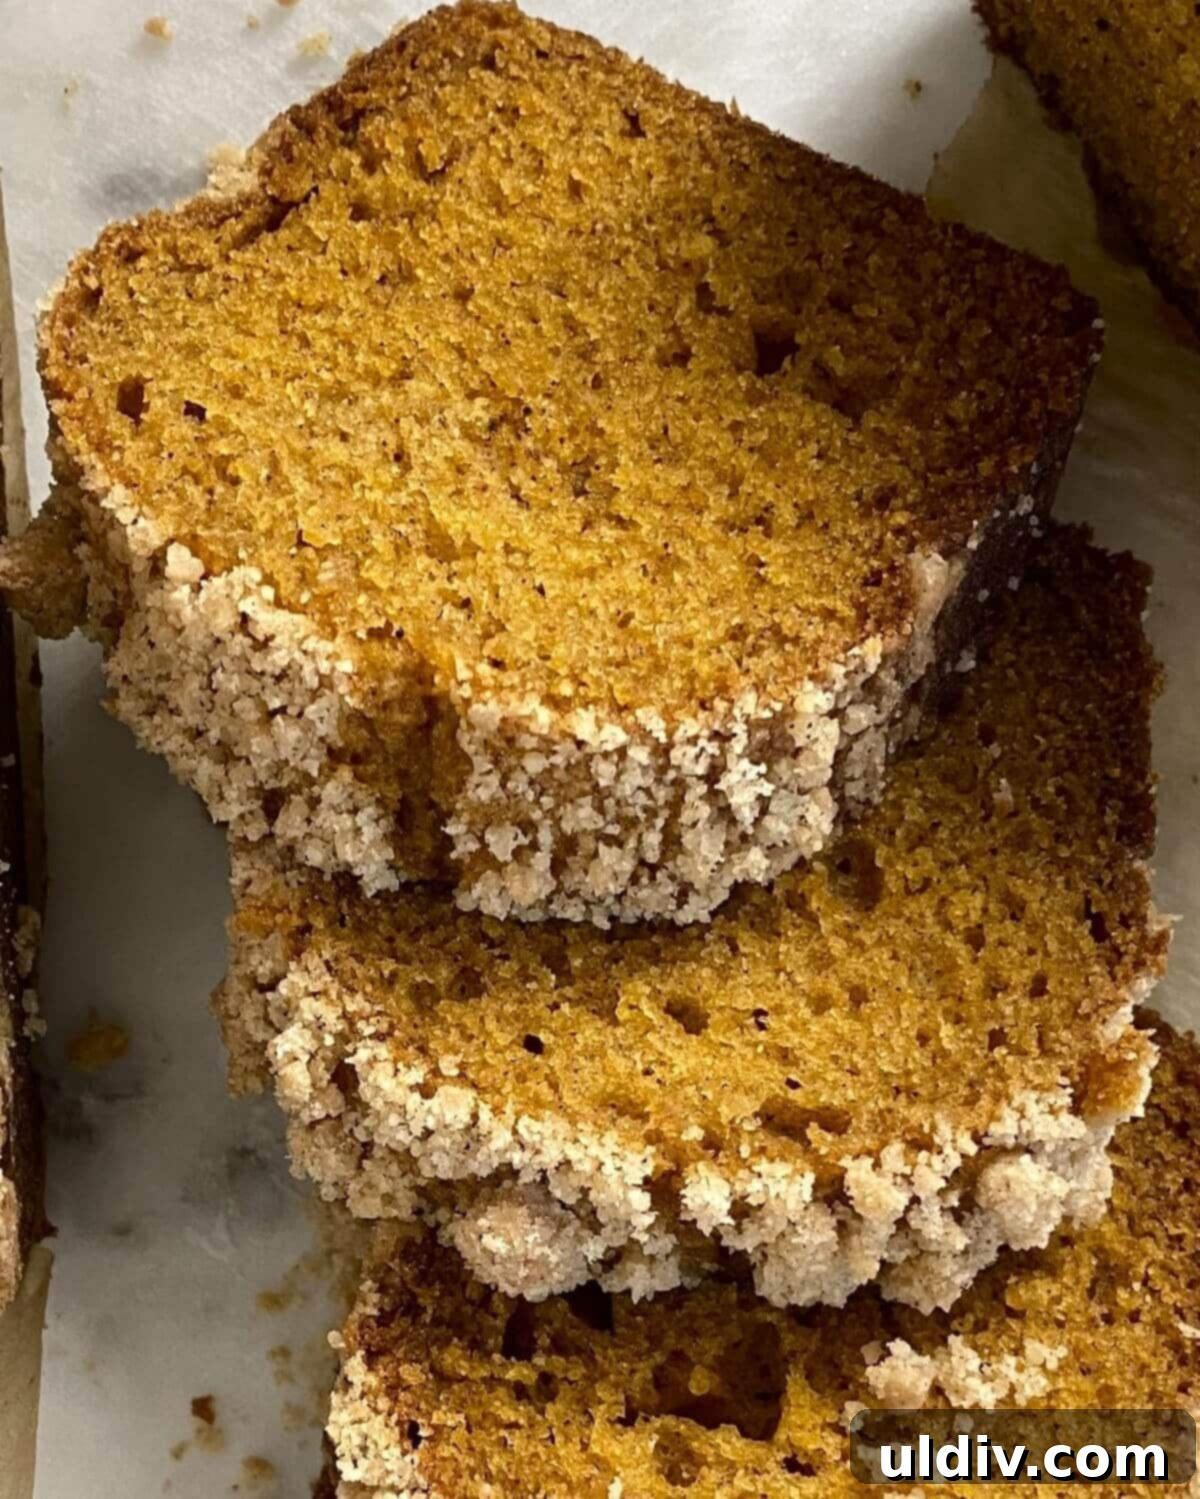
Welcome to your new favorite fall baking tradition! This exquisite Mini Pumpkin Bread Recipe with Streusel Topping combines the rich, earthy flavors of pumpkin with a harmonious blend of warm spices and is crowned with an irresistible brown sugar crumb streusel. These charming individual loaves are perfect for savoring with your morning coffee, enjoying as a delightful afternoon snack, or generously sharing with loved ones. Prepare to fall in love with the remarkably moist and tender texture of this homemade pumpkin bread.
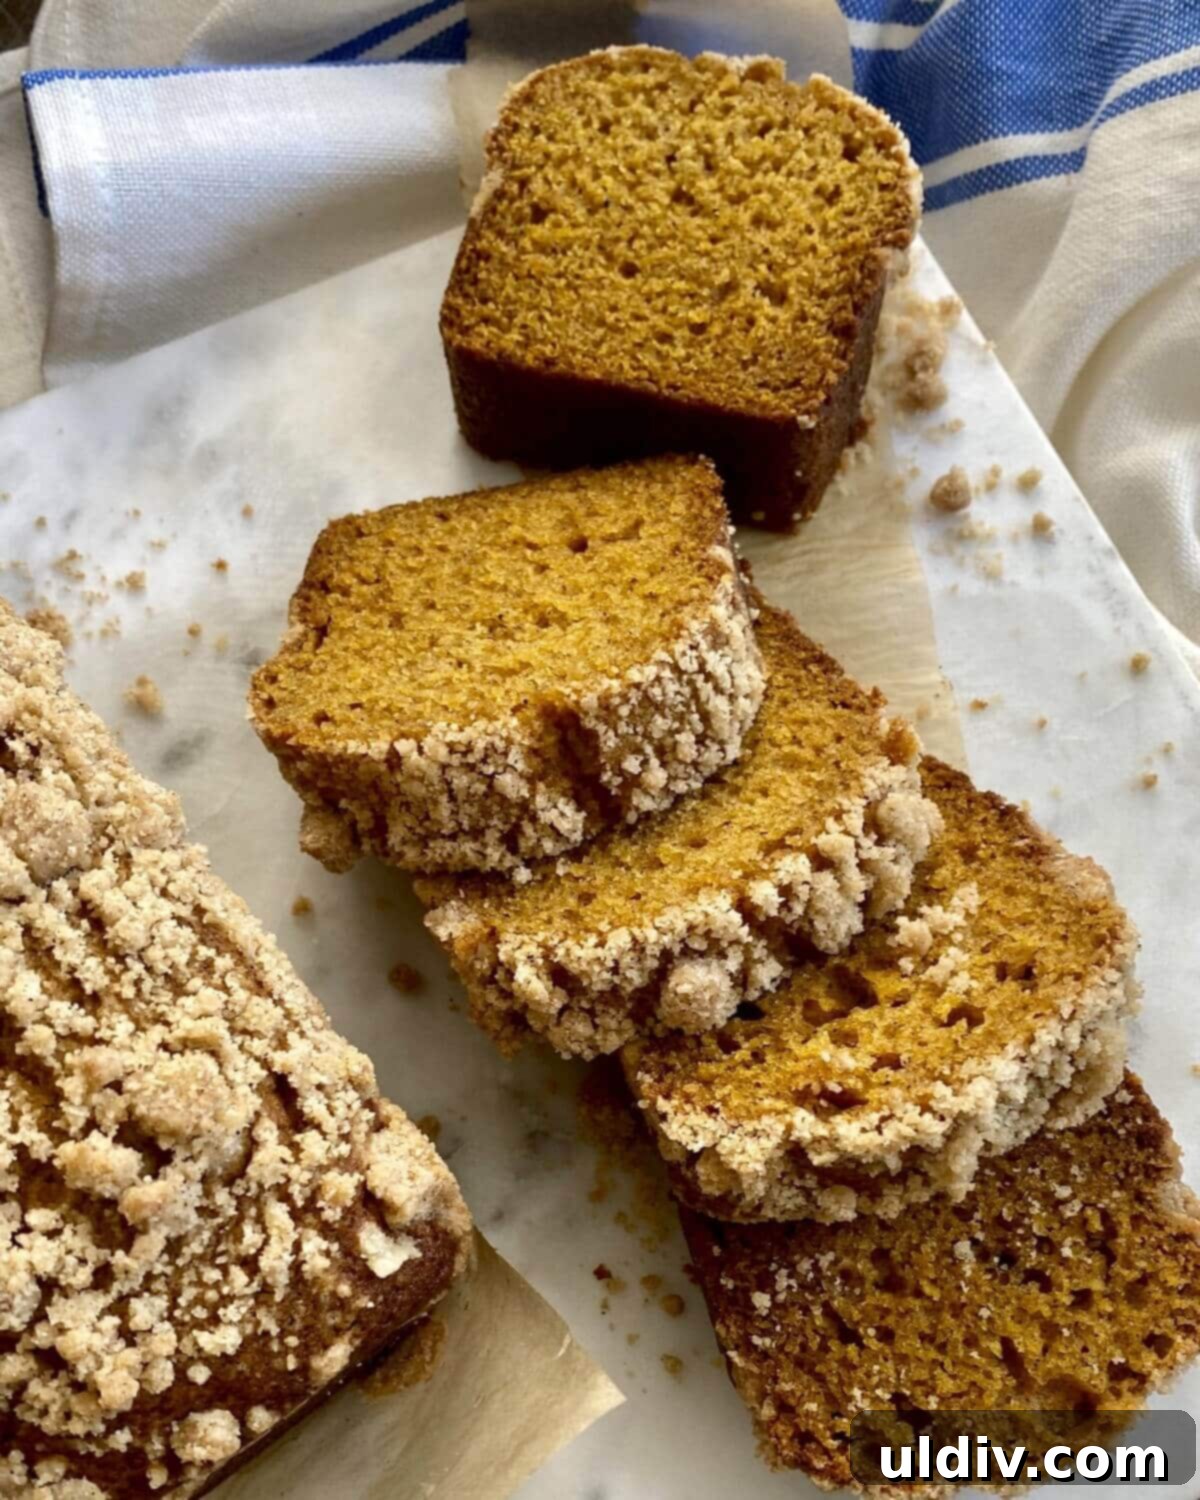
As autumn arrives and the weather gently cools, my kitchen transforms into a bustling hub of baking activity. The crisp air and vibrant fall foliage always inspire me to whip up comforting treats. From delicate sugared shortbread and a grand Texas Sheet Cake to flaky chocolate puff pastry rolls and my cherished Great Aunt Rose’s Sour Cream Pound Cake, my oven rarely gets a break. But when pumpkins start making their grand appearance everywhere, my thoughts invariably turn to baking a fresh batch of these delightful mini pumpkin loaves. This recipe holds a special place among my favorite fall creations, offering a charming, small-scale version of classic pumpkin bread that’s simply irresistible.
Why You’ll Adore This Mini Pumpkin Bread Recipe
This easy mini pumpkin bread recipe will quickly become a cherished favorite for many reasons, making it a staple in your autumn baking repertoire:
- Effortlessly Simple to Bake: Quick bread recipes are renowned for their straightforward approach, and this one is no exception. You won’t need any specialized kitchen gadgets or a stand mixer; a couple of bowls and a whisk are all it takes. It’s a fantastic recipe for bakers of all skill levels, from beginners to seasoned pros, delivering impressive results with minimal fuss. The batter comes together quickly, making it ideal for a spontaneous baking session when a pumpkin craving strikes.
- Charming Mini Loaves Perfect for Sharing: There’s something undeniably delightful and visually appealing about individual-sized portions. These mini pumpkin loaves are not only cute but also incredibly convenient for serving. They make wonderful, thoughtful gifts for friends, charming additions to a hostess basket, or easy grab-and-go snacks for busy mornings and lunchboxes. Their smaller size means they bake faster and cool quicker, perfect for satisfying your sweet tooth without a long wait.
- Bursting with Classic Autumn Flavors: Immerse yourself in the comforting and iconic tastes of fall with every bite. This recipe features a harmonious blend of warm spices—aromatic cinnamon, pungent ground cloves, earthy allspice, and a hint of nutmeg—that perfectly complement the sweet, mellow flavor of pure pumpkin puree. Topped with a rich brown sugar streusel, each loaf offers a sublime balance of textures and tastes that evoke cozy autumn days, creating a truly comforting experience.
- Incredibly Moist and Tender Texture: Say goodbye to dry, crumbly quick breads! This mini pumpkin bread boasts an exceptionally moist and tender crumb that practically melts in your mouth. The secret lies in the generous amount of pure pumpkin puree, which adds natural moisture and richness, along with the addition of oil, ensuring a truly soft, delicate, and delightful texture that stays fresh for days. This combination guarantees a bread that is never dry or dense.
Essential Ingredients & Smart Substitutions for Perfect Pumpkin Bread
Crafting these delectable mini pumpkin loaves requires a few simple pantry staples. Here’s a detailed look at what you’ll need, along with some helpful substitution ideas to ensure your baking success. For precise measurements, please refer to the comprehensive recipe card below, which provides full quantities of all ingredients.
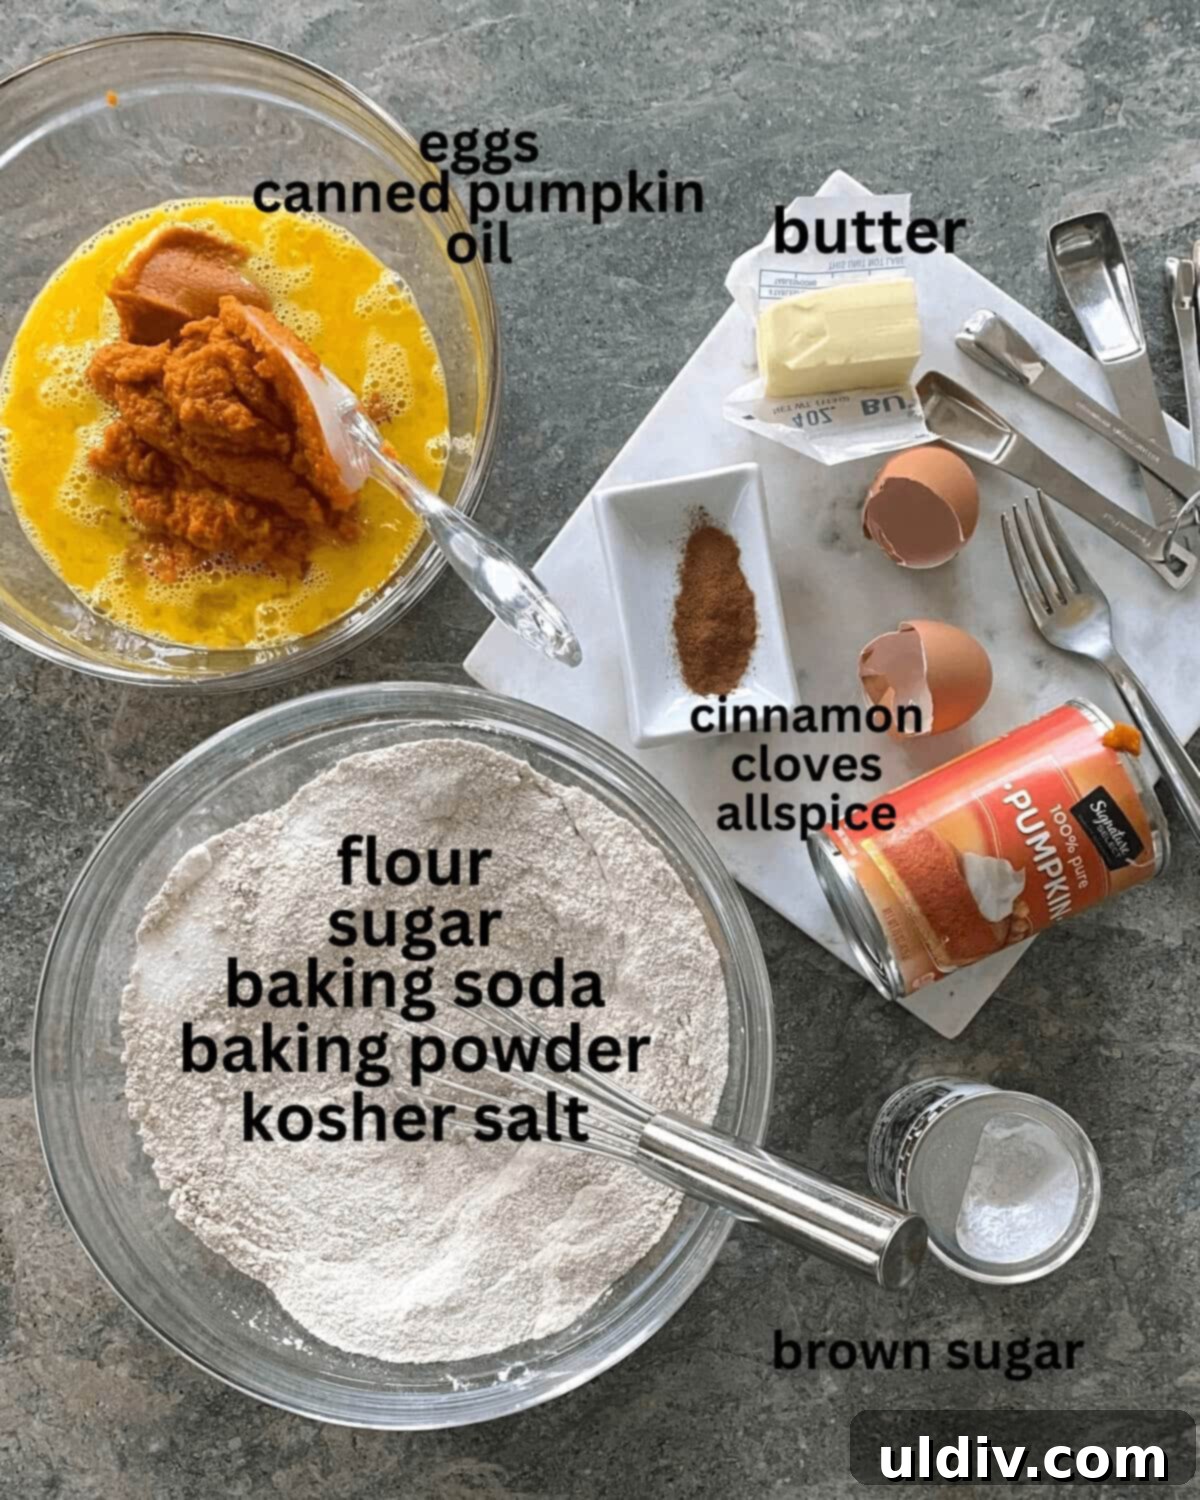
- All-Purpose Flour: This forms the essential structure of our quick bread. For a slightly healthier twist without significantly compromising texture, you can substitute up to half of the all-purpose flour with white whole wheat flour.
- Baking Soda & Baking Powder: These are your crucial leavening agents, responsible for the bread’s rise and tender crumb. Always ensure your baking soda and baking powder are fresh for optimal effectiveness.
- Kosher Salt: A small amount of salt is vital for enhancing all the other flavors in the bread and perfectly balancing the sweetness.
- Warm Spices (Cinnamon, Ground Cloves, Allspice, and Nutmeg): This quartet of classic autumn spices creates the quintessential fall flavor profile that defines pumpkin bread. While pre-ground varieties work perfectly, freshly ground spices will offer the most potent aroma and intense taste. Feel free to adjust the quantities to your personal preference; you might add a little extra cinnamon or a touch more allspice if you prefer a bolder spice blend.
- Granulated Sugar: Beyond providing sweetness, granulated sugar also plays a key role in helping the bread retain moisture, which contributes significantly to its soft and tender texture.
- Large Eggs: Eggs act as a binder, adding richness to the batter and helping with the bread’s overall structure. For better emulsification with the other wet ingredients and a more uniform batter, ensure your eggs are at room temperature.
- Pure Canned Pumpkin Puree: This is the undeniable star ingredient! It imparts incredible moisture, a beautiful orange hue, and that unmistakable, comforting pumpkin flavor. *Crucially, always make sure you’re using 100% pure pumpkin puree and NOT canned pumpkin pie filling or mix.* Pie filling already contains spices, sweeteners, and other additives, which will significantly alter the flavor and consistency of this specific recipe.
- Canola Oil: Oil contributes significantly to the bread’s moistness and wonderfully tender crumb. Other neutral-flavored oils like vegetable oil, grapeseed oil, or even melted coconut oil (if you don’t mind a very subtle hint of coconut flavor) can be used as suitable alternatives. For a slightly fruitier, more robust flavor, extra virgin olive oil can also be considered.
For the Cinnamon Streusel Topping:
- Salted Butter: Melted butter binds the streusel ingredients together, creating those irresistible, golden-brown, crumbly bits. If you only have unsalted butter, simply add an extra pinch of salt (about ¼ teaspoon) to the streusel mixture.
- Light Brown Sugar: This adds a deep, molasses-rich, caramel-like sweetness and moisture to the streusel. Dark brown sugar can be used for an even richer, more pronounced molasses flavor in your topping.
- All-Purpose Flour: Provides the necessary structure and bulk for the streusel crumbs.
- Ground Cinnamon: Further enhances the warm, spiced flavor of the topping, complementing the pumpkin bread below.
- Salt: A small amount of salt in the streusel helps to balance its sweetness and brings out the other flavors.
- Parchment Paper: Essential for lining the bottom of your mini loaf pans, ensuring an incredibly easy and clean release of the baked loaves.
Step-by-Step Guide: How to Bake Irresistible Mini Pumpkin Bread Loaves
Baking these delightful mini pumpkin bread loaves is a straightforward and immensely rewarding process. Follow these detailed steps to achieve perfectly moist, flavorful, and beautifully streusel-topped results every time. For the exact quantities of each ingredient and a convenient printable version of the recipe, please scroll down to the full recipe card located at the bottom of this page.
- Prepare Your Workspace and Pans: Begin by preheating your oven to 350°F (175°C). It is crucial to allow the oven to fully preheat for at least 15-20 minutes after it signals it’s ready, ensuring it’s at the correct temperature when your batter is ready to bake, which helps prevent a sunken middle. Next, generously grease five (5-inch by 3-inch) mini loaf pans. For an extra measure against sticking and incredibly easy removal, line the bottom of each pan with a strip of parchment paper. Set these meticulously prepared pans aside.
- Combine the Dry Ingredients: In a large mixing bowl, meticulously whisk together all the dry ingredients for the loaves. This includes the 3 ¼ cups all-purpose flour, 2 teaspoons baking soda, ½ teaspoon baking powder, 1 teaspoon kosher salt, 2 teaspoons ground cinnamon, ¼ teaspoon ground cloves, ¼ teaspoon allspice, and ¼ teaspoon ground nutmeg. Whisking ensures these ingredients are thoroughly combined and evenly distributed throughout the mixture, preventing any pockets of leavening agents or spices in the final bread.
- Mix the Wet Ingredients: In a separate, medium-sized bowl, combine the 2 ¾ cups granulated sugar, 4 large beaten eggs, 2 cups of pure canned pumpkin puree, and 1 cup of canola oil. Whisk these wet ingredients together until they are smooth, creamy, and thoroughly well-incorporated. This vibrant orange mixture will be the primary source of your bread’s rich flavor and remarkable moisture.
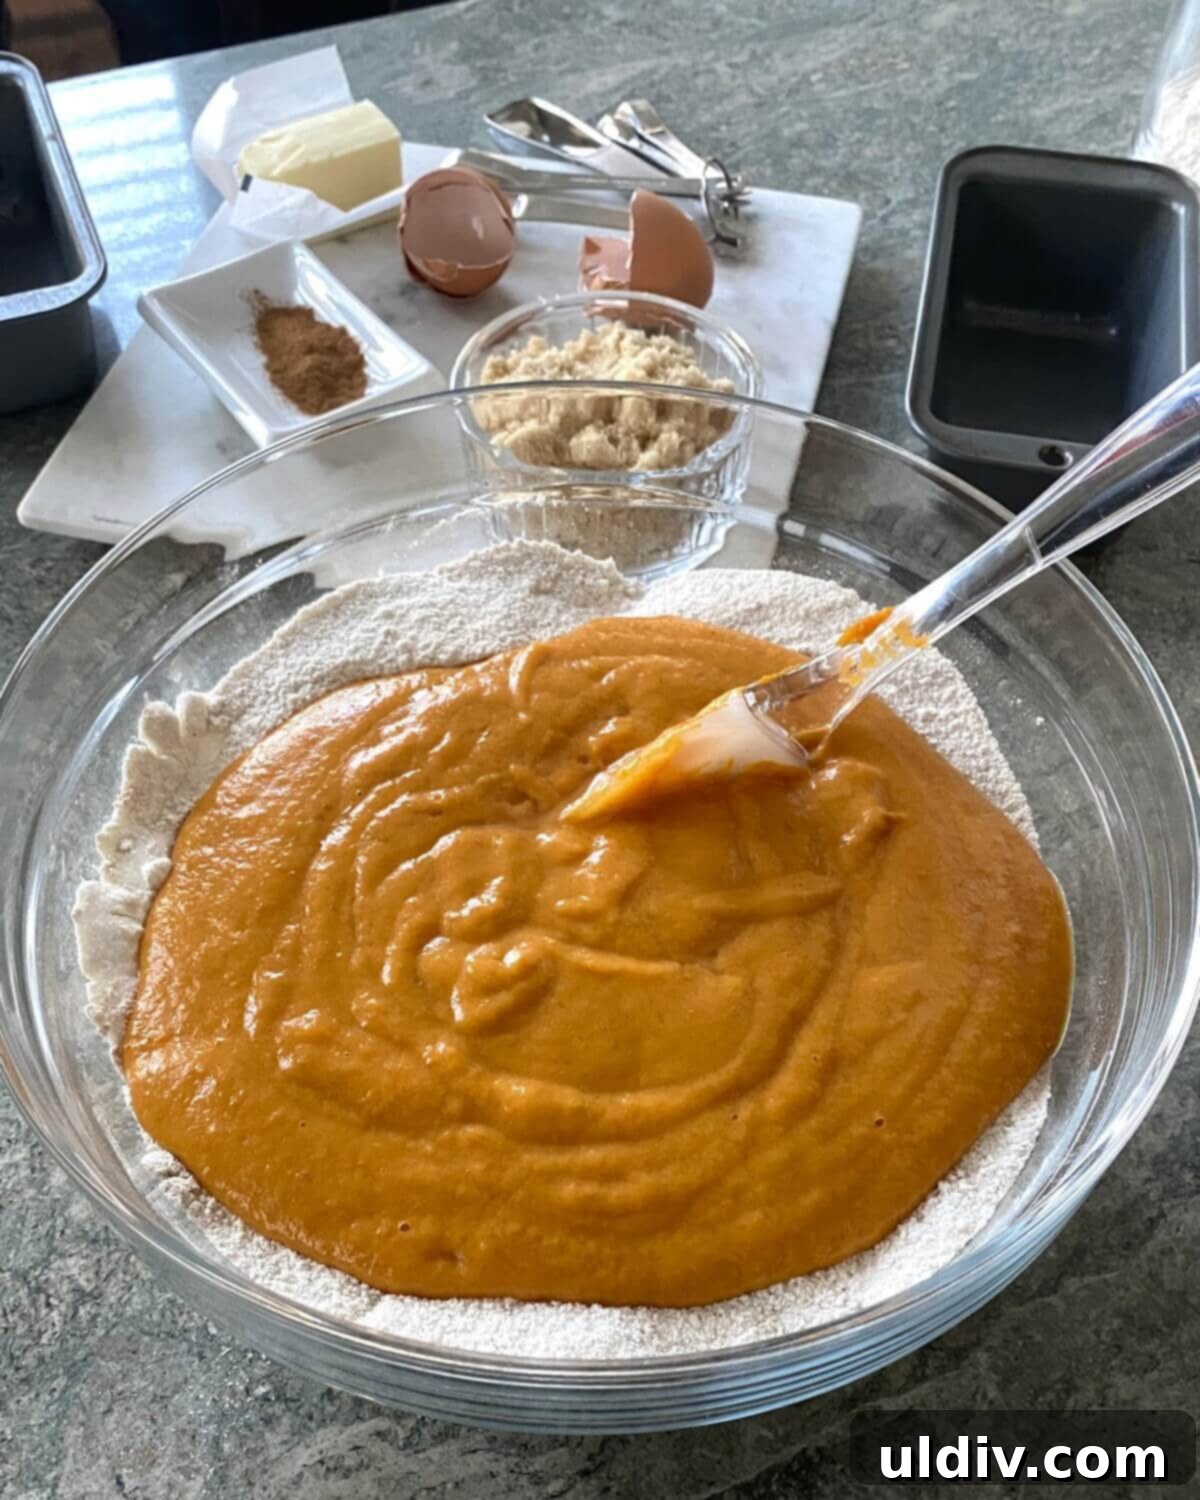
- Gently Combine Wet and Dry: Carefully pour the entire wet pumpkin mixture into the large bowl containing your whisked dry ingredients. Using a sturdy spatula or a wooden spoon, stir the ingredients together just until they are combined. It is absolutely essential to avoid overmixing the batter; overmixing can develop the gluten in the flour too much, leading to a tough, dense, and less tender bread. A few small streaks of flour remaining in the batter are perfectly fine and indicate you’ve mixed it just enough.
- Divide the Batter: Evenly divide the thick, aromatic pumpkin bread batter among your five meticulously prepared mini loaf pans. Ensure each pan is filled approximately two-thirds full; this allows ample space for proper rising during baking without overflowing.
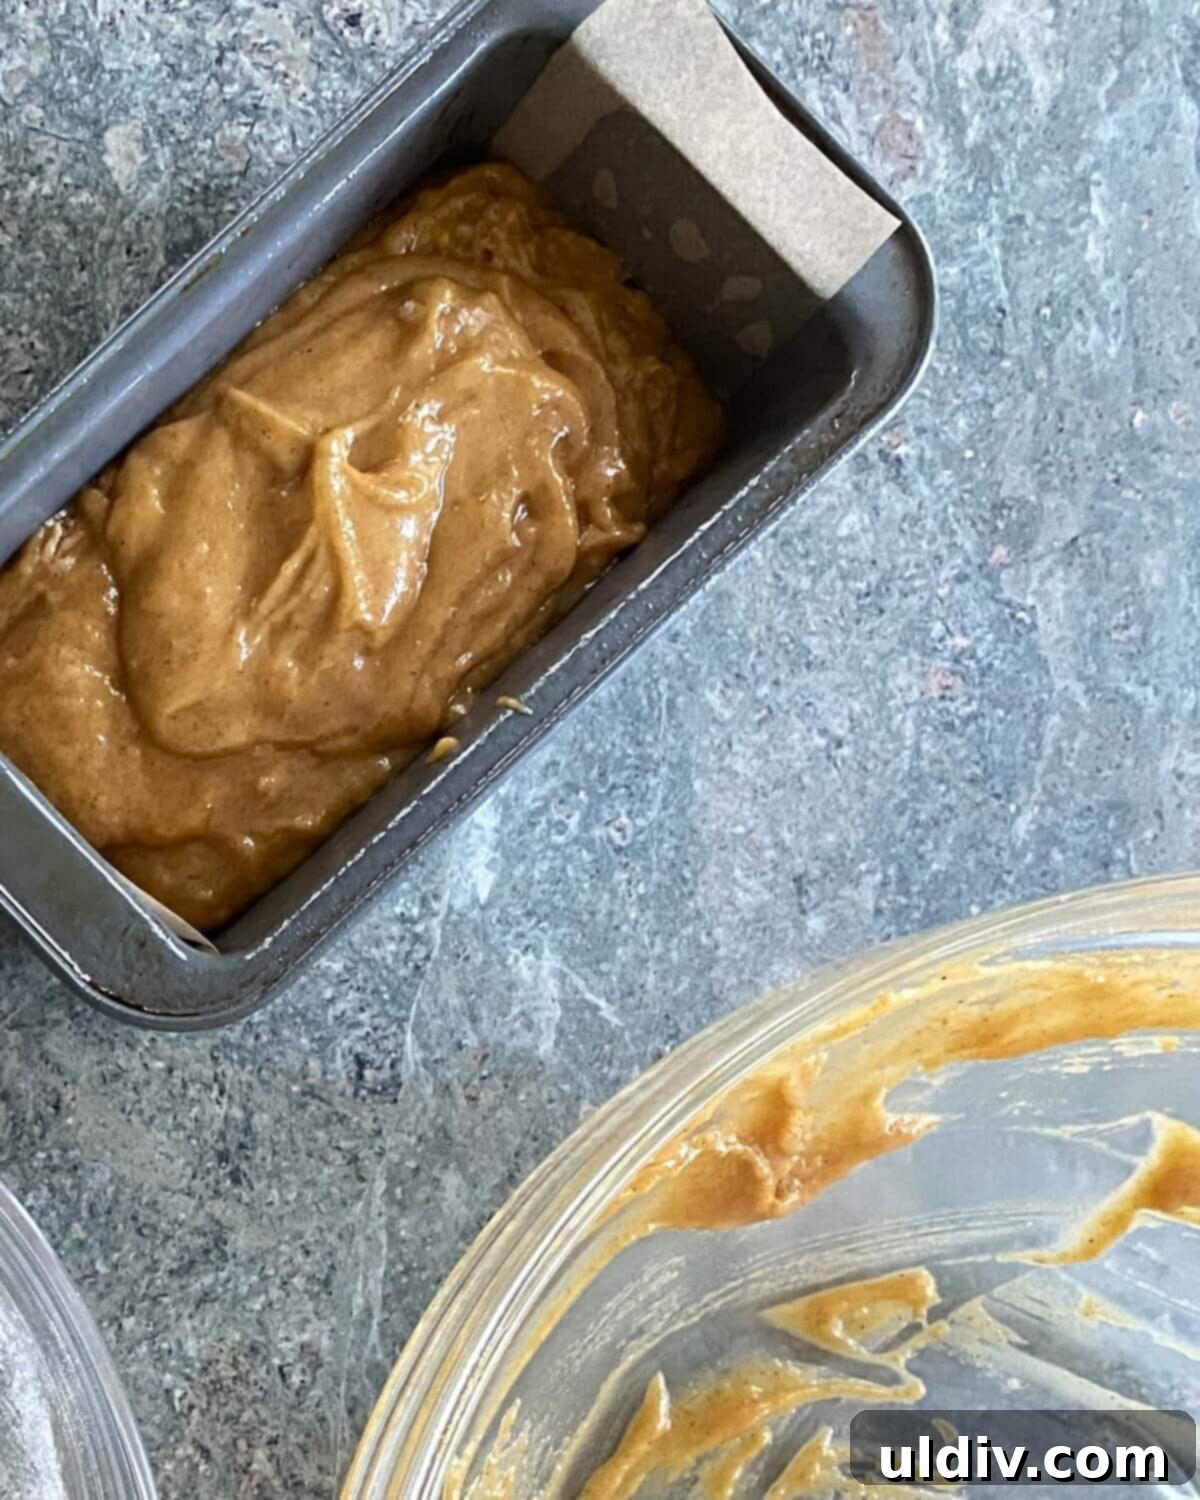
6. Prepare the Cinnamon Streusel Topping: In a separate small bowl, combine all the streusel ingredients: 4 tablespoons of melted butter, ¼ cup light brown sugar, ¾ cup all-purpose flour, ½ teaspoon ground cinnamon, and ¼ teaspoon of salt. Use a fork or your fingertips to mix these ingredients until they form coarse, crumbly bits. This delightful crumbly topping adds an irresistible textural contrast and an extra layer of spiced sweetness to your mini loaves, elevating their flavor profile.
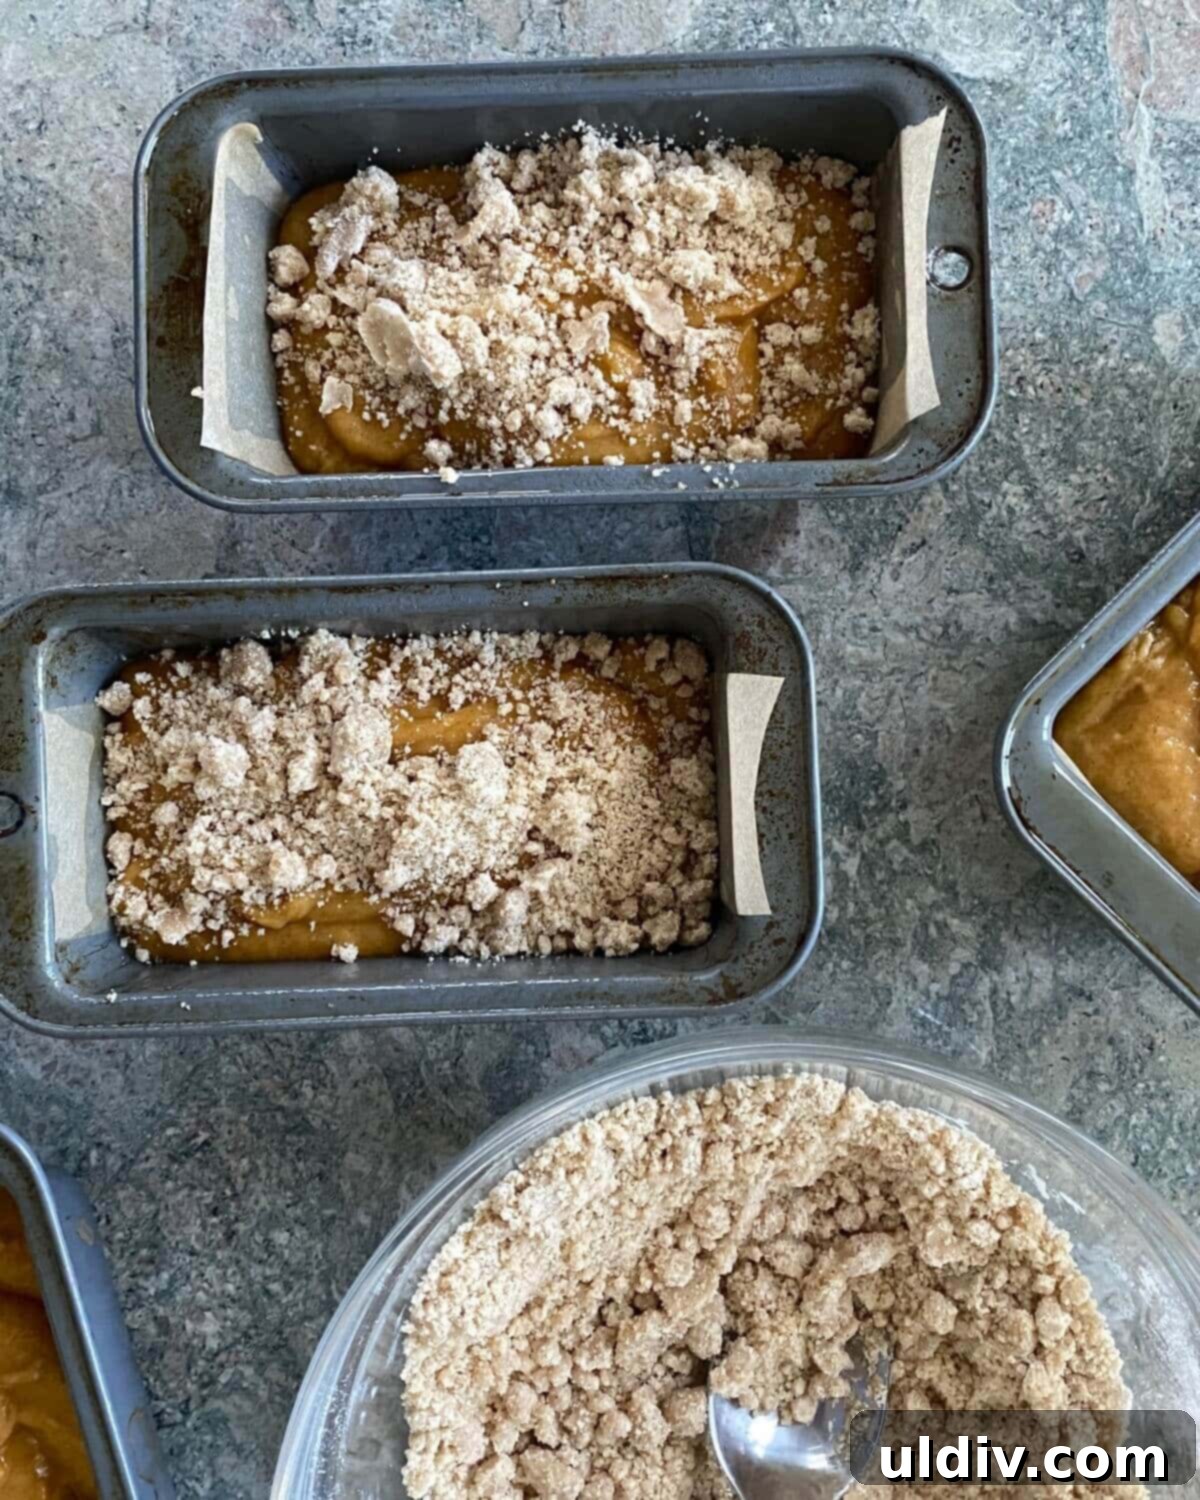
7. Apply the Streusel: Generously sprinkle the prepared streusel topping evenly over the batter in each of the mini loaf pans. Gently press down on the streusel with your fingertips; this small step helps it adhere better to the batter and prevents it from falling off during the baking process, ensuring it stays beautifully in place.
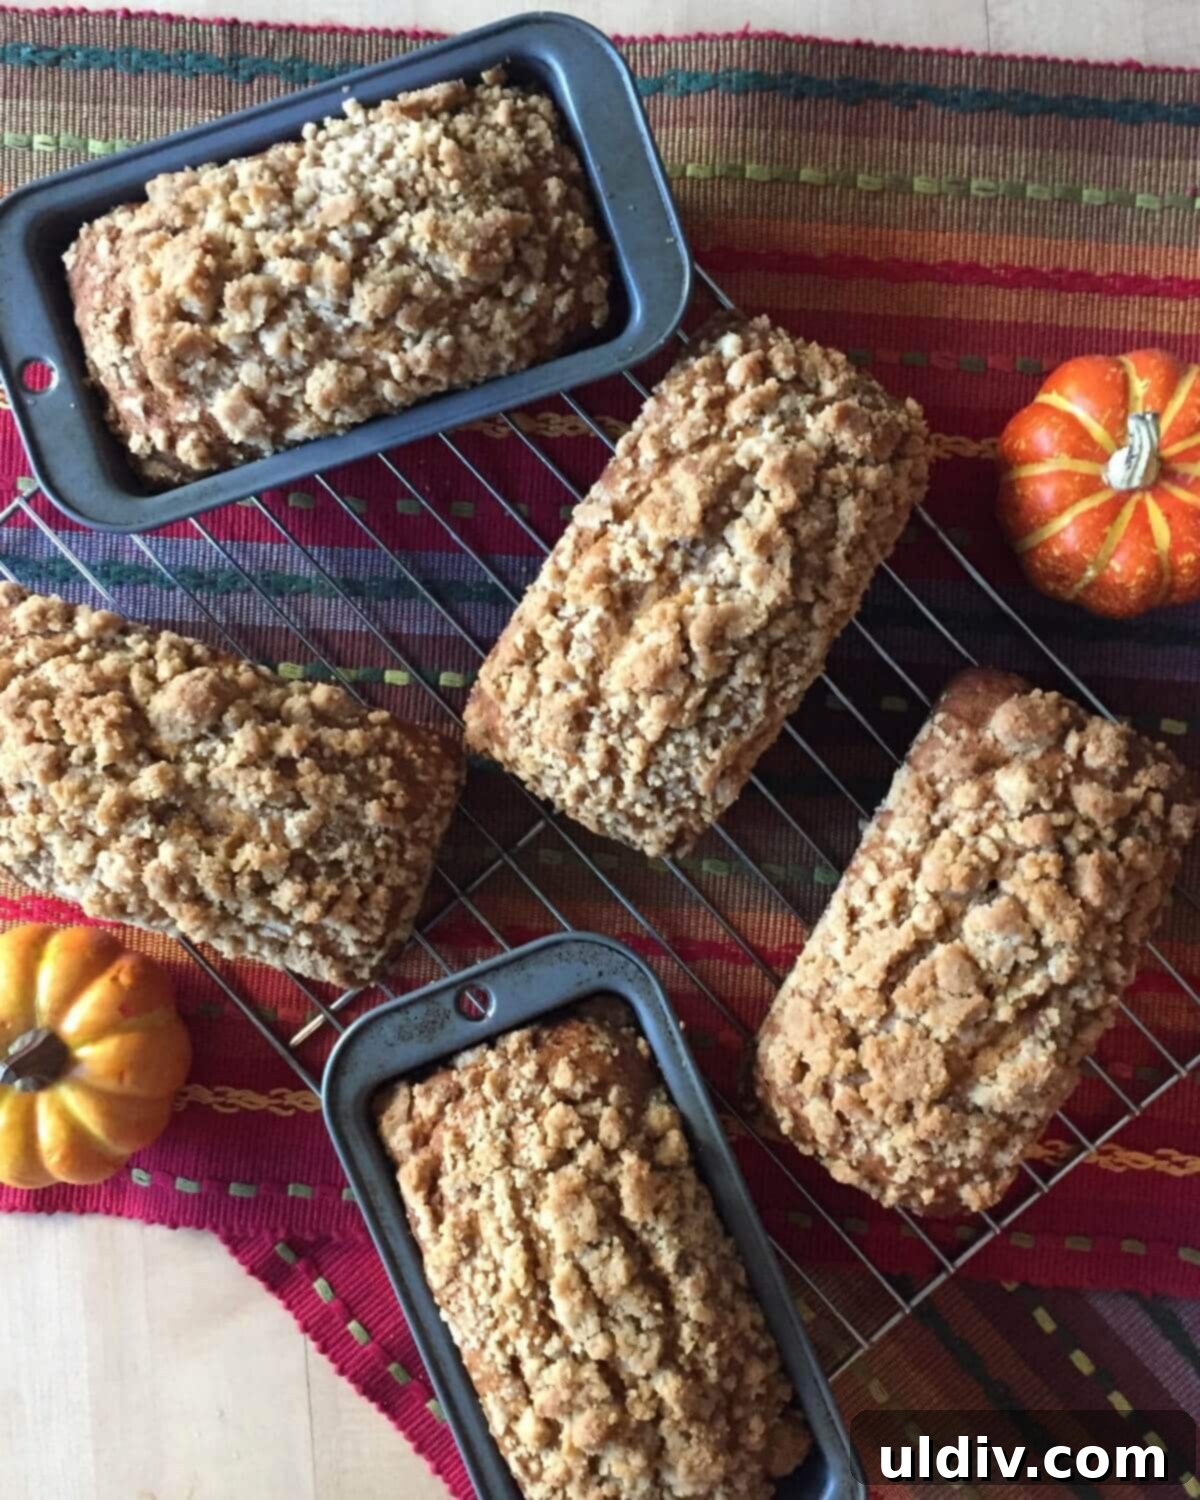
8. Bake to Golden Perfection: Carefully place the filled mini loaf pans into your preheated oven. Bake for approximately 45-50 minutes. The most reliable way to determine if your pumpkin bread is fully baked is to insert a wooden toothpick into the center of a loaf; it should come out clean, or with just a few moist crumbs attached. For ultimate precision and peace of mind, use an instant-read digital thermometer – the internal temperature of a perfectly baked loaf should register 200°F (93°C).
9. Initial Cooling Process: Once baked, carefully remove the pans from the oven. Allow the mini pumpkin bread loaves to cool undisturbed in their pans for about 15 minutes. This crucial resting period allows the loaves to set and firm up properly, making them significantly easier to handle and preventing them from breaking apart when removed from the molds.
10. Unmolding and Final Cooling: After the initial 15-minute cooling period, gently run a thin knife around the edges of each pan. The loaves should now easily pop out. Carefully transfer the warm mini breads onto a wire rack to cool completely. Cooling on a wire rack allows air to circulate freely around all sides of the loaves, which is essential for preventing the bottoms from becoming soggy and ensuring an even texture throughout.
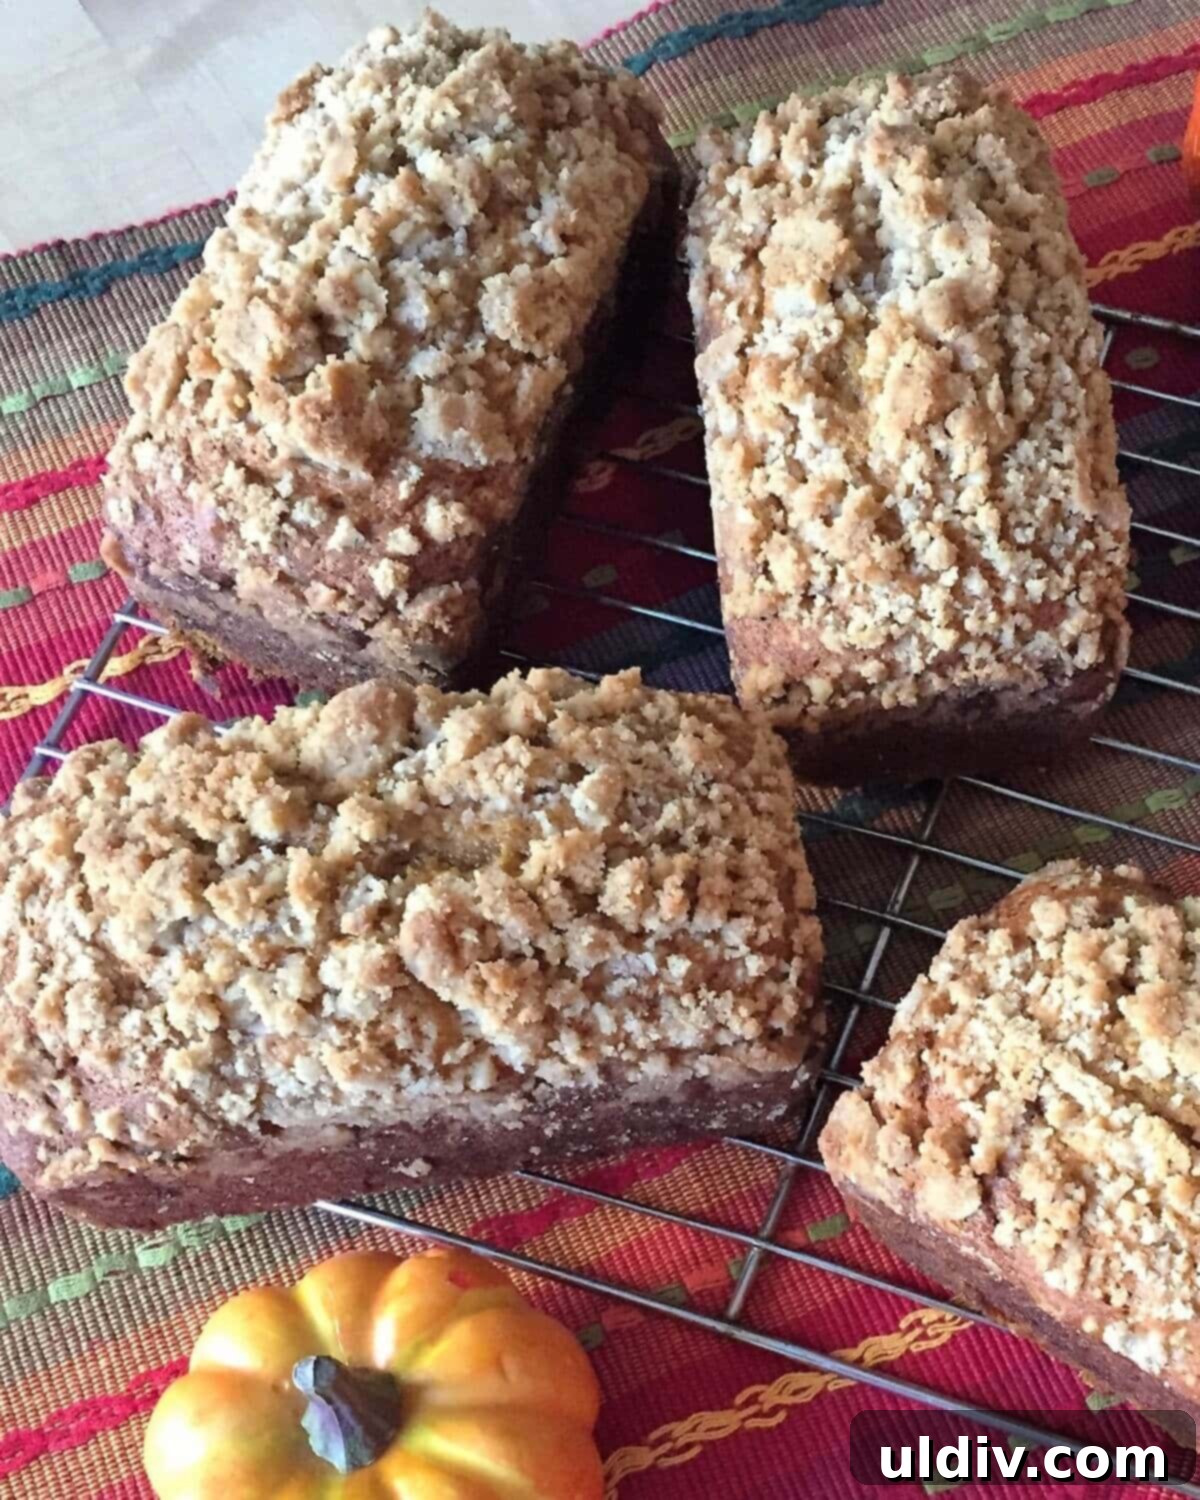
11. Store for Freshness: Once the mini loaves are completely cooled to room temperature, they are ready to be stored. Wrap each individual mini loaf tightly in plastic wrap. This barrier helps to prevent air exposure, which can quickly dry out the bread. Once wrapped, place them in large resealable bags or an airtight container. Your mini pumpkin bread will remain wonderfully moist and fresh at room temperature for 3-4 days, or you can freeze them for up to 3 months for longer enjoyment.
Expert Baking Tips for Your Mini Pumpkin Bread
Achieving bakery-quality mini pumpkin bread at home is easier than you think with these expert tips, ensuring every loaf is perfectly moist, flavorful, and beautiful:
- Precision in Pan Size Matters: The success and consistency of this recipe hinges on using the correct pan size. This particular recipe is specifically developed for a set of mini loaf pans that measure 5 inches by 3 inches, yielding 5 perfectly sized loaves. While many different sizes of mini loaf tins exist, results cannot be guaranteed if different dimensions are used, as baking times, rise, and overall texture may vary significantly. Consistency in pan size is key for uniform baking and achieving the intended outcome.
- Thoroughly Grease and Line Your Pans: To ensure your beautiful mini bread loaves release effortlessly and cleanly from their pans, take the time to grease them thoroughly. A generous coating of non-stick cooking spray or softened butter, followed by a light dusting of flour, works wonders. For an extra layer of assurance, especially important for moist quick breads like this, lining the bottom of each pan with a strip of parchment paper is highly recommended. This prevents any sticking and makes unmolding an absolute breeze.
- Patience During Cooling is a Virtue: Resist the temptation to unmold your mini loaves immediately after taking them out of the oven. Allowing them to cool in their pans for at least 15 minutes is a crucial step. This resting period allows the bread to set, firm up, and redistribute its moisture, preventing it from crumbling or breaking when you transfer it. After 15 minutes, a gentle run of a thin knife around the edges will help them pop right out onto a wire rack to finish cooling completely.
- Do Not Overmix the Batter: This is a golden rule for quick breads! Overmixing develops the gluten in the flour excessively, which can lead to a tough, dry, and chewy pumpkin bread instead of the desired moist and tender one. Mix the wet and dry ingredients just until they are combined, with a few streaks of flour still visible. The final texture of your bread will be significantly better for your restraint.
- Utilize Room Temperature Ingredients: For most baking recipes, and especially for quick breads, using room temperature ingredients (such as eggs and pumpkin puree) allows them to combine more smoothly and evenly. This creates a more uniform batter and ultimately contributes to a better, more consistent final texture in your baked goods.
- The Thermometer Test for Perfect Doneness: While a toothpick test is helpful, the most reliable and precise way to check if your mini pumpkin bread is fully baked through is with an instant-read digital thermometer. Insert it into the very center of a loaf; a perfectly baked pumpkin bread will register an internal temperature of 200°F (93°C). This method eliminates all guesswork and ensures a perfectly cooked interior without any risk of overbaking.
Creative Variations to Customize Your Mini Pumpkin Bread
While this classic mini pumpkin bread recipe is absolutely delicious as is, it also serves as a fantastic base for customization. Feel free to experiment with these wonderful additions to make the recipe truly your own and cater to different tastes. As a general guideline, aim for a total of up to 1 cup of extra ingredients to maintain the batter’s ideal consistency and baking performance.
- Sweet & Decadent Chip Additions: For an extra layer of sweetness, delightful texture, and indulgent flavor, stir in your favorite chips along with the dry ingredients before combining with the wet.
- Chocolate Chips: Classic milk, rich semi-sweet, or intense dark chocolate chips are always a universal hit and pair wonderfully with pumpkin.
- Butterscotch Chips: Offer a distinctive caramel-like flavor that complements pumpkin beautifully, adding a lovely warmth.
- Cinnamon Chips: These are perfect for amplifying the warm spice profile of the bread, infusing more autumnal notes into every bite.
- Toffee Bits: Introduce a sweet, buttery crunch that is simply irresistible and adds a gourmet touch.
- Fruity Accents with Dried Fruit: Introduce a chewy, sweet-tart element by adding dried fruits to your batter. For best results, you might want to toss them with a tablespoon of flour before adding to the batter to prevent them from sinking to the bottom of the loaves.
- Dried Cranberries: Their vibrant tartness provides a lovely contrast to the sweet pumpkin and warm spices.
- Golden Raisins: Offer a classic, subtle sweetness and a pleasant chewiness that is comforting and familiar.
- Chopped Dates: Bring a rich, caramel-like sweetness and a wonderfully soft texture that enhances the bread’s moistness.
- Nutty Crunch for Texture and Flavor: Incorporate chopped nuts for an added layer of flavor, satisfying crunch, and a heartier texture.
- Walnuts or Pecans: Stir ⅓ to ½ cup of finely chopped walnuts or pecans directly into the batter for a robust and flavorful addition.
- Pecan Streusel Topping: For an elevated and extra nutty streusel, add ⅓ cup of finely chopped pecans to your crumb topping mixture. This adds an extra dimension of nutty flavor and crunch right on top of each loaf.
- Toasted Nuts: For even more intensified flavor, lightly toast your nuts in a dry pan over medium heat for a few minutes until fragrant, or in the oven, before adding them to the batter or streusel.
- Zesty Orange or Lemon Glaze: Once the loaves are completely cooled, a simple citrus glaze can add a bright, fresh, and elegant finish. Whisk together powdered sugar with a small amount of fresh orange or lemon juice until you reach a smooth, pourable consistency, then drizzle artfully over the cooled mini breads.
- Cream Cheese Swirl: For an incredibly decadent and rich treat, prepare a cream cheese swirl. Mix 4 ounces of softened cream cheese with ¼ cup powdered sugar and 1 teaspoon of vanilla extract until smooth. Dollop spoonfuls of this mixture into the pumpkin batter in the loaf pans and gently swirl it through with a knife before adding the streusel topping.
Proper Storage and Freezing for Your Pumpkin Bread Loaves
To keep your delicious mini pumpkin bread fresh, moist, and enjoyable for as long as possible, proper storage is absolutely essential. Whether you plan to savor them over a few days or save them for later indulgence, here’s how to store them effectively to maintain their quality:
- Storing at Room Temperature:
- Ensure the pumpkin bread loaves are *completely cooled* to room temperature before storing them. Storing warm bread will create condensation inside the wrapping, leading to sogginess and potentially encouraging mold growth.
- Wrap each individual mini loaf tightly in plastic wrap. This tight barrier helps to prevent air exposure, which is the main culprit for drying out baked goods.
- Once wrapped in plastic, place the loaves in an airtight container or a large resealable plastic bag. This provides a second layer of protection against air.
- Store the container or bag at room temperature in a cool, dry place away from direct sunlight. Your mini pumpkin bread will remain wonderfully moist and fresh for 3-4 days.
- Freezing for Long-Term Enjoyment:
- As with room temperature storage, allow the bread to cool entirely to room temperature before preparing it for the freezer. This is a critical step for preventing ice crystals.
- For the best results and to prevent freezer burn, first wrap each individual loaf tightly in plastic wrap, ensuring it’s sealed completely with no air pockets.
- Then, wrap each plastic-wrapped loaf again in heavy-duty aluminum foil. This double layer of protection is crucial for maintaining the bread’s flavor, texture, and preventing any freezer odors from permeating.
- Place the foil-wrapped loaves into a large freezer-safe resealable bag or an airtight freezer container. Don’t forget to label it with the date of freezing for easy tracking.
- Your mini pumpkin bread can be frozen for up to 2-3 months without significant loss of quality.
- To thaw, simply remove the desired number of loaves from the freezer and let them come to room temperature on your kitchen counter. For a “freshly baked” experience, you can also gently warm them in a microwave for a few seconds or in a low oven (around 300°F / 150°C) for 10-15 minutes until heated through.
Frequently Asked Questions About Baking Mini Pumpkin Bread
Crumbly quick bread is often a tell-tale sign of overmixing the batter. When you overmix, you develop the gluten in the flour too much, leading to a tough and dry texture that falls apart easily. Another common culprit is adding too much flour, baking soda, or baking powder, which can throw off the delicate balance of ingredients and absorb too much moisture. Lastly, overbaking the pumpkin bread can also dry it out significantly, making it crumbly and brittle. Always follow the mixing instructions carefully, using a light hand, and use a timer, checking for doneness with a toothpick or an internal thermometer to avoid overbaking.
Several factors can cause quick bread, including pumpkin bread, to sink in the middle. One of the most common reasons is an oven that isn’t fully preheated to the correct temperature. If the oven is too cool, the bread won’t set properly, especially in the center. To prevent this, always allow your oven to fully preheat for at least 15-20 minutes *after* it indicates it’s reached the desired temperature. Opening the oven door too early during baking, before the bread’s structure is fully set, can also cause a sudden collapse. Additionally, too much liquid in the batter or an incorrect ratio of leavening agents can lead to a weak structure and subsequent sinking. Ensure you measure all ingredients accurately.
Absolutely! This versatile pumpkin bread batter is perfectly suited for making individual muffins. Simply portion the batter into lined muffin pans, filling each cup about two-thirds full. You’ll need to adjust the baking time significantly, as muffins typically bake much faster than loaves. Start checking them around 18-20 minutes, or until a wooden toothpick inserted into the center of a muffin comes out clean. The delicious streusel topping works wonderfully on muffins too, adding that extra special touch!
Yes, you can certainly use homemade fresh pumpkin puree! Just ensure it’s cooked until very tender and then thoroughly puréed until smooth. The most important step is to ensure it’s thick and has as little excess moisture as possible, as homemade puree can sometimes be more watery than canned. If your homemade puree seems watery, you might want to drain it in a fine-mesh sieve lined with cheesecloth for an hour or two to achieve a similar consistency to canned puree. This prevents the bread from becoming too wet or dense and affecting the overall texture.
While this recipe is specifically designed and tested for mini loaves to achieve its optimal texture and baking time, you can adapt it for a standard 9×5 inch loaf pan. However, you will need to significantly increase the baking time, likely to 60-75 minutes or even longer, depending on your oven. It’s a good idea to cover the loaf loosely with aluminum foil halfway through baking if you notice the top browning too quickly, to prevent over-browning while the center finishes cooking. Always check for doneness with a wooden skewer or an internal thermometer (200°F / 93°C). The streusel topping might also be too much for a single loaf, so you might consider reducing its quantity if adapting.
Explore More Delicious Bread & Muffin Recipes
If you loved baking these mini pumpkin loaves, you’re in for a treat! Discover more comforting and easy-to-make bread and muffin recipes from our collection:
- Chocolate Chip Peanut Butter Bread Recipe with Peanuts
- Olive Oil Banana Bread with Blueberries
- Vegan and Dairy Free Banana Muffins
- Rustic Irish Soda Bread with Cranberries and Currants
Discover all our delightful quick bread and muffin recipes here for more baking inspiration!
Your Feedback Matters!

Did you bake this delightful recipe?
We’d absolutely love to hear about your experience! Please consider leaving a comment and a star rating below to share your thoughts and successes. Your feedback helps other home bakers in our community. Don’t forget to share your delicious creations on social media by tagging us on Pinterest, Instagram, and Facebook! We can’t wait to see your mini pumpkin bread loaves.
Happy Baking! ~ Amy
Mini Pumpkin Bread with Streusel Topping Recipe Card
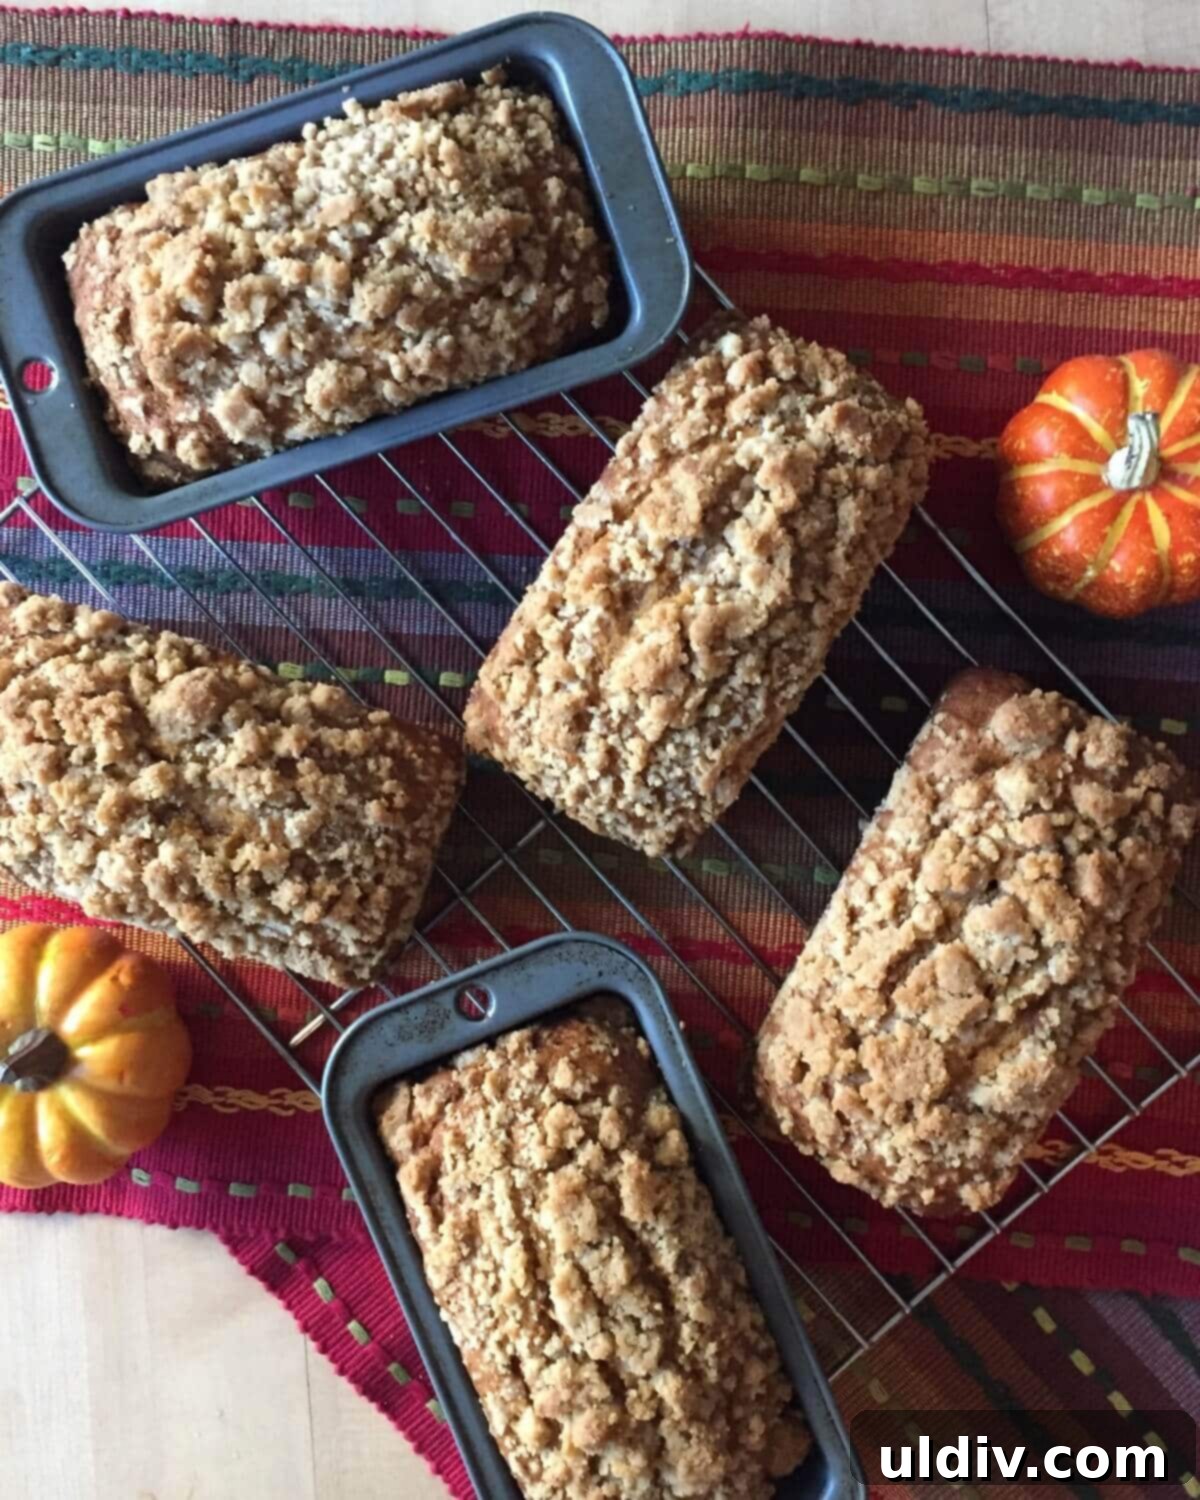
Mini Pumpkin Bread with Streusel Topping
These moist and flavorful mini pumpkin bread loaves, crowned with an irresistible brown sugar streusel, are the quintessential autumn treat perfect for coffee, snacks, or sharing with friends and family.
Prep Time: 15 minutes
Cook Time: 50 minutes
Total Time: 1 hour 5 minutes
Servings: 5 mini loaves
Calories: 360 kcal per serving
Author: Amy Casey
Pin Recipe
Equipment
- Mini Loaf Pans (5 inches by 3 inches)
Ingredients
For the Mini Loaves:
- 3 ¼ cups all-purpose flour
- 2 teaspoons baking soda
- ½ teaspoon baking powder
- 1 teaspoon kosher salt
- 2 teaspoons ground cinnamon
- ¼ teaspoon ground cloves
- ¼ teaspoon allspice
- ¼ teaspoon ground nutmeg
- 2 ¾ cups granulated sugar
- 4 large eggs, beaten
- 2 cups canned pure pumpkin puree (ensure it’s not pie filling)
- 1 cup canola oil (or other neutral-flavored oil like vegetable or grapeseed)
For the Cinnamon Streusel Topping:
- 4 tablespoons butter, melted
- ¼ cup light brown sugar
- ¾ cup all-purpose flour
- ½ teaspoon ground cinnamon
- ¼ teaspoon salt
- Parchment paper (for lining pans)
Instructions
- Prepare Oven and Pans: Preheat your oven to 350°F (175°C). Generously grease 5 (5-inch by 3-inch) mini loaf pans and line the bottom of each with a strip of parchment paper for easy release. Set aside.
- Combine Dry Ingredients: In a large mixing bowl, whisk together the 3 ¼ cups all-purpose flour, baking soda, baking powder, kosher salt, 2 teaspoons ground cinnamon, ground cloves, allspice, and ground nutmeg until well combined.
- Mix Wet Ingredients: In a separate medium-sized bowl, combine the granulated sugar, beaten large eggs, pure canned pumpkin puree, and canola oil. Whisk until smooth and thoroughly incorporated.
- Combine Wet and Dry: Pour the pumpkin mixture into the flour mixture. Stir gently with a spatula or wooden spoon until just combined. Be careful not to overmix; a few streaks of flour are acceptable.
- Fill Loaf Pans: Evenly divide the batter among the 5 prepared mini loaf pans, filling each approximately two-thirds full.
- Prepare Streusel: In a small bowl, combine the melted butter, light brown sugar, ¾ cup all-purpose flour, ½ teaspoon ground cinnamon, and ¼ teaspoon salt. Mix with a fork or your fingertips until coarse crumbs form.
- Add Topping: Generously sprinkle the streusel topping evenly over the batter in each loaf pan. Gently press down on the streusel to help it adhere.
- Bake: Bake in the preheated oven for 45-50 minutes, or until a wooden toothpick inserted into the center of a loaf comes out clean. For a precise check, the internal temperature should be 200°F (93°C).
- Initial Cooling: Remove the pans from the oven and let the mini pumpkin bread loaves cool in their pans for 15 minutes on a wire rack. This allows them to firm up.
- Unmold and Cool Completely: After 15 minutes, gently run a thin knife around the edges of each pan, then invert the loaves onto a wire rack to cool completely.
- Store: Once completely cool, wrap each mini loaf tightly in plastic wrap, then place in a large resealable bag or airtight container. Store at room temperature for up to 3-4 days, or freeze for up to 3 months.
Notes
- For easy removal, always thoroughly grease your mini loaf pans and line the bottom with parchment paper.
- This batter can also be used to make pumpkin muffins. Portion into lined muffin pans and bake for 18-20 minutes, or until a toothpick comes out clean.
- Use an instant-read digital thermometer to check for doneness. An internal temperature of 200°F (93°C) ensures perfectly baked bread.
- Allow the loaves to cool in their pans for 15 minutes before unmolding to prevent breakage and ensure structural integrity.
- Pumpkin streusel bread freezes beautifully. Wrap completely cooled loaves tightly in plastic wrap and then foil, then store in a freezer-safe bag for up to 3 months. Thaw at room temperature before enjoying.
Nutrition Information
Serving: 1/3 of loaf | Calories: 360kcal | Carbohydrates: 46g | Protein: 6g | Fat: 19g | Saturated Fat: 4g | Cholesterol: 58mg | Sodium: 419mg | Fiber: 1g | Sugar: 14g
Did you make this recipe? Tag @amycaseycooks on Instagram so we can all admire your delicious work!