
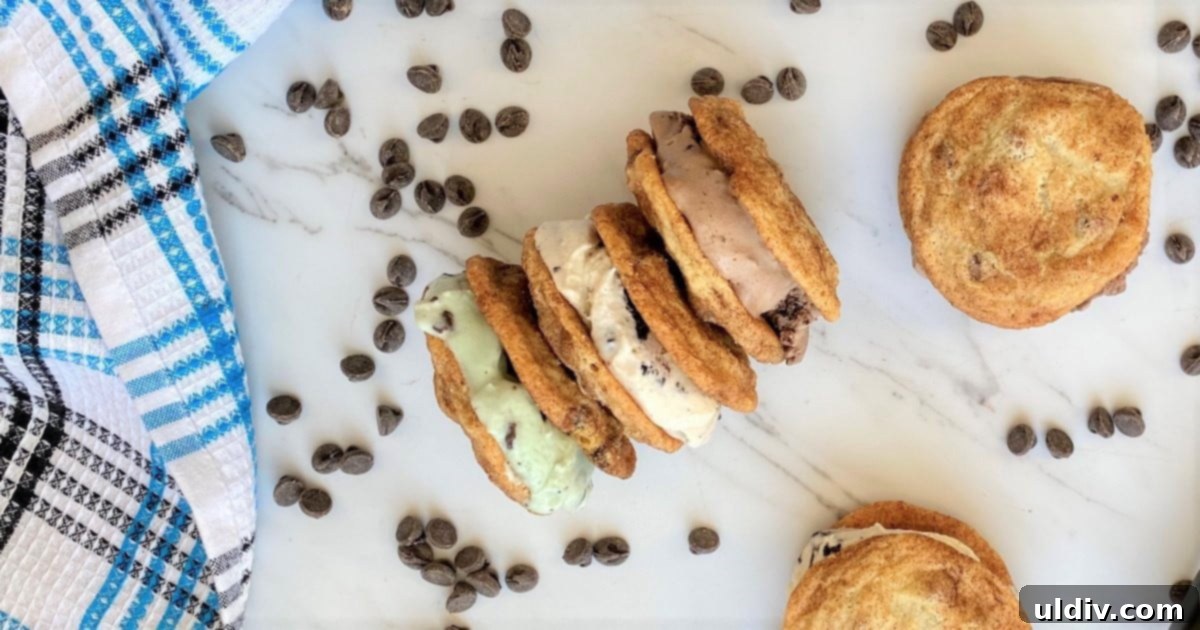
If you’re seeking an extraordinary frozen dessert that combines two beloved treats, this Snickerdoodle Cookie Ice Cream Sandwich recipe is your ultimate indulgence. Imagine two perfectly baked chocolate chip snickerdoodle cookies—each boasting a delightfully chewy center and crispy, cinnamon-sugar-dusted edges—generously filled with a scoop of cool, rich, and creamy ice cream. This isn’t just a dessert; it’s an experience, transforming a simple snack into an out-of-this-world ice cream sandwich that promises pure bliss with every bite.
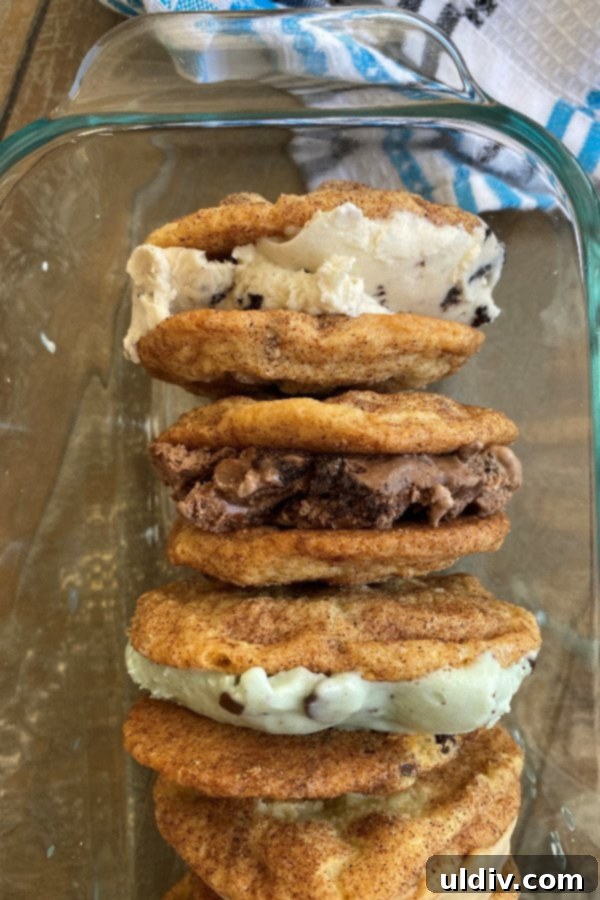
For many home bakers, the aroma of freshly baked cookies is the essence of comfort. In my kitchen, homemade cookies are a constant fixture. If my cookie jar even hints at being low, I can effortlessly whip up a batch of almond butter chocolate chip cookies or charming sprinkley sugar cookies in under an hour. There’s something inherently satisfying about crafting treats from scratch, and these snickerdoodles truly embody that sentiment.
My ideal cookie strikes a delicate balance: slightly soft and wonderfully chewy, with just enough crispy crunch around the edges to provide textural contrast. These snickerdoodle cookies hit every mark, exceeding all expectations. And when transformed into a homemade ice cream sandwich, this frozen delight elevates the entire dessert experience to a whole new level, making it far superior to any store-bought alternative.
Creating these delightful ice cream sandwiches offers a simple yet profound joy, especially when you have a batch of these perfectly spiced snickerdoodles ready. The contrast between the warm, inviting spices of the cookie and the cold, smooth ice cream is simply irresistible. This recipe is designed to bring that gourmet dessert experience right into your home, perfect for special occasions or simply a luxurious treat on any given day.
Why You’ll Adore This Snickerdoodle Ice Cream Sandwich Recipe
This recipe isn’t just about making a dessert; it’s about crafting a memorable experience. Here’s why these snickerdoodle cookie ice cream sandwiches will become your new favorite:
- Truly Decadent Frozen Treat: When a craving for something truly special strikes, nothing satisfies quite like this. Imagine sinking your teeth into two exquisitely baked, cinnamon-sugar-dusted snickerdoodle cookies, generously flecked with chocolate chips—a new obsession in my household. These cookies, already a masterpiece, are then lovingly filled with your favorite creamy ice cream, creating a frozen dessert that feels incredibly luxurious and utterly indulgent. It’s the perfect antidote to a long day or the highlight of any celebration.
- Endless Versatility and Customization: One of the most exciting aspects of these homemade ice cream sandwiches is the endless array of possibilities for customization. The base snickerdoodle cookie is incredibly versatile, pairing beautifully with almost any ice cream flavor. Whether you prefer classic vanilla, rich chocolate, refreshing mint chip, or something more adventurous like salted caramel or coffee, the combinations are limitless. You can even experiment with different types of chocolate chips in the cookies or add various mix-ins to your ice cream. This adaptability makes them incredibly fun to create and perfect for satisfying diverse tastes.
- Superior Homemade Quality: Forget the often-stale, freezer-burned ice cream sandwiches found in stores. Crafting these at home ensures you get the freshest, most flavorful cookies and the creamiest ice cream. You control the quality of every ingredient, leading to a taste and texture that simply cannot be replicated by mass-produced alternatives. The pride of serving a dessert you’ve made yourself, knowing every component is perfect, adds an extra layer of enjoyment.
- Perfect for Any Occasion: From casual summer barbecues to elegant dinner parties, or simply as a comforting treat for yourself, these ice cream sandwiches fit every scenario. They are impressive enough to wow guests yet simple enough for a relaxing baking project. Their individual portion size makes them easy to serve and enjoy, no matter the event.

Essential Ingredients for Your Snickerdoodle Cookie Ice Cream Sandwiches
To embark on this delightful baking journey, you’ll need a selection of pantry staples and a few special additions:
- Salted Butter: Provides rich flavor and helps with the cookie’s texture. Ensure it’s at room temperature for optimal creaming.
- Vegetable Shortening: Crucial for achieving that classic soft, chewy texture in snickerdoodles, preventing them from spreading too thin. Brands like Crisco work well.
- Granulated Sugar: Sweetens the cookies and creates the iconic crunchy cinnamon-sugar coating.
- Large Eggs: Act as a binder, adding moisture and structure to the cookies.
- All-Purpose Flour: The primary dry ingredient, giving the cookies their body.
- Baking Soda: A leavening agent that helps the cookies rise and achieve a soft crumb.
- Kosher Salt: Balances the sweetness and enhances all the flavors.
- Cream of Tartar: The secret ingredient for classic snickerdoodles, providing their signature tangy flavor and contributing to their soft texture.
- Cinnamon: Essential for the iconic snickerdoodle flavor, both in the dough and the outer coating.
- Chocolate Chips: Adds a delightful twist to the traditional snickerdoodle, bringing extra indulgence. Semi-sweet are recommended, but milk or dark chocolate chips also work.
- Your Favorite Ice Cream: Whether you opt for a high-quality store-bought brand or prepare your own homemade no-churn ice cream, the flavor choice is entirely yours!
The Science Behind the Snickerdoodle: Why Cream of Tartar is Key
When reviewing the ingredient list for snickerdoodle cookies, most items will likely be familiar inhabitants of a well-stocked baking pantry. However, one ingredient often raises an eyebrow: cream of tartar. What exactly is this mysterious component, and why is it so vital for a snickerdoodle?
First, let’s clarify what cream of tartar is not. Despite its name, it’s neither a cream nor a liquid. Chemically, it’s potassium bitartrate, a white powdery substance that is a natural byproduct of fermenting grapes into wine. This acidic compound is isolated during the winemaking process and then purified for culinary use.
In the broader world of baking, cream of tartar is renowned for its stabilizing properties. It’s often used to help stabilize beaten egg whites, creating loftier, more resilient meringues and angel food cakes. But its role in snickerdoodles is unique and crucial for achieving their signature characteristics.
Specifically in snickerdoodles, cream of tartar serves two primary functions:
- Prevents Sugar Crystallization: The acidity of cream of tartar interferes with the crystallization of sugar during baking. This is key to maintaining the cookies’ wonderfully soft and chewy texture over time, preventing them from becoming hard or brittle.
- Contributes to Signature Tangy Flavor: Cream of tartar imparts a subtle, slightly tangy flavor that is characteristic of traditional snickerdoodles. This unique tang, combined with the warm notes of cinnamon, creates a flavor profile that sets snickerdoodles apart from other sugar cookies. It adds a depth that makes the cookies more complex and utterly addictive.
So, while it might seem like an unusual addition, cream of tartar is truly the secret ingredient that gives snickerdoodles their beloved texture and distinctive taste. It’s a small but mighty component that elevates these cookies from good to truly exceptional. Enough with the science lesson for now. Let’s get baking and create some magic!
Crafting the Perfect Frozen Treat: How to Assemble Your Cookie Ice Cream Sandwiches
Once your irresistible snickerdoodle cookies are baked and cooled, the real fun begins: assembling these magnificent ice cream sandwiches! The beauty of this recipe lies in its flexibility, allowing you to pair your perfect cookies with any ice cream flavor your heart desires. Some of my personal favorites include classic mint chip, rich coffee mocha, decadent brownie chocolate chip, and the ever-popular cookies and cream. Don’t be afraid to get creative!
- Soften the Ice Cream (Slightly): For effortless assembly, remove your chosen ice cream from the freezer about 5 to 10 minutes before you plan to start making the sandwiches. This brief softening period will make the ice cream easier to scoop and spread, allowing it to reach the edges of the cookies without becoming a soupy mess. You want it soft enough to work with, but still firm enough to hold its shape.
- Scoop and Sandwich: Select two cookies of similar size. Scoop approximately ¼ to ½ cup of ice cream onto the flat bottom side of one cookie. The amount can be adjusted based on the size of your cookies and how generously you like your sandwiches filled. Gently place the flat bottom side of the second cookie on top of the ice cream.
- Press and Even Out: Carefully press the two cookies together, allowing the ice cream to spread evenly to the edges. Be gentle but firm enough to ensure the ice cream fills the cookie cavity. If desired, you can use a butter knife or a small offset spatula to smooth any overflowing ice cream around the edges for a neat finish.
- Wrap and Freeze for Best Results: For optimal texture and to prevent freezer burn, immediately wrap each assembled ice cream sandwich tightly in plastic wrap. This helps them maintain their shape and prevents ice crystals from forming. Store the wrapped sandwiches in an airtight container in the freezer for at least 30 minutes to firm up completely before serving. They can be stored for up to 1 week—if they manage to last that long!

Expert Tips for Baking Your Best Snickerdoodle Cookies
Achieving the perfect snickerdoodle cookie is key to an incredible ice cream sandwich. Here are some essential baking tips to ensure your cookies turn out beautifully every time:
- Room Temperature Ingredients are Non-Negotiable: Always ensure your butter and eggs are at room temperature before you begin. This allows them to cream together more easily and uniformly, creating a smooth batter that results in a more consistent and tender cookie texture. Cold ingredients resist mixing, leading to a lumpy batter and potentially dense cookies.
- Preheat Your Oven Thoroughly: Don’t just turn on the oven and immediately put your cookies in. Allow your oven to preheat for at least 15-20 minutes after it signals it’s reached the desired temperature. This ensures the oven cavity and baking sheets are uniformly heated, leading to even baking and preventing undercooked centers or burnt edges.
- Scrape Down the Bowl Religiously: As you beat your wet ingredients and then incorporate the dry ones, frequently stop the mixer to scrape down the sides and bottom of the bowl with a spatula. This guarantees all ingredients are fully incorporated, preventing pockets of unmixed flour or sugar and ensuring a uniform cookie dough.
- Parchment Paper is Your Best Friend: Always line your baking sheets with parchment paper or silicone baking mats. This prevents the cookies from sticking to the pan, promotes even baking, and makes for incredibly easy cleanup. Your cookies will slide right off!
- Consistency is Key with a Cookie Scoop: For uniformly sized cookies that bake evenly, invest in a large cookie scoop (approximately 2 tablespoons). Scooping consistent portions means all your cookies will finish baking at roughly the same time, giving you a batch of perfectly matched snickerdoodles for your sandwiches.
- Rotate Your Baking Sheets: Ovens often have hot spots. If baking one pan at a time, rotate the pan 180 degrees halfway through the baking time (e.g., after 5-6 minutes). If baking two sheets simultaneously, not only rotate them front to back but also switch their positions from the top rack to the lower rack and vice-versa. This ensures every cookie receives consistent heat for even browning.
- Master the Baking Time Range: Baking times are always a range, as oven temperatures can vary slightly. For a softer, chewier center—which I find ideal for an ice cream sandwich—take the cookies out of the oven when their edges are set and lightly golden, but the centers still look slightly soft or even a little under-baked. They will continue to cook slightly from residual heat on the pan as they cool.
- Cooling Methods for Desired Texture: The way you cool your cookies affects their final texture. For a softer, chewier cookie (ideal for ice cream sandwiches as they won’t shatter when bitten), let them cool completely on the parchment paper on the baking sheet for a few minutes before transferring them to a wire rack. For a crisper cookie (if that’s your preference), transfer them directly to a cooling rack immediately after removing them from the oven.

One More Sweet Thought

Did you try this recipe?
Your feedback is invaluable! Let me know how your Snickerdoodle Cookie Ice Cream Sandwiches turned out by leaving a comment and a star rating below. Your creations inspire us all! Share your delicious results on Pinterest, Instagram, and Facebook—I’d love to see them.
Happy Baking! ~ Amy
Recipe
Snickerdoodle Cookie and Ice Cream Sandwich Recipe
Equipment
-
large cookie scoop
Ingredients
- 8 tablespoons salted butter at room temperature
- ½ cup vegetable shortening such as Crisco
- 1 ¾ cups granulated sugar divided
- 2 large eggs
- 2 ½ cups all-purpose flour
- 1 teaspoon kosher salt
- ½ teaspoon baking soda
- 2 teaspoons cream of tartar
- 1 tablespoon cinnamon
- 2 cups semi sweet chocolate chips
- 3 pints of your favorite ice cream
Instructions
-
Preheat oven to 375 degrees F. Line 2 baking sheets with parchment paper and set aside.
-
In the bowl of a standing mixer, beat the butter, shortening and 1 ½ cups of sugar on medium low speed for about 3 minutes. Scrape down the sides of the bowl.
-
Add the eggs 1 at a time. Beat for 30 to 60 seconds or until incorporated.
-
In a small bowl, whisk the flour, salt, baking soda, and cream of tartar.
-
With the mixer on low, gradually add the dry ingredients. Beat until just combined.
-
Add the chocolate chips and mix for about 30 seconds.
-
In a small bowl, combine the remaining ¼ cup sugar and the cinnamon.
-
Using a large cookie scoop (about 2 tablespoons of dough) form the batter into balls. Roll in the cinnamon sugar and place about 2 to 3 inches apart on the prepared baking sheet.
-
Bake for 10 to 12 minutes. The cookies should puff up in the middle and be golden brown on the edges. Place on a cooling rack.
-
Cool the cookies completely before making the ice cream sandwiches. Take the ice cream out of the freezer about 5 minutes before making the sandwiches.
-
For each sandwich, choose 2 cookies. Scoop about ¼ to ½ cup of ice cream and place it on the bottom side of one of the cookies. Top with the bottom side of the other cookie. Press the cookies slightly together so the ice cream comes to the edges of the cookies. Wrap the sandwich in plastic wrap and store in the freezer for up to 1 week.
Notes
- Have all the ingredients at room temperature. It makes them mix together better.
- Preheat the oven for at least 15 minutes.
- Scrape down the bowl as you beat the batter. It helps with uniform mixing the ingredients.
- Line the baking sheets with parchment. The cookies won’t stick to the pan and will bake up evenly.
- Use a large cookie scoop to make all the cookies the same size.
- Rotate the sheets half way through the baking time. I like to bake only 1 pan at a time so I flip the pan around from front to back so the cookies bake evenly. If you bake 2 sheets at a time also switch the sheets from the top to the lower baking rack too.
- Baking times are a range. A softer, chewier center is the perfect cookie for me. I take the cookies out of the oven when they are slightly under cooked.
- For a softer cookie, cool them on parchment paper. For a crisper cookie, cool them on a cooling rack.