
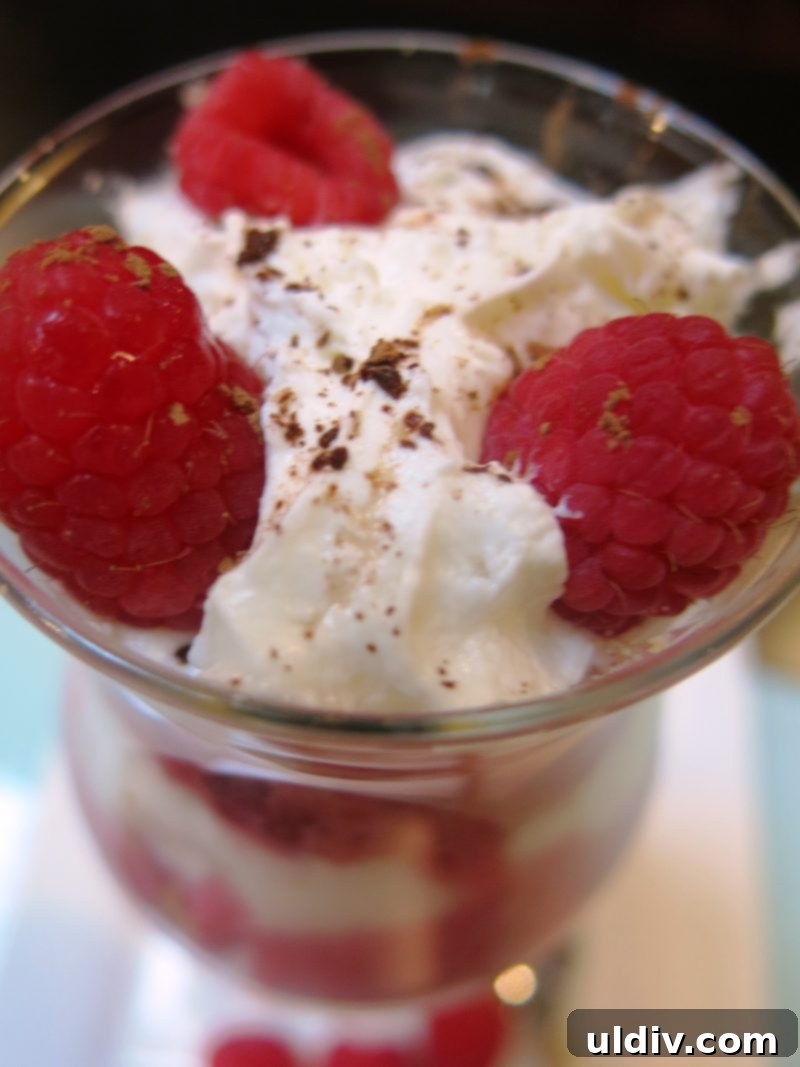
Indulge in the Ultimate No-Bake Raspberry Cream Dessert: Quick, Easy & Refreshing
Life has a remarkable way of changing our perspectives and priorities, often in the most beautiful and unexpected ways. Just the other day, I found myself reminiscing, scrolling through one of my older dessert posts, and a wave of nostalgia washed over me. So much has unfolded in my life since I first penned that recipe! From incredible vacations and a whirlwind academic semester to, most profoundly, the journey of becoming a parent. This monumental shift has truly redefined my world, giving life new meaning, a fresh sense of purpose, and an undeniable impetus. I like to think I’ve emerged a little different – perhaps older, and definitely wiser. Or so I tell myself! This new chapter has undeniably influenced my approach to everything, including my culinary adventures, pushing me towards simplicity, efficiency, and unwavering deliciousness.
The Allure of No-Bake: Why This Raspberry Cream Dessert Steals the Show
My recent trip down memory lane was prompted by a very modern predicament: a pressing need for a quick, effortless, and utterly delightful dessert to satisfy my family’s sweet cravings. The summer heat was relentless, making the mere thought of turning on the oven an unbearable proposition. Fiddling over a hot stovetop felt equally daunting. What I needed was a culinary escape, a sweet solution that required minimal effort but delivered maximum flavor. The answer presented itself beautifully: a wonderfully simple raspberries and cream dessert. As fate would have it, the raspberry season was in full swing, gracing our local markets with an abundance of these vibrant, ruby-red jewels. There’s truly no better time to enjoy raspberries, whether on their own, or incorporated into a myriad of dishes.
This dessert isn’t just about convenience; it’s about celebrating the natural goodness of seasonal produce. Fresh raspberries, at their peak, offer a balance of sweetness and tartness that elevates any dish they touch. Coupled with the rich, velvety texture of whipped cream, they create a symphony of flavors that is both refreshing and comforting. The genius of a no-bake dessert, especially during warmer months, cannot be overstated. It eliminates the need for preheating, baking times, and the subsequent heating of your kitchen. This means less stress, less energy consumption, and more time to enjoy the beautiful weather and your company. It’s a testament to the idea that sometimes, the most extraordinary culinary experiences come from the simplest combinations of high-quality ingredients.
Gather Your Essentials: Simple Ingredients for a Spectacular Treat
One of the many joys of this particular recipe is its reliance on readily available ingredients. I was fortunate to find plump, ripe raspberries on sale at my local grocery store, so I naturally stocked up. Beyond that, heavy whipping cream was virtually my only other significant purchase. The remaining components were already comfortably nestled in my pantry and refrigerator, making this a true last-minute hero dessert. This accessibility underscores the beauty of a well-stocked kitchen and the versatility of common ingredients.
Choosing the Best Raspberries
For a dessert where raspberries are the star, quality is paramount. Look for berries that are bright, plump, and firm, with no signs of mold or bruising. The color should be uniform and vibrant. While fresh is always best for this recipe, you can also use high-quality frozen raspberries if fresh ones are out of season or too expensive. If using frozen, allow them to thaw completely and drain any excess liquid to prevent your dessert from becoming watery.
Ingredient List (Serves 5)
The quantities listed below are designed to create five generous portions. Feel free to adjust these measurements proportionately to cater to your specific needs, whether you’re serving a small family or a larger gathering. Remember, flexibility is key in the kitchen!
- 8 fl oz (approximately 1 cup) heavy whipping cream
- 18 oz raspberries (typically three 6 oz containers for optimal flavor and texture)
- 1 cup powdered sugar (also known as confectioners’ sugar; adjust to taste, especially if your raspberries are on the tart side)
- 1 store-bought graham cracker crust (pre-crushed or whole, depending on availability)
- 3 oz extra fresh raspberries for garnish and decoration
- 1 can whipped cream (optional, for additional topping and presentation)
- Pinch of cocoa powder (optional, for a subtle flavor hint and visual contrast)
Crafting Your Dessert: A Step-by-Step Guide to Raspberry Perfection
Preparing this exquisite no-bake raspberry cream dessert is as delightful as it is straightforward. Follow these simple steps to create a treat that will impress with its flavor and elegance, without the fuss.
- Combine Raspberries and Cream: Begin by placing the main quantity of fresh raspberries (18 oz) and the heavy whipping cream into a spacious mixing bowl. For a smooth, consistent mixture, I prefer to use a hand blender. Its portability and ease of use make quick work of blending. Alternatively, a countertop blender or food processor will achieve excellent results just as efficiently. Blend until the raspberries are fully incorporated into the cream, creating a beautiful, uniform pink hue. The texture should be creamy, with perhaps a few tiny raspberry seeds remaining, which adds a lovely rustic touch.
- Sweeten and Chill: Once your raspberry and cream base is smoothly combined, gradually add the powdered sugar. Start with about half a cup, mix thoroughly, and then taste. Raspberries vary in sweetness, so this tasting step is crucial. If you desire a sweeter profile, continue to add more sugar, a tablespoon at a time, mixing after each addition until you reach your preferred level of sweetness. Once perfectly balanced, cover the bowl tightly with plastic wrap and transfer it to the refrigerator. Allow the mixture to chill for at least 30 minutes, or preferably an hour. This chilling time is vital; it not only enhances the flavors but also helps the mixture firm up slightly, contributing to a better texture in the final dessert.
- Prepare the Graham Cracker Crumble: While the raspberry cream is chilling, prepare your graham cracker crust. If you purchased a whole crust, gently remove it from its packaging. Place the crust inside a sturdy plastic bag (a Ziploc bag works perfectly) and seal it, expelling as much air as possible. Using a rolling pin, carefully but firmly crush the graham cracker crust until it forms fine, consistent crumbs. Aim for a texture that’s not too powdery, but fine enough to layer easily. If you don’t have a rolling pin, the bottom of a heavy glass or even your hands can work to break down the crust. The goal is to have a textural contrast that complements the smooth cream.
Elevate Your Presentation: Creative Serving Ideas
When it comes to serving this versatile dessert, your imagination truly is the limit. Its inherent beauty and simple elegance allow for a wide range of creative presentations. My personal favorite method involves creating visually appealing layers in tall, clear glasses or elegant dessert bowls. This approach not only showcases the vibrant colors but also offers an exciting interplay of textures with every spoonful.
Here’s my preferred layering sequence:
- Start with a generous layer of the crushed graham cracker crust at the bottom of the glass. This provides a delightful crunch and a buttery base.
- Spoon a rich layer of the chilled raspberry and whipping cream mixture over the crumbs.
- Add a scattering of fresh, whole raspberries. These bursts of fresh fruit provide a wonderful tart contrast and an appealing visual element.
- Finally, top with a swirl of extra whipped cream from a can (if using) or freshly whipped cream for an added touch of indulgence.
To truly finish off this masterpiece, I love to sprinkle a delicate pinch of cocoa powder over the top. This seemingly small addition offers a sophisticated flavor note and a beautiful color contrast, making the red of the raspberries and the white of the cream pop even more. Beyond individual glasses, you could also serve this dessert in a large trifle bowl, building up the layers for a dramatic centerpiece, or even in small ramekins for a more intimate serving size. Consider garnishing with a sprig of fresh mint for an extra touch of green and a refreshing aroma.
Tips for Enjoyment and Storage
For the absolute best experience, timing is everything when serving this delicious dessert. The raspberry and cream mixture is at its most delectable when thoroughly chilled. Therefore, ensure you take the bowl out of the refrigerator only moments before you plan to assemble and serve. This maintains its refreshing coolness and ideal consistency.
A crucial tip for optimal enjoyment: assemble the individual portions just a few minutes before serving. While the raspberry cream mixture holds up beautifully, the graham cracker crust can absorb moisture and become overly soggy if left in contact with the cream for too long. By assembling shortly before serving, you preserve the delightful crispness of the crumbs, ensuring that every bite offers that perfect textural balance between crunchy and creamy.
In terms of storage, the prepared raspberry and cream mixture is best enjoyed within 1 to 2 days when kept properly sealed in the refrigerator. Beyond this timeframe, the texture and freshness may begin to diminish. Therefore, I highly recommend not delaying the assembly and enjoyment of this wonderful dessert. If you have leftover components, store them separately: the crushed graham crackers in an airtight container at room temperature, and any extra fresh raspberries in the fridge. This way, you can quickly whip up additional portions as needed, always ensuring the freshest possible experience.
A Sweet Ending to Any Day
This no-bake raspberry cream dessert is more than just a recipe; it’s a celebration of simplicity, seasonal flavors, and the joy of creating something delicious with minimal effort. It embodies the essence of what I now seek in my kitchen: dishes that are quick to prepare, incredibly satisfying, and perfect for sharing with loved ones. Whether you’re a seasoned baker or a novice in the kitchen, this recipe promises an effortless path to a truly delightful treat. So, gather your ingredients, embrace the ease of a no-bake creation, and savor every refreshing spoonful. Enjoy!