
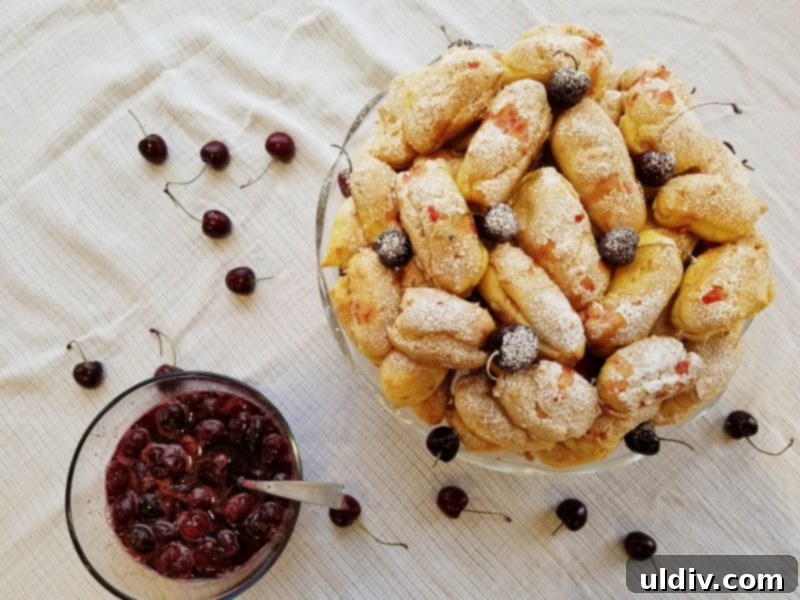
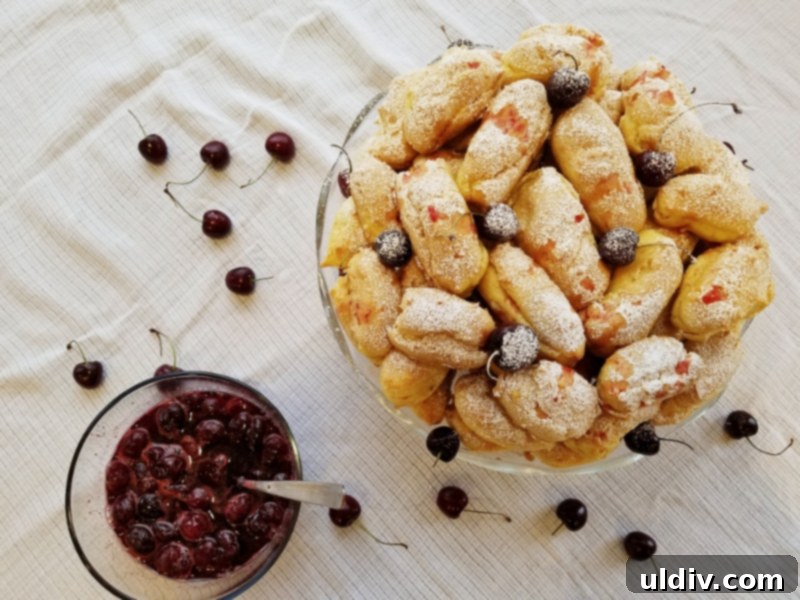
Master the Art of Homemade Éclairs: A Beloved Family Recipe
There’s an undeniable joy in savoring a perfectly crafted éclair – that delicate, airy choux pastry shell filled with rich, velvety pastry cream. But what’s even better than one éclair? Two, of course! And what if those two éclairs were lovingly baked right in your own kitchen? For years, my family and I shared a deep appreciation for this classic French pastry, but the idea of making them at home felt like a distant dream. That changed thanks to my incredible mother-in-law, who shared an age-old recipe that, after months of careful testing and refinement, has become our cherished family tradition. Now, I’m thrilled to share this perfected recipe with you, so you can bring the magic of homemade éclairs to your own table and impress everyone with this delectable French dessert.
A Journey Through Time: My Éclair Story and the Quest for Perfection
My earliest memories of éclairs are deeply rooted in my childhood. After school, I would often stop at a quaint, somewhat shadowy local confectionery shop. It was a place with oversized platters and an old-fashioned charm, where the éclairs often had a pastry cream that vaguely tasted of coffee. Sometimes, the cream would be a bit sour, or the dough slightly stale, but there was little choice. In those days, ingredients like flour and butter were not always readily available in grocery stores, and sugar was rationed, making home baking a luxury. I had spent my precious pocket money, and an éclair, however imperfect, was a treat to be cherished and consumed.
Thankfully, those days of scarcity are long behind us. Today, with an abundance of fresh, high-quality ingredients at our fingertips, the possibilities for home baking are limitless. This newfound freedom reignited my desire to recreate one of my favorite childhood desserts. It was during a conversation with my mother-in-law that the idea truly took shape. She possessed an old family recipe for éclairs, a culinary treasure from a different era. The challenge, however, was adapting it. The original recipe called for margarine instead of butter – a common substitute during times of ingredient shortages – and all quantities were in the metric system. For months, we meticulously worked together, converting measurements, experimenting with butter ratios, and fine-tuning every step to ensure the éclairs were not only authentic to her heritage but also perfectly suited for an American kitchen and palate. It was a labor of love, a beautiful blend of tradition and adaptation, and the result is an easy éclair recipe we are incredibly proud to share.
The Secret to Perfect Éclairs: Crafting the Choux Pastry Dough
The foundation of any exquisite éclair lies in its choux pastry, or *pâte à choux*. This seemingly complex dough is surprisingly straightforward once you understand the basic principles. The process begins on the stovetop, where water and unsalted butter are gently melted together in a pan. This creates the essential liquid base. Once simmering, the flour is added all at once, and the mixture is vigorously stirred over low heat. The goal here is to create a thick, cohesive dough that pulls away from the sides of the pan, forming a “ball” – this is known as the *panada* or “drying out” stage. This step is crucial for developing the proper texture and ensuring the choux pastry will rise beautifully, creating the light and airy shells characteristic of a perfect éclair.
After the panada is formed, remove the pan from the heat. This is where the magic truly happens with the eggs. Instead of adding them all at once, you incorporate them gradually, one by one. Each egg must be fully mixed into the dough before the next is added. This ensures the dough remains smooth and emulsified, preventing a greasy or curdled texture. The dough will transform from a stiff ball into a glossy, pipeable consistency. It should be thick enough to hold its shape but soft enough to be easily extruded. You can test for the correct consistency by lifting some dough with a spoon; it should fall off in a V-shape, indicating it’s ready for piping.
Once your choux pastry is ready, it’s time to shape your éclairs. While a piping bag with a star or round tip offers precision and elegance, a simple spoon can also yield beautiful, rustic results. I often use a spoon to create traditionally elongated shapes, but don’t hesitate to get creative! Cookie cutters can inspire a variety of fun forms, especially if you have little helpers eager to participate. Kids absolutely love being involved in shaping, and they’ll be even more excited to eat the unique éclairs they helped create. This hands-on approach transforms baking éclairs at home into a joyful family activity, making the final treat even sweeter.
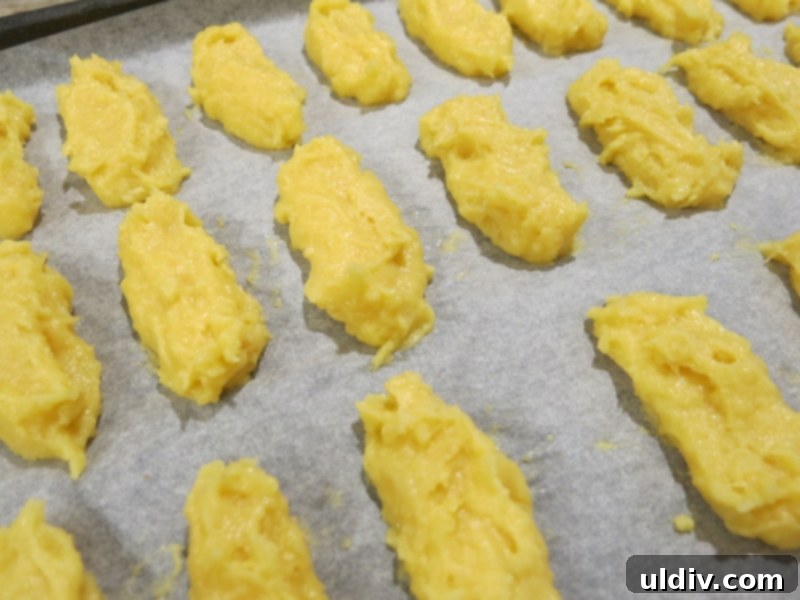
Now comes the baking. Place your perfectly shaped éclairs into a preheated oven. They will bake until they achieve a glorious golden-brown hue and feel light and crisp to the touch. But here’s an incredibly important, non-negotiable rule: **You must NOT open the oven door at all during the first 15-20 minutes of baking!** This is paramount to prevent your éclairs from collapsing. Choux pastry relies on steam created within the dough to puff up and create its hollow center. Opening the door releases this crucial steam and introduces cold air, causing the delicate structure to deflate. Patience is key during this initial baking phase; resist the urge to peek!
Crafting the Silky Smooth Pastry Cream (Crème Pâtissière)
While your choux pastry shells are baking to perfection, you’ll have the ideal window to prepare the luscious pastry cream, or *crème pâtissière*, that will fill them. This rich, creamy filling is a cornerstone of French patisserie and surprisingly simple to master. Begin by whisking together eggs and sugar in a pan. On the counter, not on the stove, ensure they are thoroughly combined until light and frothy. Then, gradually add the all-purpose flour, one tablespoon at a time, whisking vigorously after each addition to prevent lumps. A smooth consistency at this stage is vital for a silky final product.
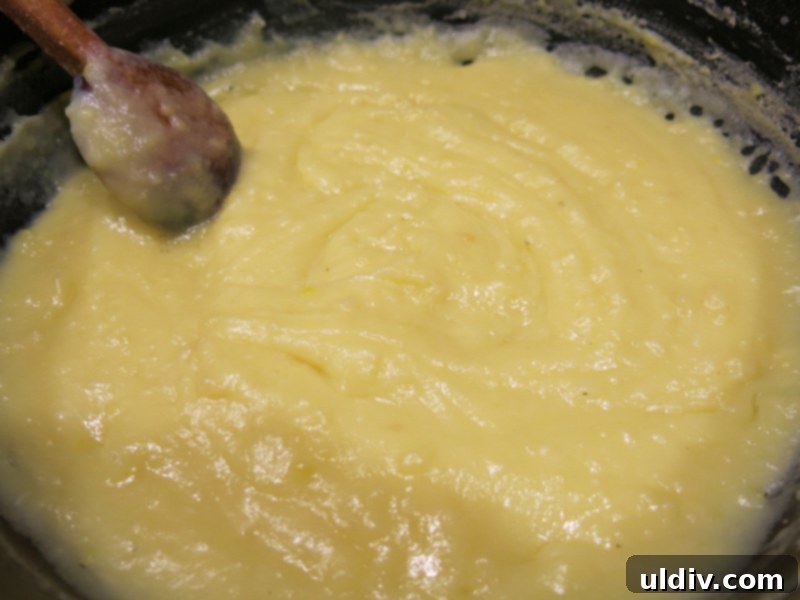
Next, slowly incorporate the whole milk, again in stages, stirring continuously until the mixture is homogeneous. Once everything is well combined, transfer the pan to the stove over medium heat. This is where your continuous stirring becomes critical. The mixture will gradually thicken as it heats, transforming into a rich cream. Do not stop stirring, especially along the bottom and sides of the pan, to prevent scorching and ensure an even cook. Once the pastry cream has reached your desired thickness – it should be thick enough to coat the back of a spoon – continue to cook and stir for another 1-2 minutes. This extra cooking time ensures the flour is fully cooked, eliminating any raw flour taste and achieving that perfect pastry cream consistency.
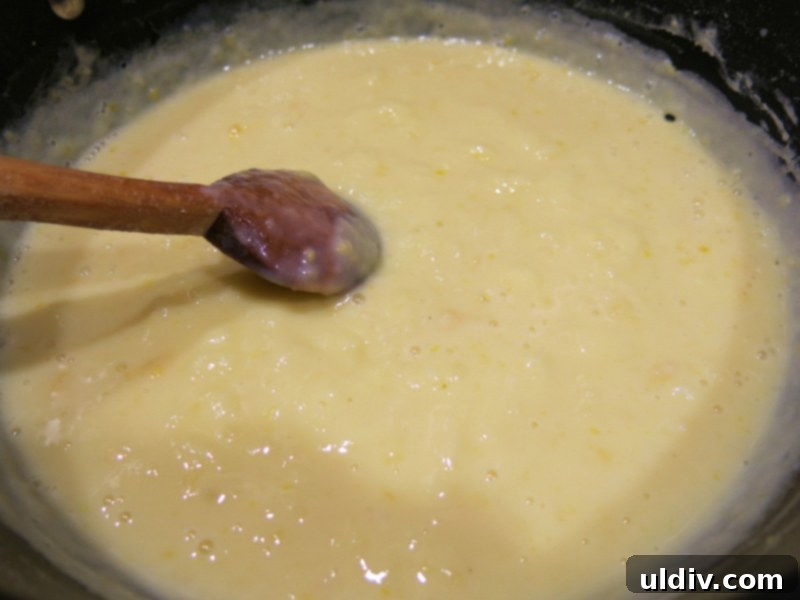
Once the pastry cream has reached its perfect, thick consistency, remove the pan from the stove. This is the moment to enrich it further. Cut the unsalted butter into small pieces and add them to the hot cream, stirring continuously until the butter is completely melted and incorporated. The butter adds a luxurious richness and a beautiful sheen to the cream, enhancing the flavor profile of your homemade éclairs. Finally, stir in the vanilla extract. The vanilla not only enhances the flavor but also adds a comforting aroma that is simply irresistible. Allow the pastry cream to cool slightly before covering it with plastic wrap directly on the surface to prevent a skin from forming. Once cooled to room temperature, you can refrigerate it until ready to use.
Assembly and Presentation: Bringing Your Éclairs to Life
After approximately 35-40 minutes of total baking time, your choux pastry shells should emerge from the oven looking plump, golden, and wonderfully airy. They’ll have a light, crisp exterior and a hollow interior, perfectly ready for their creamy filling. Allow them to cool down completely on a wire rack. This “resting” period is important for them to set and firm up, ensuring they maintain their structure once filled. They should exude a radiant golden-brown aura, promising a delightful texture and taste that only homemade éclairs can offer.
Now for the most satisfying part: assembly! Once the éclair shells have cooled completely, carefully slice them in half horizontally using a serrated knife. This creates two perfect halves, ready to be generously filled with your luscious, chilled pastry cream. You can spoon the cream into each half for a rustic look, or for a more professional finish, transfer the cream to a piping bag fitted with a star or round tip and pipe it neatly along the bottom half of each éclair. The visual appeal of a perfectly piped filling is truly rewarding, making your homemade éclairs look as good as they taste.


To truly elevate your homemade éclairs, consider serving them with a variety of delectable accompaniments. A dollop of freshly whipped cream adds a cloud-like lightness, while fresh berries – raspberries, strawberries, or blueberries – provide a delightful tart contrast and a pop of color. For the chocolate lovers, a drizzle of warm chocolate sauce creates an irresistible indulgence. Feel free to customize with your favorite toppings; a light dusting of powdered sugar or a simple chocolate glaze can also beautifully complete your masterpiece. Each bite will be a testament to your baking prowess and a celebration of flavor.


Troubleshooting & Essential Tips for Éclair Success
While this homemade éclair recipe is designed for success, paying attention to a few crucial details will guarantee perfect results every time. Remember these golden rules for baking éclairs at home:
- **The Choux Pastry Dough:** When adding flour to the melted butter and water, do so all at once and stir vigorously until no lumps remain and the dough forms a cohesive ball that pulls away from the pan. This ensures proper gluten development and avoids a lumpy texture that can hinder rising.
- **Adding Eggs to Dough:** Always incorporate eggs one by one, ensuring each is fully mixed in before adding the next. This creates a smooth, emulsified dough with the perfect consistency for piping or spooning.
- **The Pastry Cream:** When incorporating butter into the hot pastry cream, add it slowly, stirring continuously. This prevents the cream from splitting and ensures a wonderfully smooth, rich consistency, key for a perfect éclair filling.
- **The Oven Door Rule:** As emphasized, absolutely **do NOT open the oven door during the first 15-20 minutes of baking your éclairs**. This is the most critical step to prevent them from falling flat and ensures they develop their characteristic hollow, airy interior. Any sudden drop in temperature or release of steam will cause them to deflate.
- **Cooling:** Allow both the choux pastry shells and the pastry cream to cool completely before assembly. Filling warm shells with warm cream can lead to soggy éclairs, compromising their delicate texture.
- **Storage:** Éclairs are best enjoyed fresh on the day they are made. However, if you have leftovers, store unfilled shells in an airtight container at room temperature for up to two days. Store pastry cream separately in the refrigerator for up to three days. Once filled, éclairs should be refrigerated and consumed within a day for optimal freshness and texture.
If your éclairs come out flat, it’s most likely due to opening the oven door too early or insufficient drying of the *panada*. If your cream is lumpy, it means the flour wasn’t fully incorporated or stirred enough. With a little practice and attention to these key steps, you’ll be baking professional-looking and tasting éclairs in no time!
Why Homemade Éclairs Are Worth the Effort
You might be asking, “Is all this effort truly worth the trouble?” My answer is an emphatic “yes!” The satisfaction of pulling a tray of perfectly puffed, golden éclairs from your oven, the aroma of vanilla-infused pastry cream filling your kitchen, and the sheer delight on the faces of your family and friends when they bite into these homemade treats is immeasurable. There’s a profound difference between a store-bought éclair and one made with fresh ingredients and a touch of love in your own home. The crispness of the choux, the luxurious smoothness of the cream, and the customizable toppings all combine to create a dessert experience that is truly unparalleled. This isn’t just baking; it’s creating memories.
Baking homemade éclairs is more than just following a recipe; it’s an experience, a journey from a simple childhood memory to a cherished family tradition. It’s about creating something beautiful and delicious with your own hands, and sharing that joy with others. It’s about taking the time to craft a dessert that speaks of elegance and care, a truly special treat. So, go ahead, gather your ingredients, follow these steps with confidence, and prepare to indulge in one of life’s simple, yet profound, pleasures. Now, grab a few éclairs, pour yourself a comforting cup of coffee or a glass of milk, and savor every exquisite bite. Enjoy the taste of tradition and triumph!
Print Recipe
Éclairs
Ingredients
- 1 cup water (for the dough)
- 6.5 tbsp unsalted butter (for the dough)
- 1 cup all-purpose flour (for the dough)
- 5 large eggs (for the dough)
- 3 large eggs (for the pastry cream)
- 1/2 cup granulated sugar (for the pastry cream)
- 4 tbsp all-purpose flour (for the pastry cream)
- 2 cups whole milk (for the pastry cream)
- 4 tbsp unsalted butter (for the pastry cream)
- 1 tbsp vanilla extract (for the pastry cream)
- Berries, whipped cream and/or chocolate sauce (optional, for serving)
Instructions
-
Preheat your oven to 325°F (160°C). Prepare a baking sheet by lining it with parchment paper.
-
**For the Éclair Dough (Pâte à Choux):** Cut 6.5 tablespoons of unsalted butter into small pieces. In a medium saucepan, combine the butter and 1 cup of water. Bring the mixture to a rolling boil over medium heat, ensuring all the butter is melted. Immediately remove the pan from the heat and add 1 cup of all-purpose flour all at once. Return the pan to very low heat and stir vigorously with a wooden spoon for 2-3 minutes until the mixture forms a smooth, cohesive ball that pulls away from the sides of the pan. This is crucial for drying out the dough.
-
Remove the pan from the stove. Add the 5 large eggs one by one, mixing thoroughly after each addition until fully incorporated and the dough is smooth and glossy. The dough should be thick but pipeable. Using a piping bag with a large round or star tip (or a spoon for traditional shapes), make small, elongated éclairs (about 4-5 inches long) on the prepared parchment-lined baking pan, ensuring they are evenly spaced.
-
Bake the éclairs in the preheated oven for 35-40 minutes, or until they are puffed, golden-brown, and firm. **Crucial Note: You must NOT open the oven door at all during the first 15-20 minutes of baking,** as this will cause the éclairs to collapse. Once baked, turn off the oven and prop the door open slightly, allowing the éclairs to cool gradually for about 10-15 minutes inside the oven to prevent them from deflating. Then, transfer them to a wire rack to cool completely.
-
**For the Pastry Cream (Crème Pâtissière):** While the éclairs are baking, prepare the pastry cream. In a clean saucepan (off the stove), whisk together 3 large eggs and 1/2 cup of granulated sugar until light and well combined. Gradually whisk in 4 tablespoons of all-purpose flour, ensuring no lumps remain. Slowly add 2 cups of whole milk in stages, stirring continuously until the mixture is completely homogeneous. Place the pan on the stove over medium heat and stir continuously with a whisk or wooden spoon. The mixture will begin to thicken. Once the cream has thickened to a pudding-like consistency, continue to cook and stir for another 1-2 minutes to ensure the flour is fully cooked.
-
Remove the pan from the stove. Cut 4 tablespoons of unsalted butter into small pieces and add them to the hot pastry cream, stirring continuously until the butter is completely melted and incorporated, resulting in a smooth, glossy cream. Finally, stir in 1 tablespoon of vanilla extract until well combined. Transfer the cream to a bowl, cover its surface directly with plastic wrap to prevent a skin from forming, and allow it to cool slightly before refrigerating until completely chilled and firm.
-
**Assembly:** Once the éclair shells are completely cool, carefully cut them in half horizontally using a serrated knife. Fill the bottom halves generously with the chilled pastry cream using a spoon or a piping bag. Place the top halves back on, creating your filled éclairs.
-
Serve your homemade éclairs immediately with your preferred toppings, such as freshly whipped cream, a medley of fresh berries, or a decadent chocolate sauce. Enjoy the fruits of your labor!