
Tropical Twist: My Aunt’s Beloved Upside-Down Cake with Pineapple and Lemon

There are some flavors that instantly transport you back to childhood, and for me, the rich, deeply caramelized taste of my aunt’s upside-down cake is one of them. Growing up, this dessert was a staple at family gatherings, a cherished treat I enjoyed countless times. Her original recipe, a culinary treasure passed down through generations, beautifully showcased the humble apple, picked fresh from her countryside orchard. The combination of sweet, tender apples, a glistening caramel topping, and subtle lemon undertones created a symphony of flavors that was simply irresistible.
Recently, a trip to the local grocery store sparked a delicious wave of nostalgia and inspiration. Piles of vibrant, ripe pineapples caught my eye, tempting me to experiment beyond our usual fresh fruit consumption. It was then that a fond memory surfaced: my aunt meticulously slicing apples for her famous cake. A lightbulb moment! Why not reinvent this beloved classic, substituting the traditional apples with the tropical sweetness of pineapple? The idea felt audacious, yet perfectly aligned with the spirit of culinary creativity. With my cooking dilemma joyfully resolved, I eagerly headed into the kitchen, ready to give this timeless recipe a refreshing, sun-kissed makeover.
The Enduring Charm of Upside-Down Cakes
Upside-down cakes hold a special place in the dessert world, celebrated for their stunning presentation and moist, flavorful results. The magic happens during baking when the fruit, layered at the bottom of the pan with a sweet caramel or sugary butter mixture, becomes beautifully caramelized and forms the top of the cake once inverted. This method not only creates a visually appealing dessert but also infuses the cake with incredible moisture and a unique depth of flavor from the cooked fruit and caramel. It’s a testament to simple techniques yielding spectacular outcomes, making it a favorite for home bakers looking for that “wow” factor without excessive fuss.
Why Pineapple Elevates This Classic
While the apple version of my aunt’s cake holds a special place in my heart, the pineapple rendition offers a delightful contrast. Pineapple brings a vibrant, tangy sweetness that beautifully cuts through the richness of the caramel. Its juicy, fibrous texture softens during baking, becoming incredibly tender and infused with the golden syrup. The tropical notes of pineapple, when paired with a hint of zesty lemon, create a refreshing yet decadent dessert that feels both familiar and excitingly new. It’s a fantastic way to enjoy the bright flavors of summer and add an exotic touch to a cherished family recipe.
Essential Ingredients for Your Tropical Upside-Down Cake
To achieve the perfect Pineapple Upside-Down Cake, quality ingredients are key. For this recipe, I chose to bake it in my well-seasoned 10.25-inch cast iron round skillet. If your skillet or baking dish is larger, remember to proportionately increase the quantities of all ingredients to ensure a beautifully balanced cake.
Ingredients:
- 1 small pineapple: Freshly peeled, cored, and sliced into rings or half-moons. Look for a pineapple that smells sweet at the base and gives slightly when pressed.
- 5 large eggs: Separated into yolks and whites. Using large eggs ensures proper moisture and structure for the cake.
- 6 tbsp granulated sugar (for the caramel): This will form the glorious golden layer on top of your cake.
- 5 tbsp granulated sugar (for the cake batter): Provides sweetness to the cake itself.
- 3 tbsp granulated sugar (for the syrup): To create the moisturizing lemon syrup that drenches the finished cake.
- 5 tbsp all-purpose flour: The structural foundation of our cake. Ensure it’s measured accurately.
- 1 tsp baking powder: The leavening agent that gives the cake its light, fluffy texture.
- 1 medium lemon: You’ll need both the zest and the juice for vibrant flavor in both the batter and the syrup.
- 1 cup water: The base for our flavorful lemon syrup.
Step-by-Step Guide to Baking Perfection
Creating this Pineapple Upside-Down Cake is a delightful journey, from caramelizing sugar to the final, satisfying flip. Follow these detailed steps for a truly memorable dessert.
1. Prepare Your Oven and Skillet
Preheat your oven to 375°F (190°C). While the oven heats, ensure your cast iron skillet is ready. A well-seasoned cast iron skillet is ideal for this cake, as it distributes heat evenly and helps create a perfect caramel crust. If you don’t have one, a heavy-bottomed, oven-safe non-stick pan of similar size can also work, but cast iron truly enhances the caramelization.
2. Crafting the Golden Caramel Base
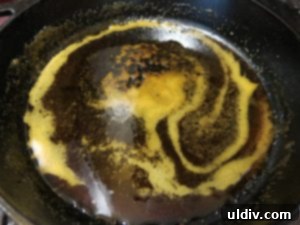
Place 6 tablespoons of granulated sugar directly into your preheated skillet. Set the skillet over a medium heat on your stovetop. Allow the sugar to melt and caramelize slowly without stirring initially. This process typically takes about 10-15 minutes. Watch it carefully; it will transition from clear liquid to a beautiful amber and then a rich, deep golden brown. The skillet will become extremely hot, so always use oven mitts or kitchen gloves when handling it. Once the sugar has reached a deep amber color, remove the skillet from the heat. Gently swirl the skillet in circular motions to evenly coat the entire bottom and a little up the sides with the hot caramel. This creates a beautiful, even layer for your fruit. Set the skillet aside to cool slightly.
3. Preparing the Fluffy Cake Batter
In a large mixing bowl, whisk the egg whites until they form soft, airy peaks. This step incorporates air, contributing to the cake’s light texture. Gently fold in the egg yolks until the mixture is uniform. Gradually add 5 tablespoons of granulated sugar, followed by the flour and baking powder. For the lemon element, zest the entire lemon and then juice it. Add about three-quarters of the lemon zest to the batter – reserving the rest for the syrup. Mix everything until the batter is light, fluffy, and homogeneous, being careful not to overmix, which can lead to a tough cake.
4. Arranging the Pineapple
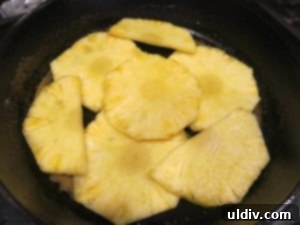
With the caramel slightly cooled and set, it’s time to arrange the pineapple slices. Distribute the peeled and sliced pineapple evenly over the caramelized sugar at the bottom of the skillet. You can be creative with the pattern, perhaps forming concentric circles or an artistic mosaic. It’s better to have a few extra slices than to overcrowd the pan; avoid overlapping them too much, as this can prevent the caramel from properly adhering to the cake. Each slice should ideally have direct contact with the caramel.
5. Adding the Cake Batter
Carefully pour the prepared cake batter over the pineapple slices in the skillet. Use a spatula to gently spread the batter evenly, ensuring all the pineapple is covered. Smooth out the top as best you can before baking.

6. Baking to Perfection
Place the skillet in your preheated oven and bake for approximately 35 minutes, or until the cake is golden brown and cooked through. To check for doneness, insert a toothpick into the center of the cake; if it comes out clean and dry, your cake is ready. Avoid opening the oven door too frequently during baking, as this can cause the cake to sink.

7. Cooling and Syrup Preparation
Once baked, carefully remove the cake from the oven and let it cool in the skillet for about 10-15 minutes. This cooling period is crucial, allowing the cake to set slightly and preventing it from falling apart when inverted. While the cake cools, prepare the luscious lemon syrup. In a small saucepan, combine 1 cup of water, 3 tablespoons of granulated sugar, the juice of the lemon, and the remaining lemon zest. Heat the mixture over medium heat, stirring until the sugar completely dissolves and the syrup is gently simmering. This syrup adds extra moisture and a burst of fresh lemon flavor to the cake.

8. Drenching with Syrup and the Grand Reveal
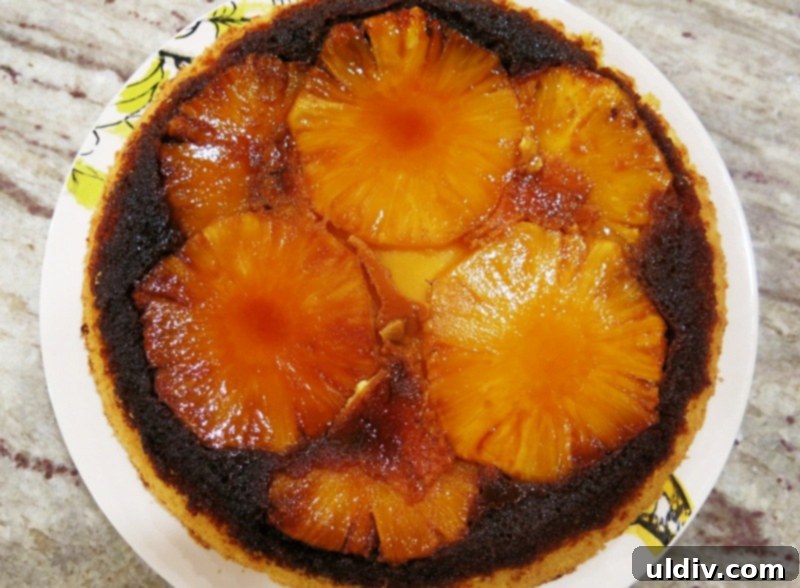
Evenly pour the hot lemon syrup over the slightly cooled cake while it’s still in the skillet. The cake will absorb this delicious liquid, becoming even more moist and flavorful. Now for the exciting part: place a large serving plate upside down over the skillet. With a confident, swift motion, carefully invert the skillet and plate together. The cake should release easily from the well-caramelized bottom of the skillet onto the plate. Gently lift the skillet to reveal your stunning Pineapple Upside-Down Cake! Take a moment to admire its beauty – the shiny caramel coating the pineapple slices is truly a gorgeous sight.
9. Final Cooling and Presentation
Allow the cake to cool completely on the serving plate before slicing. This helps the caramel and fruit set fully, making for cleaner slices and enhancing the flavors. The patience is worth it for a perfect presentation and taste experience.
Serving Suggestions and Future Culinary Adventures
Once your Pineapple Upside-Down Cake has cooled, it’s ready to be savored. Slice generously and serve with your favorite topping. We often enjoy it with a generous dollop of freshly whipped cream, which provides a light, ethereal contrast to the cake’s rich sweetness. However, the possibilities are truly endless! Consider pairing it with a scoop of vanilla bean ice cream for a classic indulgent treat, or a delicate crème anglaise for an elegant touch. For a fresher, lighter flavor mix, a scattering of fresh berries like raspberries or blueberries, or a vibrant raspberry coulis, would be exquisite. The inherent sweetness and decadent nature of this cake make it a showstopper on its own, but these additions elevate the experience even further.
I was absolutely thrilled with how this rendition of my childhood favorite turned out in my new cast iron skillet. The earthly simplicity of apples, though never forgotten, gracefully made way for the juicy exoticism of pineapple. Its tropical sweetness, perfectly paired with the deep caramel and zesty lemon, delivered a taste sensation that was truly unforgettable. This cake is definitely going into regular rotation in my kitchen, and I encourage you to try it!
My culinary explorations with upside-down cakes are far from over. I plan to revisit my aunt’s original apple recipe, staying faithful to its classic charm, but also to experiment with other seasonal fruits. Imagine the possibilities with ripe pears, sweet apricots, succulent peaches, or even tart plums and cherries. Each fruit offers a unique flavor profile and texture that will undoubtedly transform the cake into something new and exciting. Now is the perfect time to celebrate and experiment with in-season flavors at their peak. I promise to keep you updated on all my future upside-down cake adventures – stay tuned for more delicious discoveries!