
In a world seemingly unified by a love for all things sweet, I find myself in a peculiar minority: I don’t particularly care for peanut brittle. While I hold a deep appreciation for the humble peanut and consider rich, gooey caramel to be nothing short of divine, their combination in brittle form often leaves me wanting. I perceive it as excessively sweet and notoriously difficult to consume gracefully, often leading me to seek creative avenues for its transformation. My upbringing in a different country, during a period of significant scarcity, instilled in me a profound respect for food. The memory of not having *any* food at all fuels my unwavering commitment to avoid wasting edible ingredients. This philosophy extends to every last crumb and overlooked morsel, including, yes, even that challenging peanut brittle.
The recent holiday season presented a familiar scenario. Last week, my husband’s workplace bestowed upon him a delightful gift basket, brimming with an assortment of sweet treats – prominent among them, a generous block of peanut brittle, alongside dried fruits and classic shortbread cookies. For me, this wasn’t just a collection of goodies; it was a perfect canvas, an ideal opportunity to embark on a culinary adventure: crafting delicious, no-bake cocoa and fruit balls! This recipe is a testament to mindful eating and creative repurposing, offering an exciting and budget-friendly way to revitalize leftover cookies, cake, or even that once-dreaded peanut brittle into something entirely new and utterly delectable. It’s an act of culinary alchemy, transforming the ordinary into the extraordinary, proving that true value lies in potential, even in the smallest of remnants.
The Art of Repurposing: Transforming Leftovers into Delight
These cocoa and fruit balls stand out not only for their delightful taste but also for their remarkable ease of preparation and their economical nature. They embody the spirit of reducing food waste, a concept that resonates deeply with my personal ethos. Many households, especially around the festive winter holidays, already have a selection of dried fruits readily available in their pantries, making this recipe incredibly accessible. Among the array of choices, dried apricots hold a special place in my heart for this particular confection. Their slightly tart, bold, and distinct flavor, coupled with a deep, aromatic profile and a fiery hue that vividly recalls sun-drenched summer days, makes them an ingredient to truly savor. Observe the perfectly cubed apricots pictured below; their intrinsic beauty is undeniable, promising a burst of flavor and visual appeal in every bite.
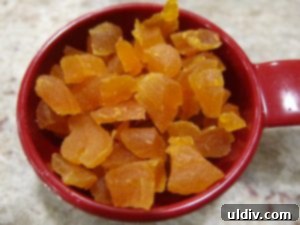
Beyond the magnificent apricots, you’ll also incorporate dried cranberries. Depending on their size and your preference, these can be kept whole to provide delightful bursts of tartness, or you can opt to cut them in half for a more even distribution throughout the mixture. Their vibrant color and tangy kick complement the sweetness of the other ingredients, adding another layer of complexity to these simple yet sophisticated treats.
Gathering Your Ingredients for Culinary Alchemy
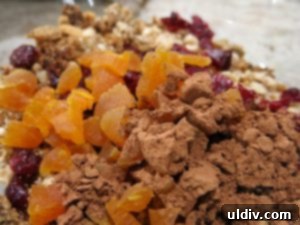
The magic begins when you combine these flavorful dried fruits with the star of our repurposing mission: crushed peanut brittle. To this foundational mix, you’ll add rich cocoa powder and, arguably, the most pivotal element for texture and body: cookie or cake crumbs. This is where the recipe truly shines in its versatility. Any leftover baked sweet good can be transformed for this purpose. From forgotten shortbread cookies to slices of cake that have seen better days, or even stale muffins, all can find a new lease on life. On this particular occasion, I had a banana bread loaf that had comfortably rested on our kitchen counter for several days, past its prime for slicing but perfect for crumbling. I simply broke the banana bread into chunks, placed them in a food processor, and pulsed until they transformed into fine, soft crumbs. The recipe calls for two cups of these delightful crumbs in total, providing the essential base and structure for our no-bake balls.
One of the beauties of this recipe is its inherent reliance on natural sweetness. I purposefully omit any added sugar, trusting entirely on the concentrated sugars present in the dried fruit and the residual sweetness from the cookie or cake crumbs. This approach not only results in a more balanced flavor profile but also aligns with a healthier, more conscious way of enjoying desserts, letting the natural flavors shine through without being overwhelmed by excessive sweetness. The combination of ingredients creates a harmonious blend where each element contributes to a complex and satisfying taste experience, proving that sometimes, less truly is more.
Bringing the Mixture Together: The Perfect Consistency
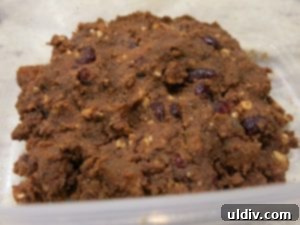
Once your dry ingredients are thoroughly combined, it’s time to introduce the liquid elements that will bind everything into a workable, cohesive mixture. Start by adding the milk gradually. Pour it in and mix diligently, either with a sturdy spoon or, as many seasoned bakers prefer, with clean hands, until the milk has been completely absorbed by the dry components and the mixture begins to come together. This step is crucial for achieving the right texture, so take your time to ensure even distribution and absorption.
Next, fold in the rum. The rum isn’t just for flavor; it also contributes to the moisture content and helps create that desirable homogeneous consistency. Continue mixing until the entire mass is uniformly moist and pliable. The goal is a mixture that is compact enough to hold its shape when pressed, yet still soft and easy to mold. Should you find the mixture too dry after the initial additions, don’t hesitate to incorporate more milk. Begin with a small increment, perhaps just one tablespoon at a time, and gradually increase until you reach the desired consistency. The ideal texture is firm but not crumbly, allowing you to easily roll it into smooth, round balls without them falling apart or being excessively sticky. This careful attention to consistency is key to perfectly formed, delightful cocoa and fruit balls.
Shaping and Finishing Your Festive Treats
With your mixture perfectly prepared, the enjoyable task of shaping the cocoa balls awaits. You can achieve this using a small, rounded spoon, such as a melon baller or a measuring spoon, to scoop uniform portions, or simply embrace the tactile experience and use your hands. Roll each portion gently between your palms until a smooth, compact ball forms. The size is entirely up to your preference, but a typical batch using the specified ingredient quantities should yield approximately 12 to 14 pieces, providing a generous serving for about four people. This makes them ideal for a small family treat, a delightful addition to a holiday platter, or an excellent component for a homemade gift package.
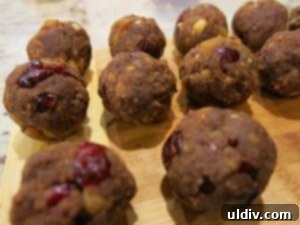
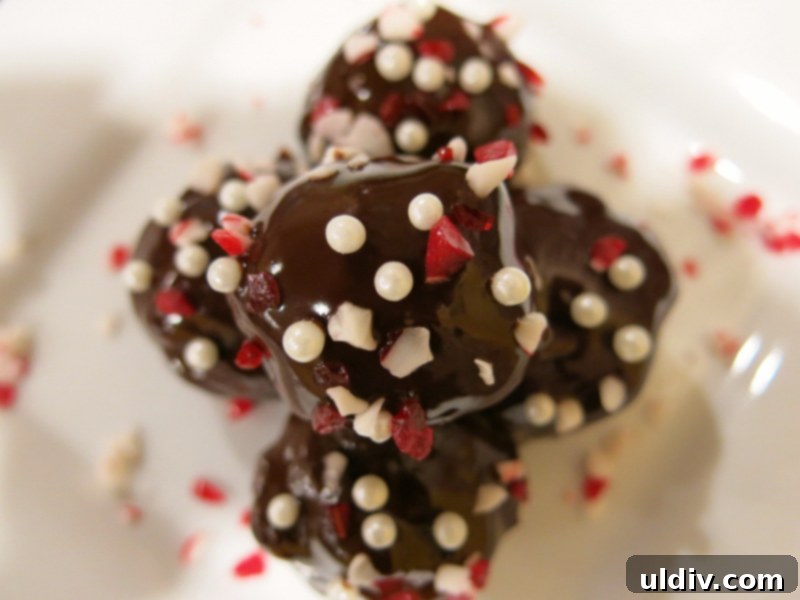
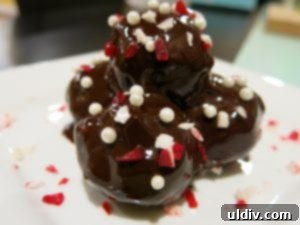
Once your cocoa and fruit balls are formed, the possibilities for serving are wonderfully varied. They are absolutely delicious as they are, showcasing their rich, fudgy interior. However, for an extra touch of elegance and flavor, consider rolling them in a light dusting of confectioners’ sugar, a generous coating of additional cocoa powder for an intensified chocolate experience, or delicate shavings of chocolate for added texture and visual appeal. For the ultimate indulgence, a dip in melted chocolate takes these treats to an entirely new level of decadence. If you’re preparing them for a special occasion or during the holiday season, enhance their festive charm by incorporating seasonal edible decorations, such as colorful sprinkles, chopped pistachios, or a drizzle of contrasting white chocolate. The versatility of these balls means they can be tailored to any palate or celebration, transforming simple ingredients into a truly memorable dessert.
Storage, Enjoyment, and the Joy of Reinvention
These delightful cocoa and fruit balls are not only easy to make but also incredibly convenient to store. They keep exceptionally well for several days when refrigerated, making them perfect for preparing in advance or for enjoying over an extended period. I frequently turn to this recipe whenever I find myself with day-old cakes or cookies that might otherwise go uneaten, particularly when faced with relatives who, despite their initial enthusiasm, declare themselves “all sugared out.” It’s truly a kitchen savior.
The magic of this dessert lies in its transformative power. Underneath a velvety layer of rich cocoa and enlivened by majestic fruity undertones, these baked leftovers are resurrected. They are reinvented, refreshed, and deliciously succulent, ready to be savored not just once, but again and again. Each bite offers a harmonious blend of textures and flavors – the subtle crunch of transformed peanut brittle, the chewy sweetness of dried fruits, and the comforting depth of chocolate, all bound by the soft cake crumbs. It’s a testament to the idea that with a little creativity, nothing truly goes to waste, and even the most unlikely ingredients can become the foundation for a new, cherished treat. So go ahead, embrace the spirit of culinary creativity, reduce food waste, and enjoy these wonderfully reinvented cocoa and fruit balls!
Recipe: Cocoa & Fruit Balls
Cocoa & Fruit Balls
Prep Time: 20 minutes |
Servings: 4 people
Ingredients:
- 2 cups cookie/cake crumbs
- 1/3 cup peanut brittle, crushed
- 1/3 cup dried apricots, cut into tiny cubes
- 1/3 cup dried cranberries
- 1/2 cup milk
- 2 tsp Dutch process cocoa powder
- 1 tsp rum
Instructions:
- Combine the cookie/cake crumbs, crushed peanut brittle, apricots, cranberries, and cocoa powder in a large bowl. Mix thoroughly until all dry ingredients are well distributed.
- Gradually add the milk to the dry mixture. Mix well, either with a sturdy spoon or your hands, until the milk has been fully absorbed and the mixture starts to come together.
- Stir in the rum and continue mixing until the entire mixture is homogeneous, meaning all ingredients are evenly incorporated and the consistency is uniform.
- If the mixture feels too dry and crumbly, add more milk, one tablespoon at a time, until it becomes compact and easy to work with. The ideal consistency should allow you to roll balls without them falling apart or being overly sticky.
- Using a small rounded spoon or your hands, scoop portions of the mixture and roll them into smooth, compact balls. Aim for a consistent size for even serving.
- Serve the cocoa & fruit balls as they are for a simple treat. For enhanced presentation and flavor, cover them with confectioners’ sugar, roll them in extra cocoa powder, or sprinkle with shaved chocolate. Alternatively, dunk them in melted chocolate for a decadent coating. For a truly festive touch, add seasonal edible decorations like sprinkles or chopped nuts.